
How-To: Knotting and Burying Threads
Confession: knotting and burying my threads isn’t something I do very often.
99% of the time, I’m quilting my own quilts on my trusty Janome, usually not taking the time to secure my threads by knotting and burying them. Typically, I’ll use small stitches at the beginning and end points, or I will begin and end my lines just off the edge of my quilt top. But sometimes you just want an extra nice finish, and that’s where knotting and burying your threads comes in. And that just means that you will bring your quilting threads to the top of your quilt, tie them into a knot, and bury them under the quilt top for a super tidy look.
So when would you use this technique? Think of: any quilting design that starts on the inside of your quilt, and not on the edge. Recently, I worked on a quilt with a lot of threads that needed to be buried (A LOT of threads). If you’ve been avoiding this technique (I had been!) don’t skip out on it! It’s a little time consuming, but it’s not hard, AND it creates a really nice finish. So- here’s a step by step guide to knotting and burying your quilt threads.
Let’s get into it!
What you’ll need:
A basted quilt top (fabrics seen below on this top are all Kona Cottons)
Sewing machine and walking foot (mine is a Janome Skyline S5)
Thread (for this project I’m using Aurifil 40wt in the color Blush)
A pin
A needle (I use whatever I have handy from a pack of John James Sharps)
Small pair of scissors
The Quilting
First, you’ll want to have a good length of your top and bobbin thread to work with- I like to pull out about 4-6” worth of thread.
Insert your needle where you want to start quilting. Here, I want to start right where the blue and white fabrics meet.

Insert your needle where you want to start quilting.
With your needle inserted, turn your hand crank forward to move the needle to the up position, then lift your walking foot.
Tug on the top thread until you see a small loop get drawn up- this is your bobbin thread, and you want to bring this up to the front of the quilt. Insert a pin into the loop to help pull the whole thread up.

Use a pin to help pull up the bobbin thread to the front of the quilt.
Now both threads are at the front of the quilt, and you’ll want to insert your needle back in the exact hole that the threads are coming from. Gently hold the top and bobbin thread to the side of your walking foot while you insert your needle back into your starting position. I use the hand crank to find the exact spot.

Hold the top and bobbin threads to the side while you re-insert your needle and start quilting.
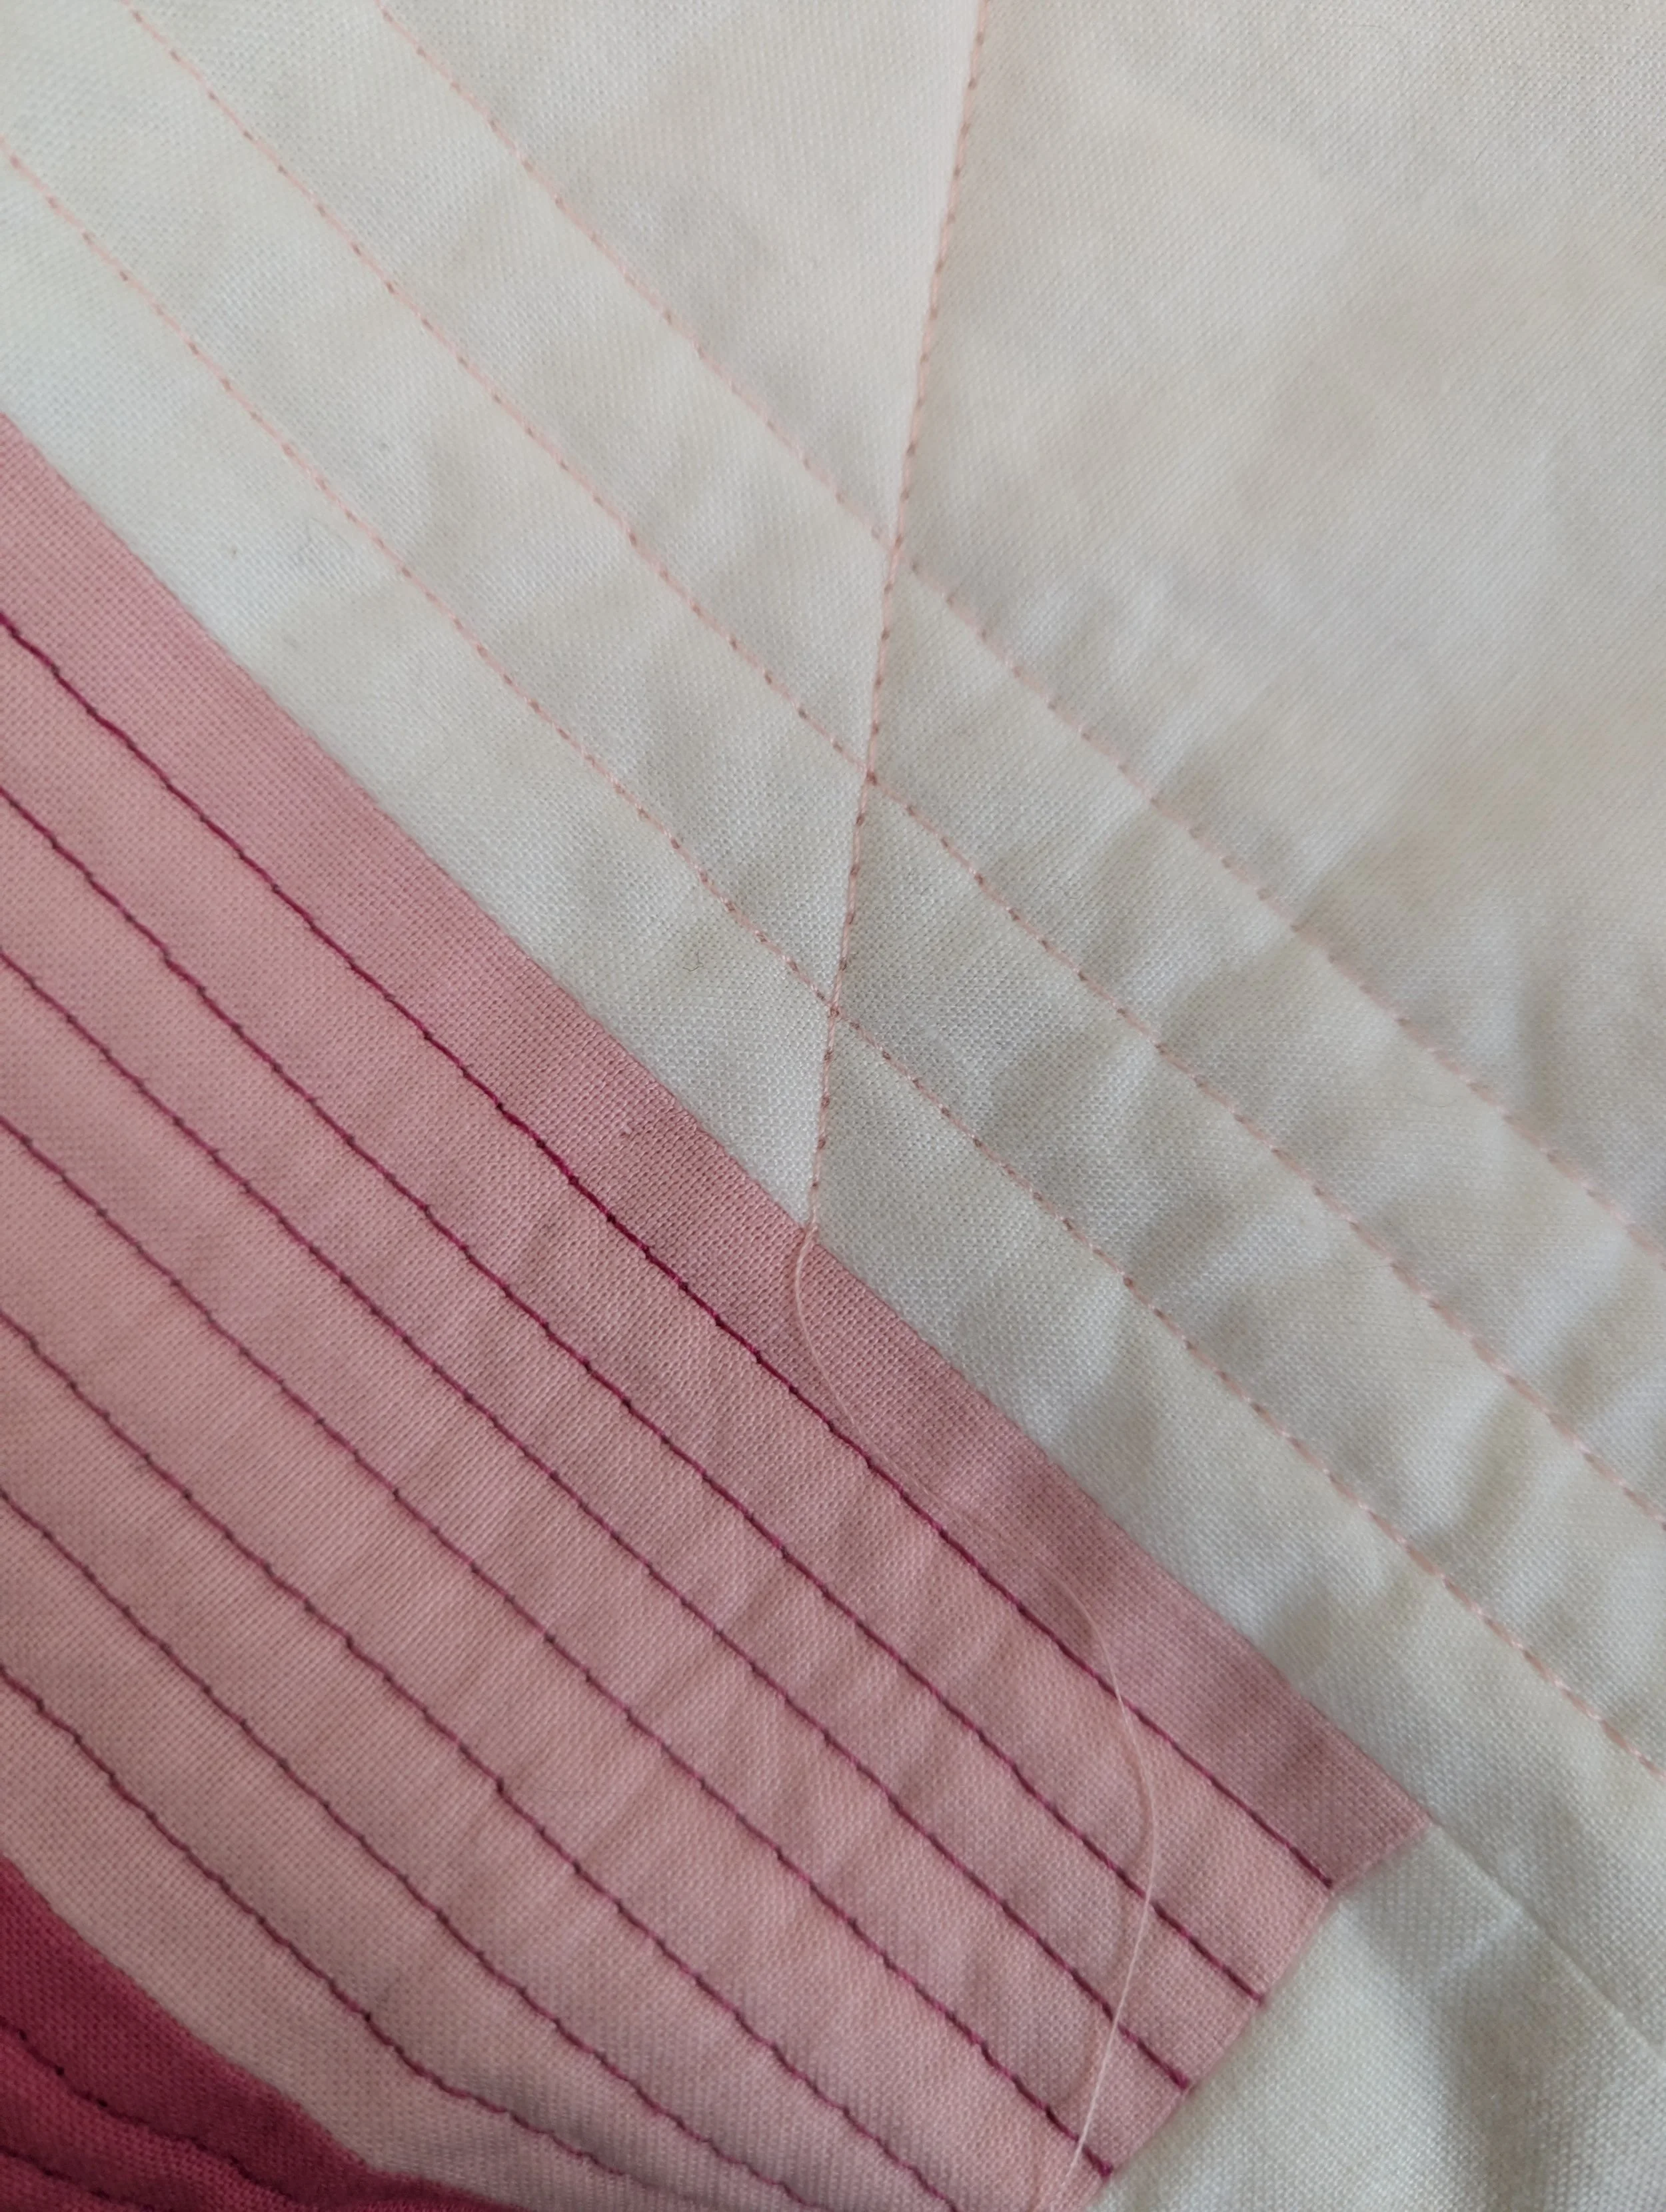
Gently hold your threads as you start quilting. Continue your design until you come up to your end point (I slow waaay down as I come to my stopping point, shown here where the pink and white fabrics come together).

I want to stop my quilting right where my pin is.
Once you’ve come to your end point, remove your quilt from your machine and clip your threads to at least 4-6” long.
Now you have your top thread on the top of your quilt and your bobbin thread in the back, and you want to bring the bobbin thread to the front.
Just the top thread can be seen in the front (bobbin thread still on the back of the quilt).
Pull on your top thread until a little loop appears. Use a pin to help grab the loop and then pull the whole thread up.

Tug on the top thread to pull up a loop. Grab with a pin and pull the bobbin thread forward.
Hooray! All your threads should be on the front of your quilt now, at both the start of your quilting line and at the end of your quilting line. It’s time to knot and bury!

Both threads are now in the front- yay!
Knot and Bury
First, you’ll want to organize a bit: separate your threads and untangle any loops that might be hanging around. Now is a good time to trim any extra long threads if you have them!

My pin is pointing to a little extra loop- I untangle that so it doesn’t interfere with my knot that I’m going to make.
Next you need to take the top and bobbin thread together and tie a knot. A simple overhand knot is all I used, which can be doubled if needed. This knot will sit ¼” or ½” from the surface of the quilt.

Single overhand knot.

The knot should sit just above the surface of the quilt.
Thread your needle, then insert the needle directly into where the bobbin thread comes up from the back of the quilt.

Insert your needle in the same spot that your bobbin thread is coming up from.
Slide the needle through just the top layer, or the top layer and the batting- you don’t want your needle going through all the layers to the backside of the quilt. (It’s always a good idea to check the underside to make sure your needle hasn’t slid all the way through!)
Bring your needle back up to the surface of the quilt, about ½” to 1” away from where you inserted it.

Bring your needle back to the surface of the quilt about 1/2” or 1” away.
As you pull your needle through, your knot will catch on the surface of the top. Gently tug on the thread so you pop the knot underneath the top layer. The knot is now securely underneath the top of the quilt.
Clip the thread where it exits the quilt top, and you’re done!
Tips and Troubleshooting
Tip: Work in sections, one step at a time. If you have a lot of threads to bury, I find it helpful to trim everything in a section, then knot it all, then bury it all. Then move onto the next section.

Threads all knotted and ready to be buried
Tip: For this quilt, I was using Auriful 40wt thread. I found that a double overhand was very hard to pull through the fabric, so I just did a single overhand knot. Adjust to what works with your fabric and thread combination!
Oh no! Ran out of bobbin thread while in the middle of your quilting? It happens to the best of us. Unfortunately, because you need a bit of a tail to be able to pull the thread through, you’ll need to unpick some of what you quilted until your bobbin thread is long enough to work with. Pull on the top thread to pull up a loop. With a pin, grab the loop and pull up the bobbin thread. Continue this until your bobbin thread is long enough. When you start quilting again, insert your needle in the position where your bobbin thread is coming up from and proceed as you normally would. Knot and bury as described above.


You Did It!
That’s it! I hope you found this helpful. Now you’re ready to level up your finishing game with some tidy quilting. If you have any other tips for knotting and burying thread, leave them in the comments!
Happy Quilting!

A nice and tidy finish :)