
Half Rectangle Triangle (HRT) Tutorial
A step by step guide to sewing and trimming your half rectangle triangles
Today I’m happy to walk you through how to make and trim half rectangle triangles (HRTs)! I was a little intimidated by these blocks at first, but I really didn’t have a reason to be. Once you get the hang of sewing and trimming them they are easy to whip up, and the results within a quilt design are gorgeous. I’m using HRTs for the first time in my latest pattern, The 1751 Quilt. This is a great skill builder pattern, with easy to read instructions and clear diagrams. But as an extra bonus (and for those that like some additional visual help!) I also wanted to provide a step-by-step tutorial so you can tackle your first HRTs with confidence. Let’s get into it!
But first- a quick story!
The story behind The 1751 Quilt:
The journey of The 1751 Quilt starts with a visit to city hall. Oslo, Norway’s Rådhus is a beautiful building filled with art depicting Norwegian history and culture. It also happens to be where I got married! My in-laws came to visit in 2024 and wanted to see the location where we eloped so we made sure to pay a visit. I took a lot of pictures that day (the building is gorgeous), which included a picture of a pretty metal gate. I filed it away into my inspiration folder, thinking something might come out of it eventually. A few months later, as I was tinkering with a few designs, I found the metal gate picture and was off and running. Of course the final design looks a little bit different, but the shapes in that gate helped me decide where I wanted to go. And now I have a quilt pattern that I love, and reminds me of a very special place :)


What you’ll need to make your HRTs:
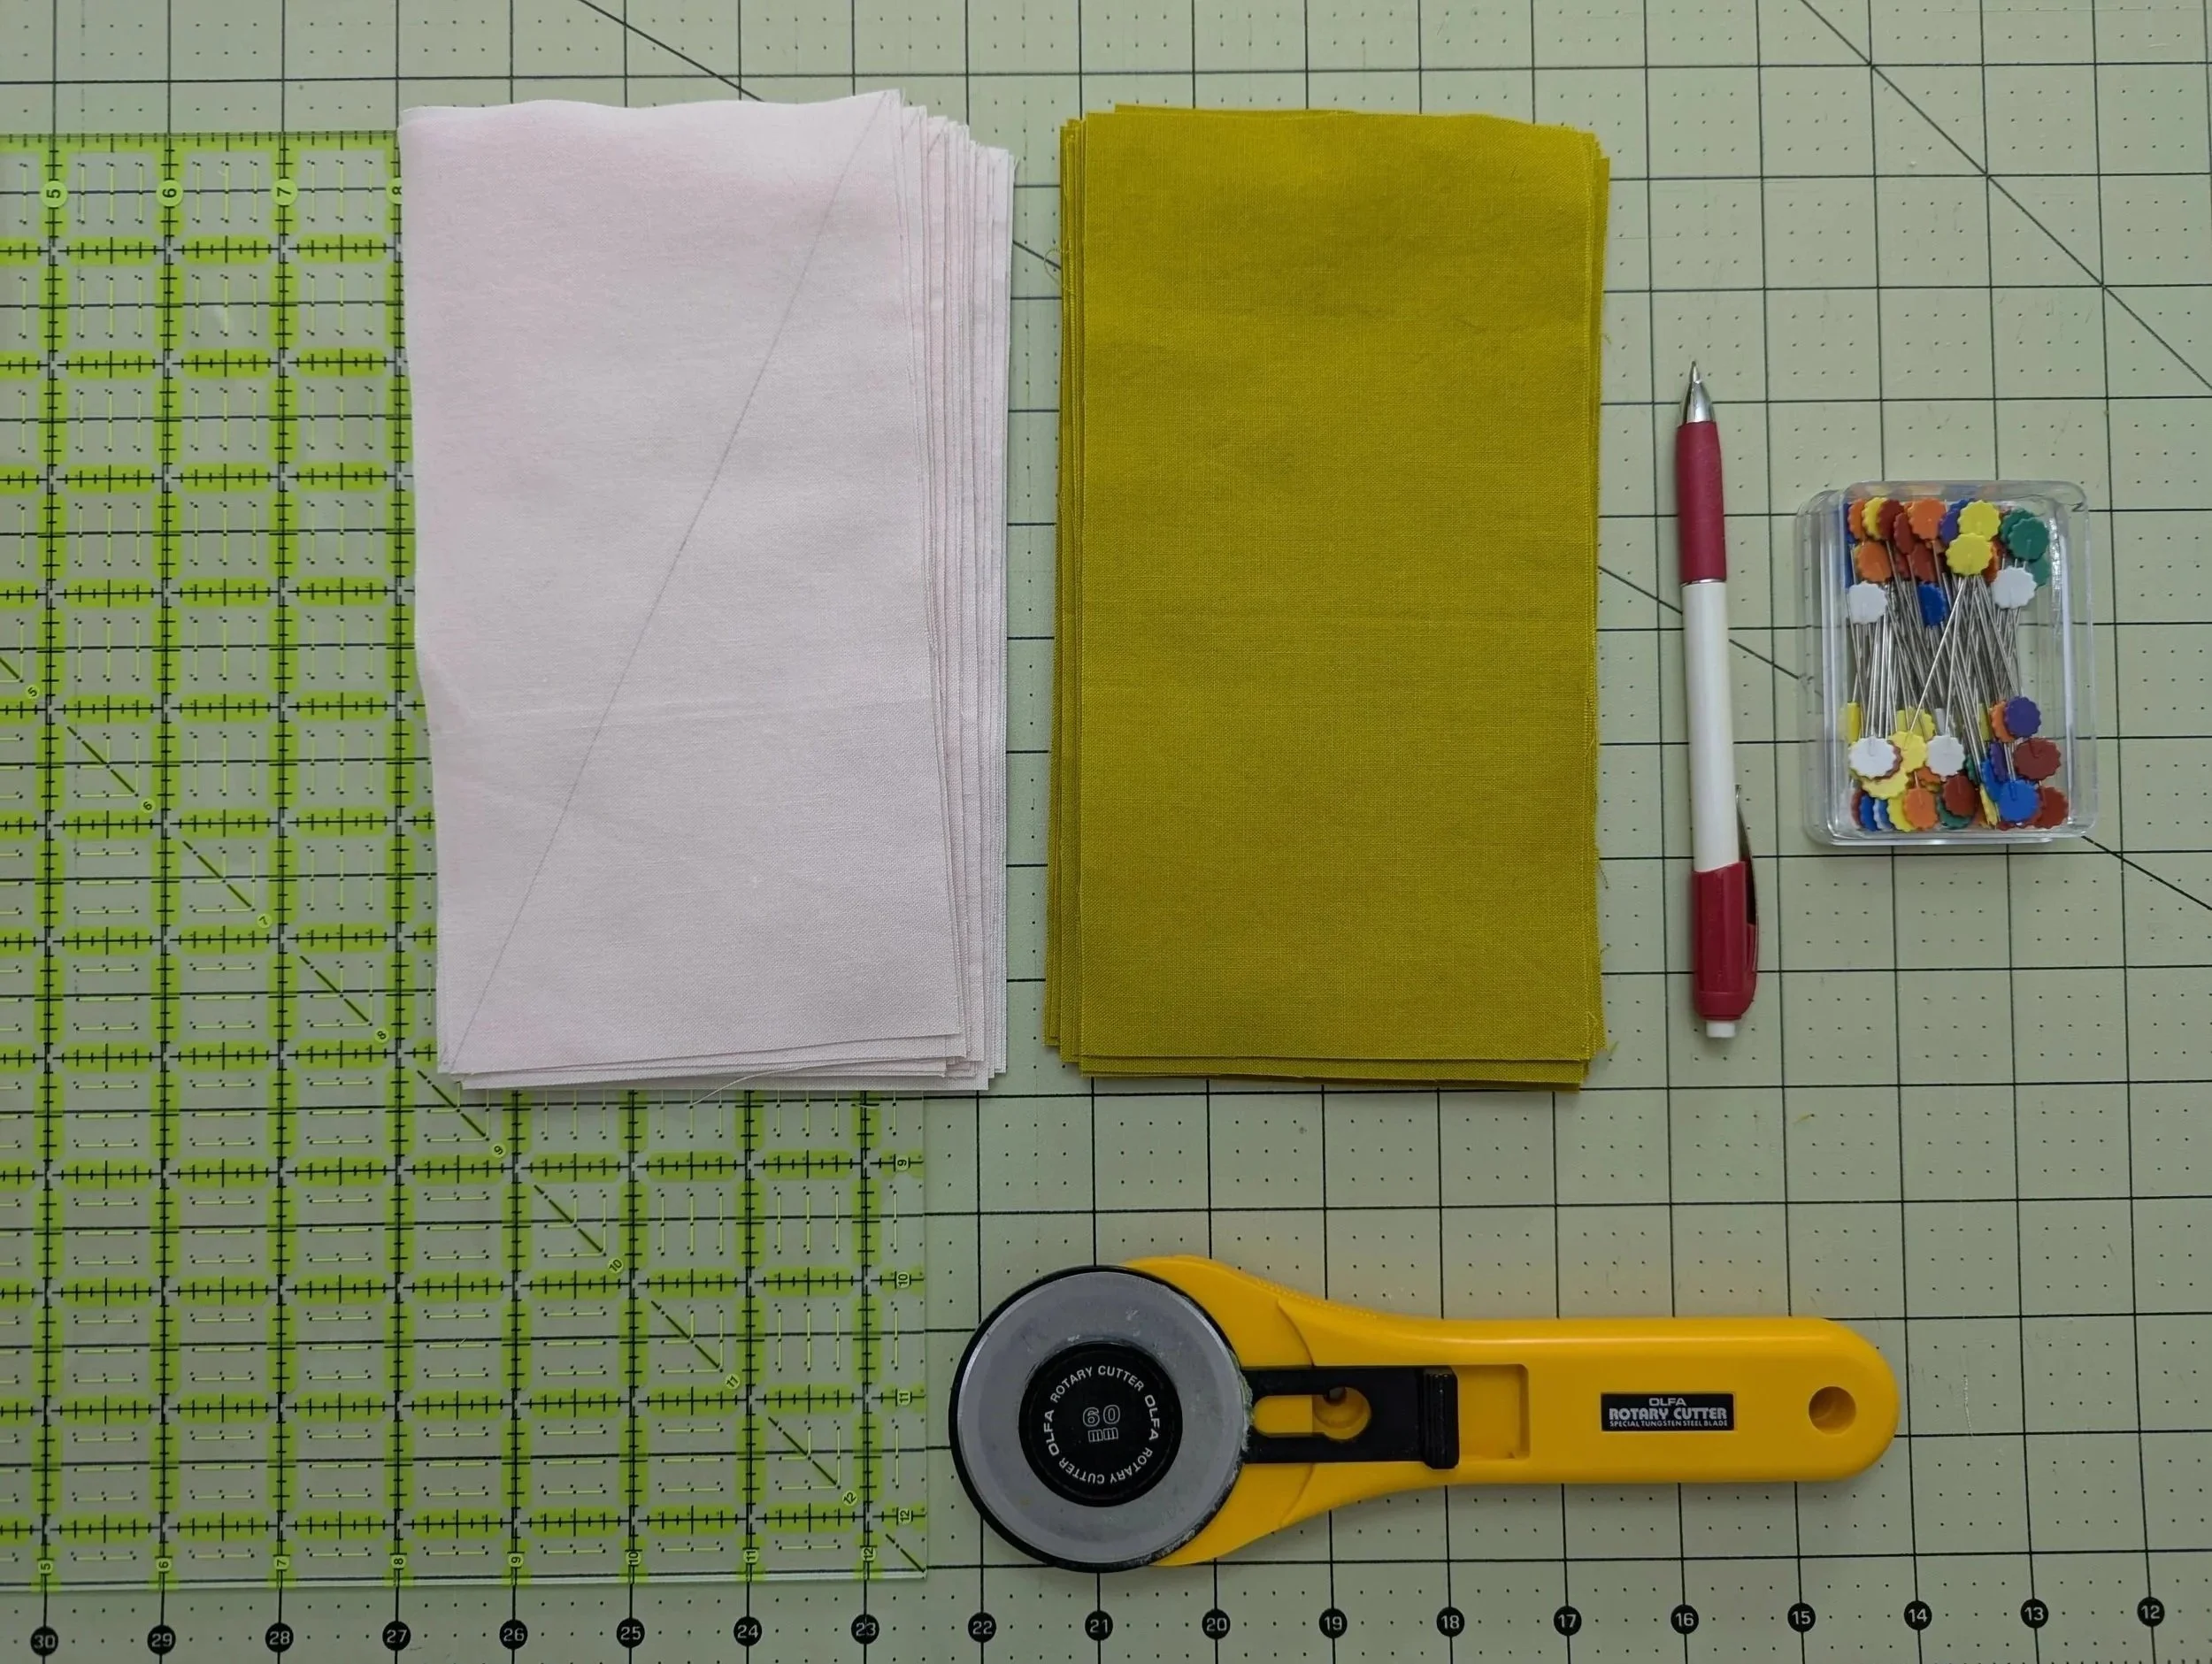
2 different colored rectangles (size depends on the pattern). The fabric I’m working with is Kona Cotton in Shell and Pickle, and the pattern I’m using is Millie & Bun Designs The 1751 Quilt
Marking tool (I’m using a Bohin pencil)
Pins
Ruler (make sure your ruler is larger than your unfinished HRT measurements)
Masking Tape
Sharpie Marker
Rotary Cutter (mine is an Olfa 60mm)
Sewing Machine and Thread (I have a Janome Skyline S5, and use Aurifil 50wt thread in white)
Iron
Prep Your Pieces
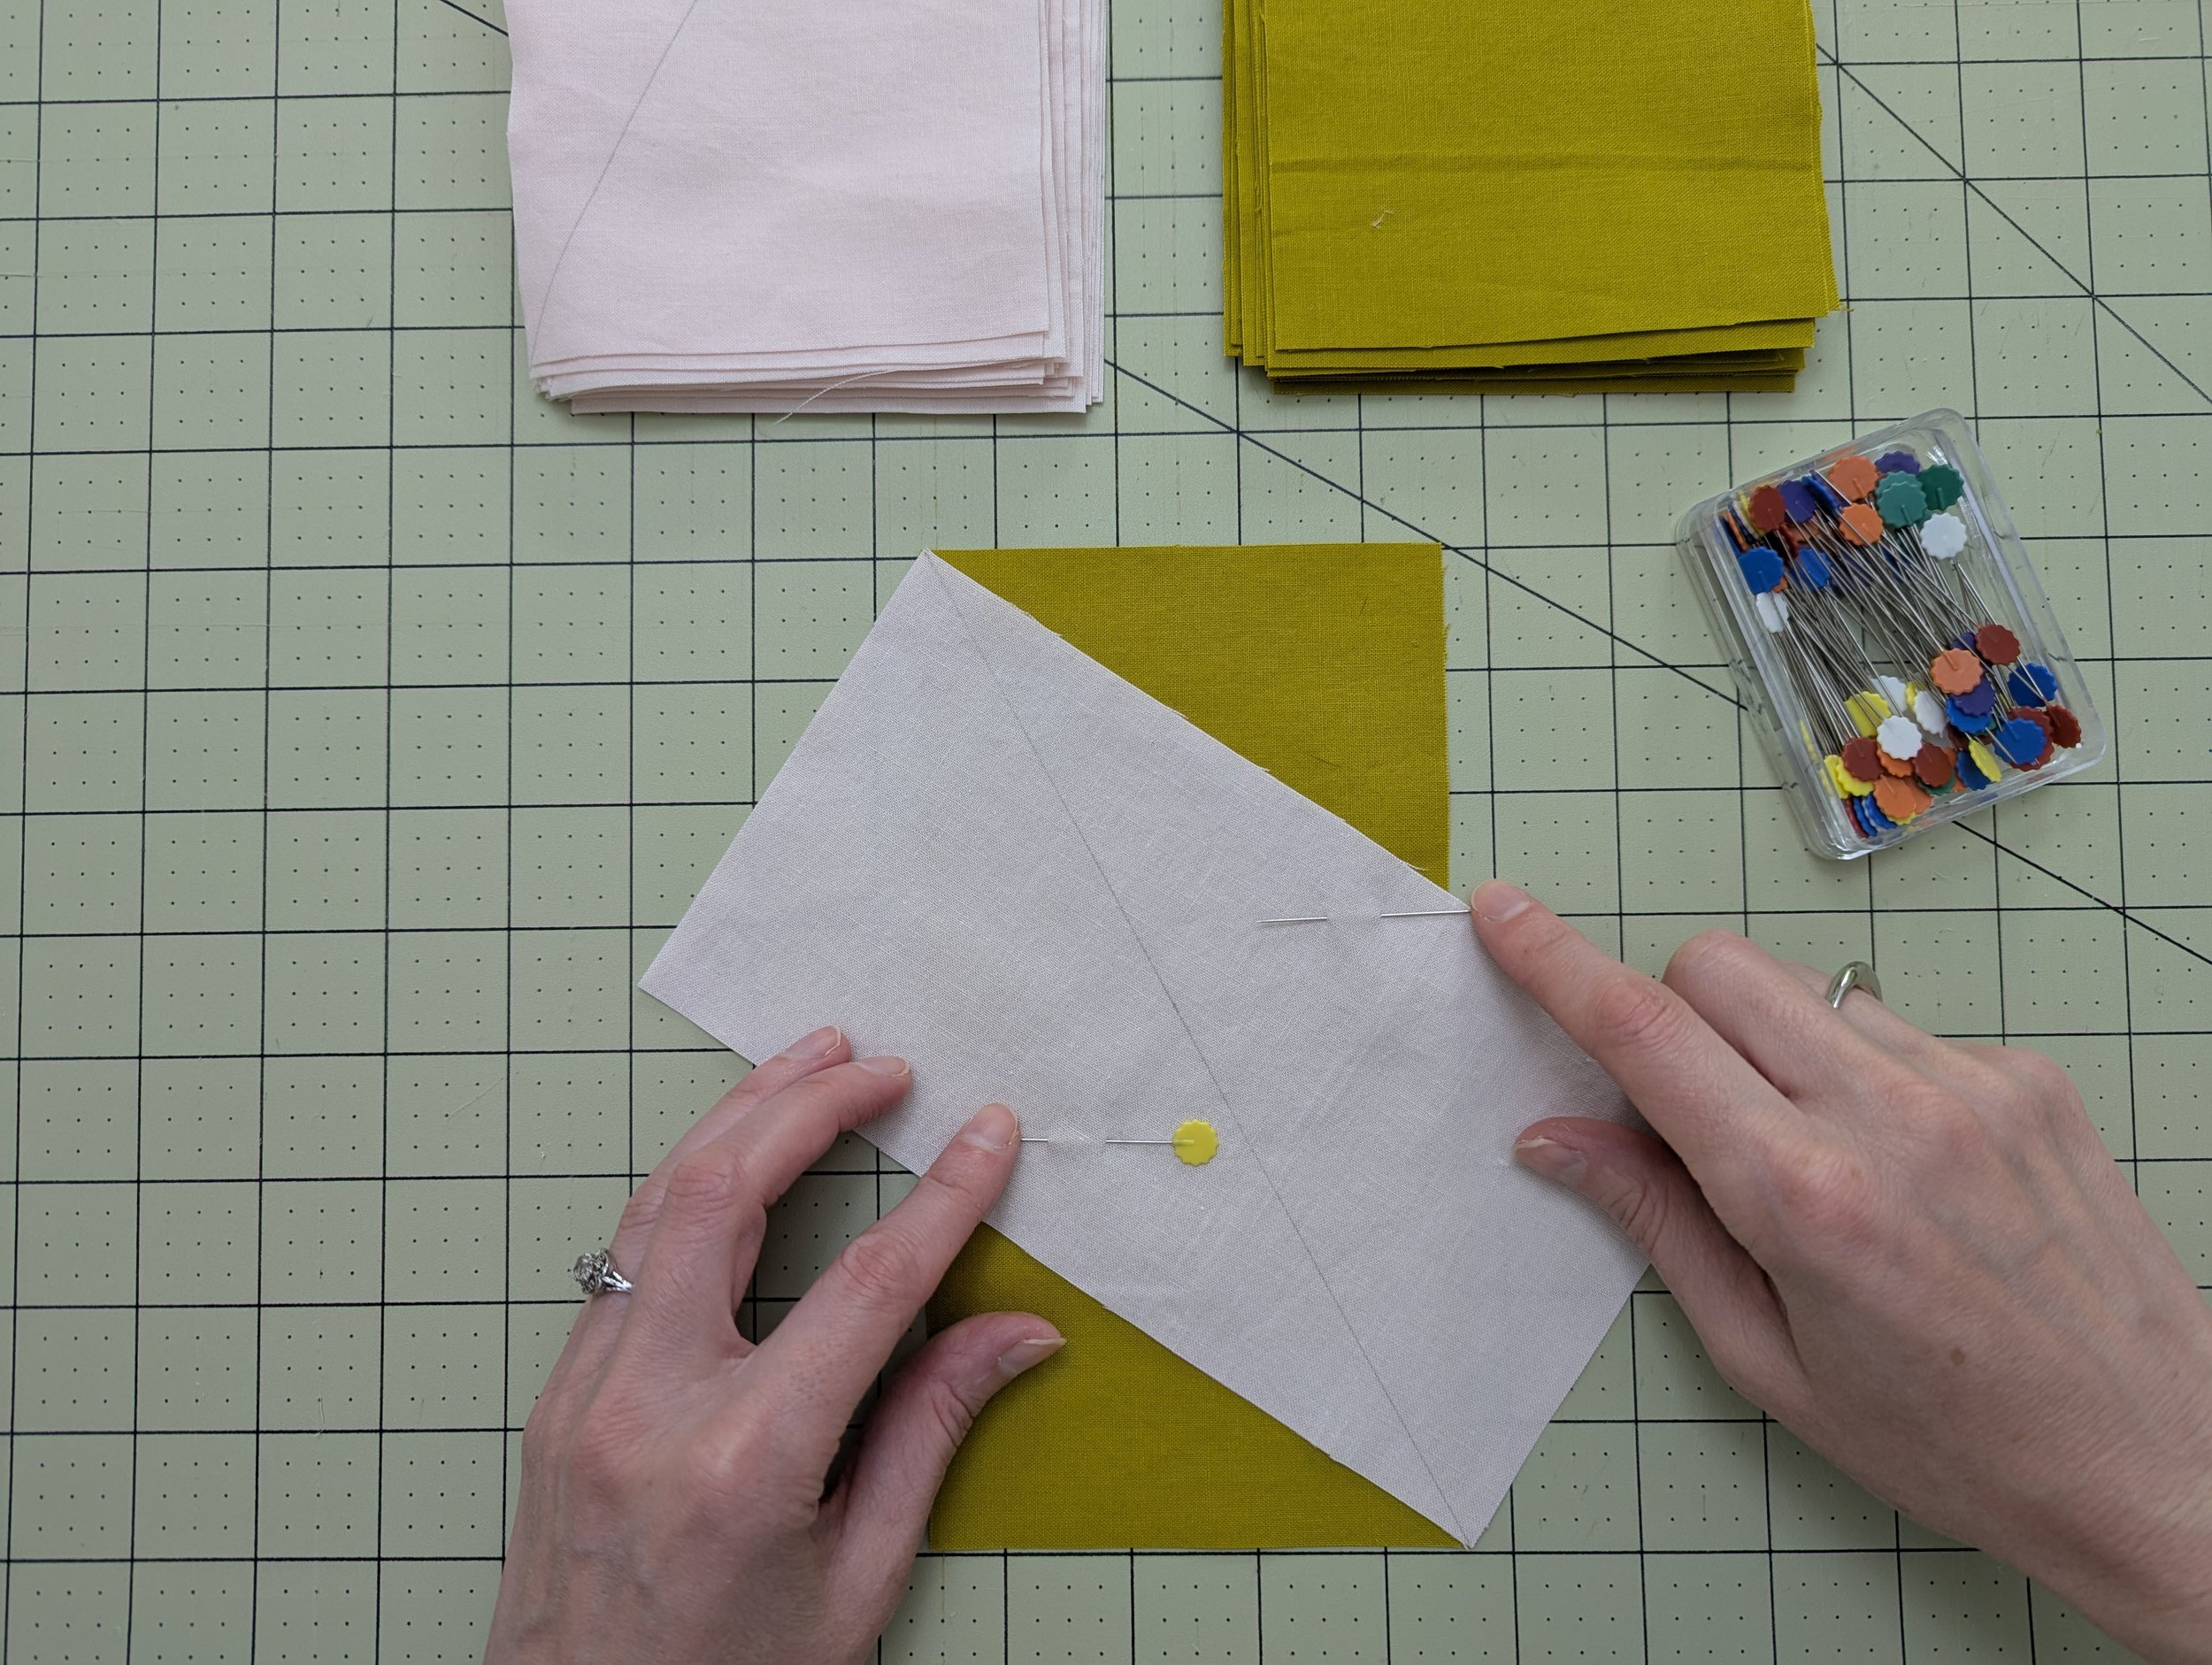
Draw a diagonal line on the wrong side of one rectangle.
Mark a diagonal line on the wrong side of one of the rectangles (shown here in pink)
Arrange your rectangles, right sides together, with corners touching.

Pin your pieces on both sides of the drawn line.
Sew ¼” on either side of the drawn line.


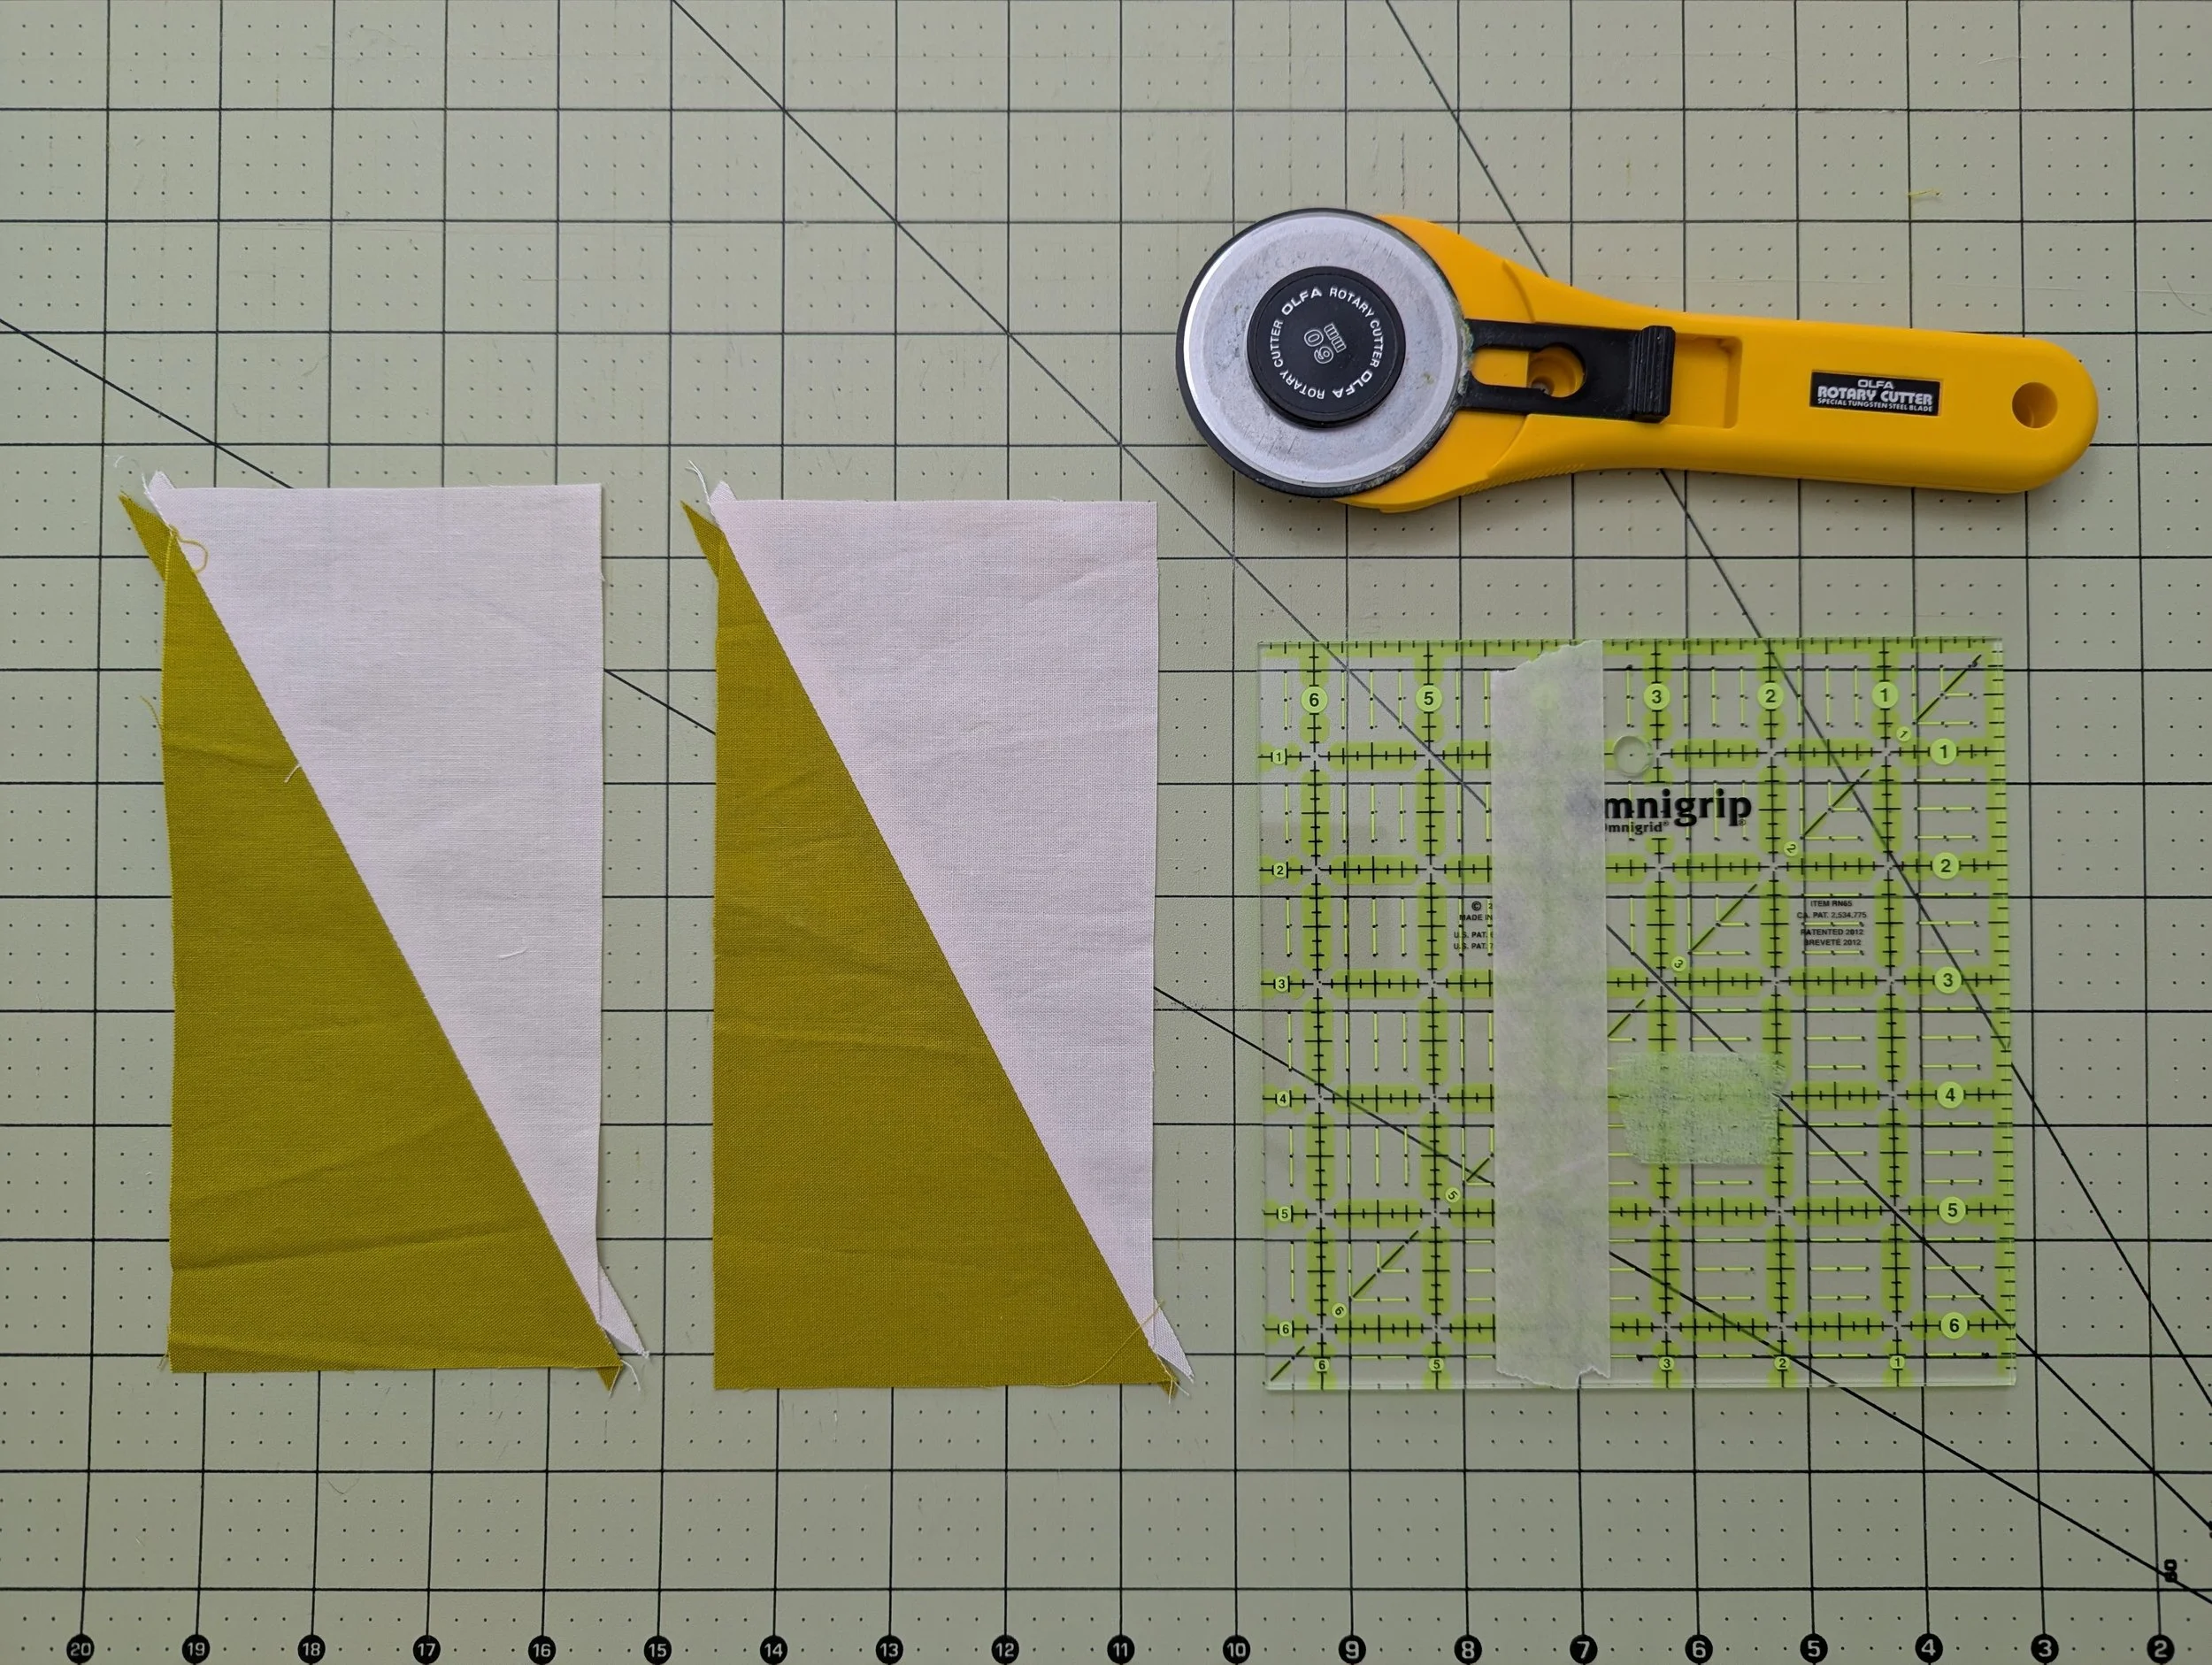
Cut on your drawn line, giving you 2 HRT units, then press seams open (or however your pattern instructs).


Prepare Your Ruler for Trimming
For my HRTs I want to trim them to an unfinished size of 3 ½” x 6 ½”. I’ll mark my ruler with masking tape and a Sharpie marker to help me quickly and easily line up and trim. Prepare your ruler for whatever unfinished size your pattern calls for.
I’m using a 6 ½” square ruler, so I only need to place tape at the 3 ½” mark. Use the Sharpie marker to place a small dot ¼” in from the edges of all four corners. (Don’t worry- the Sharpie comes off with rubbing alcohol!)
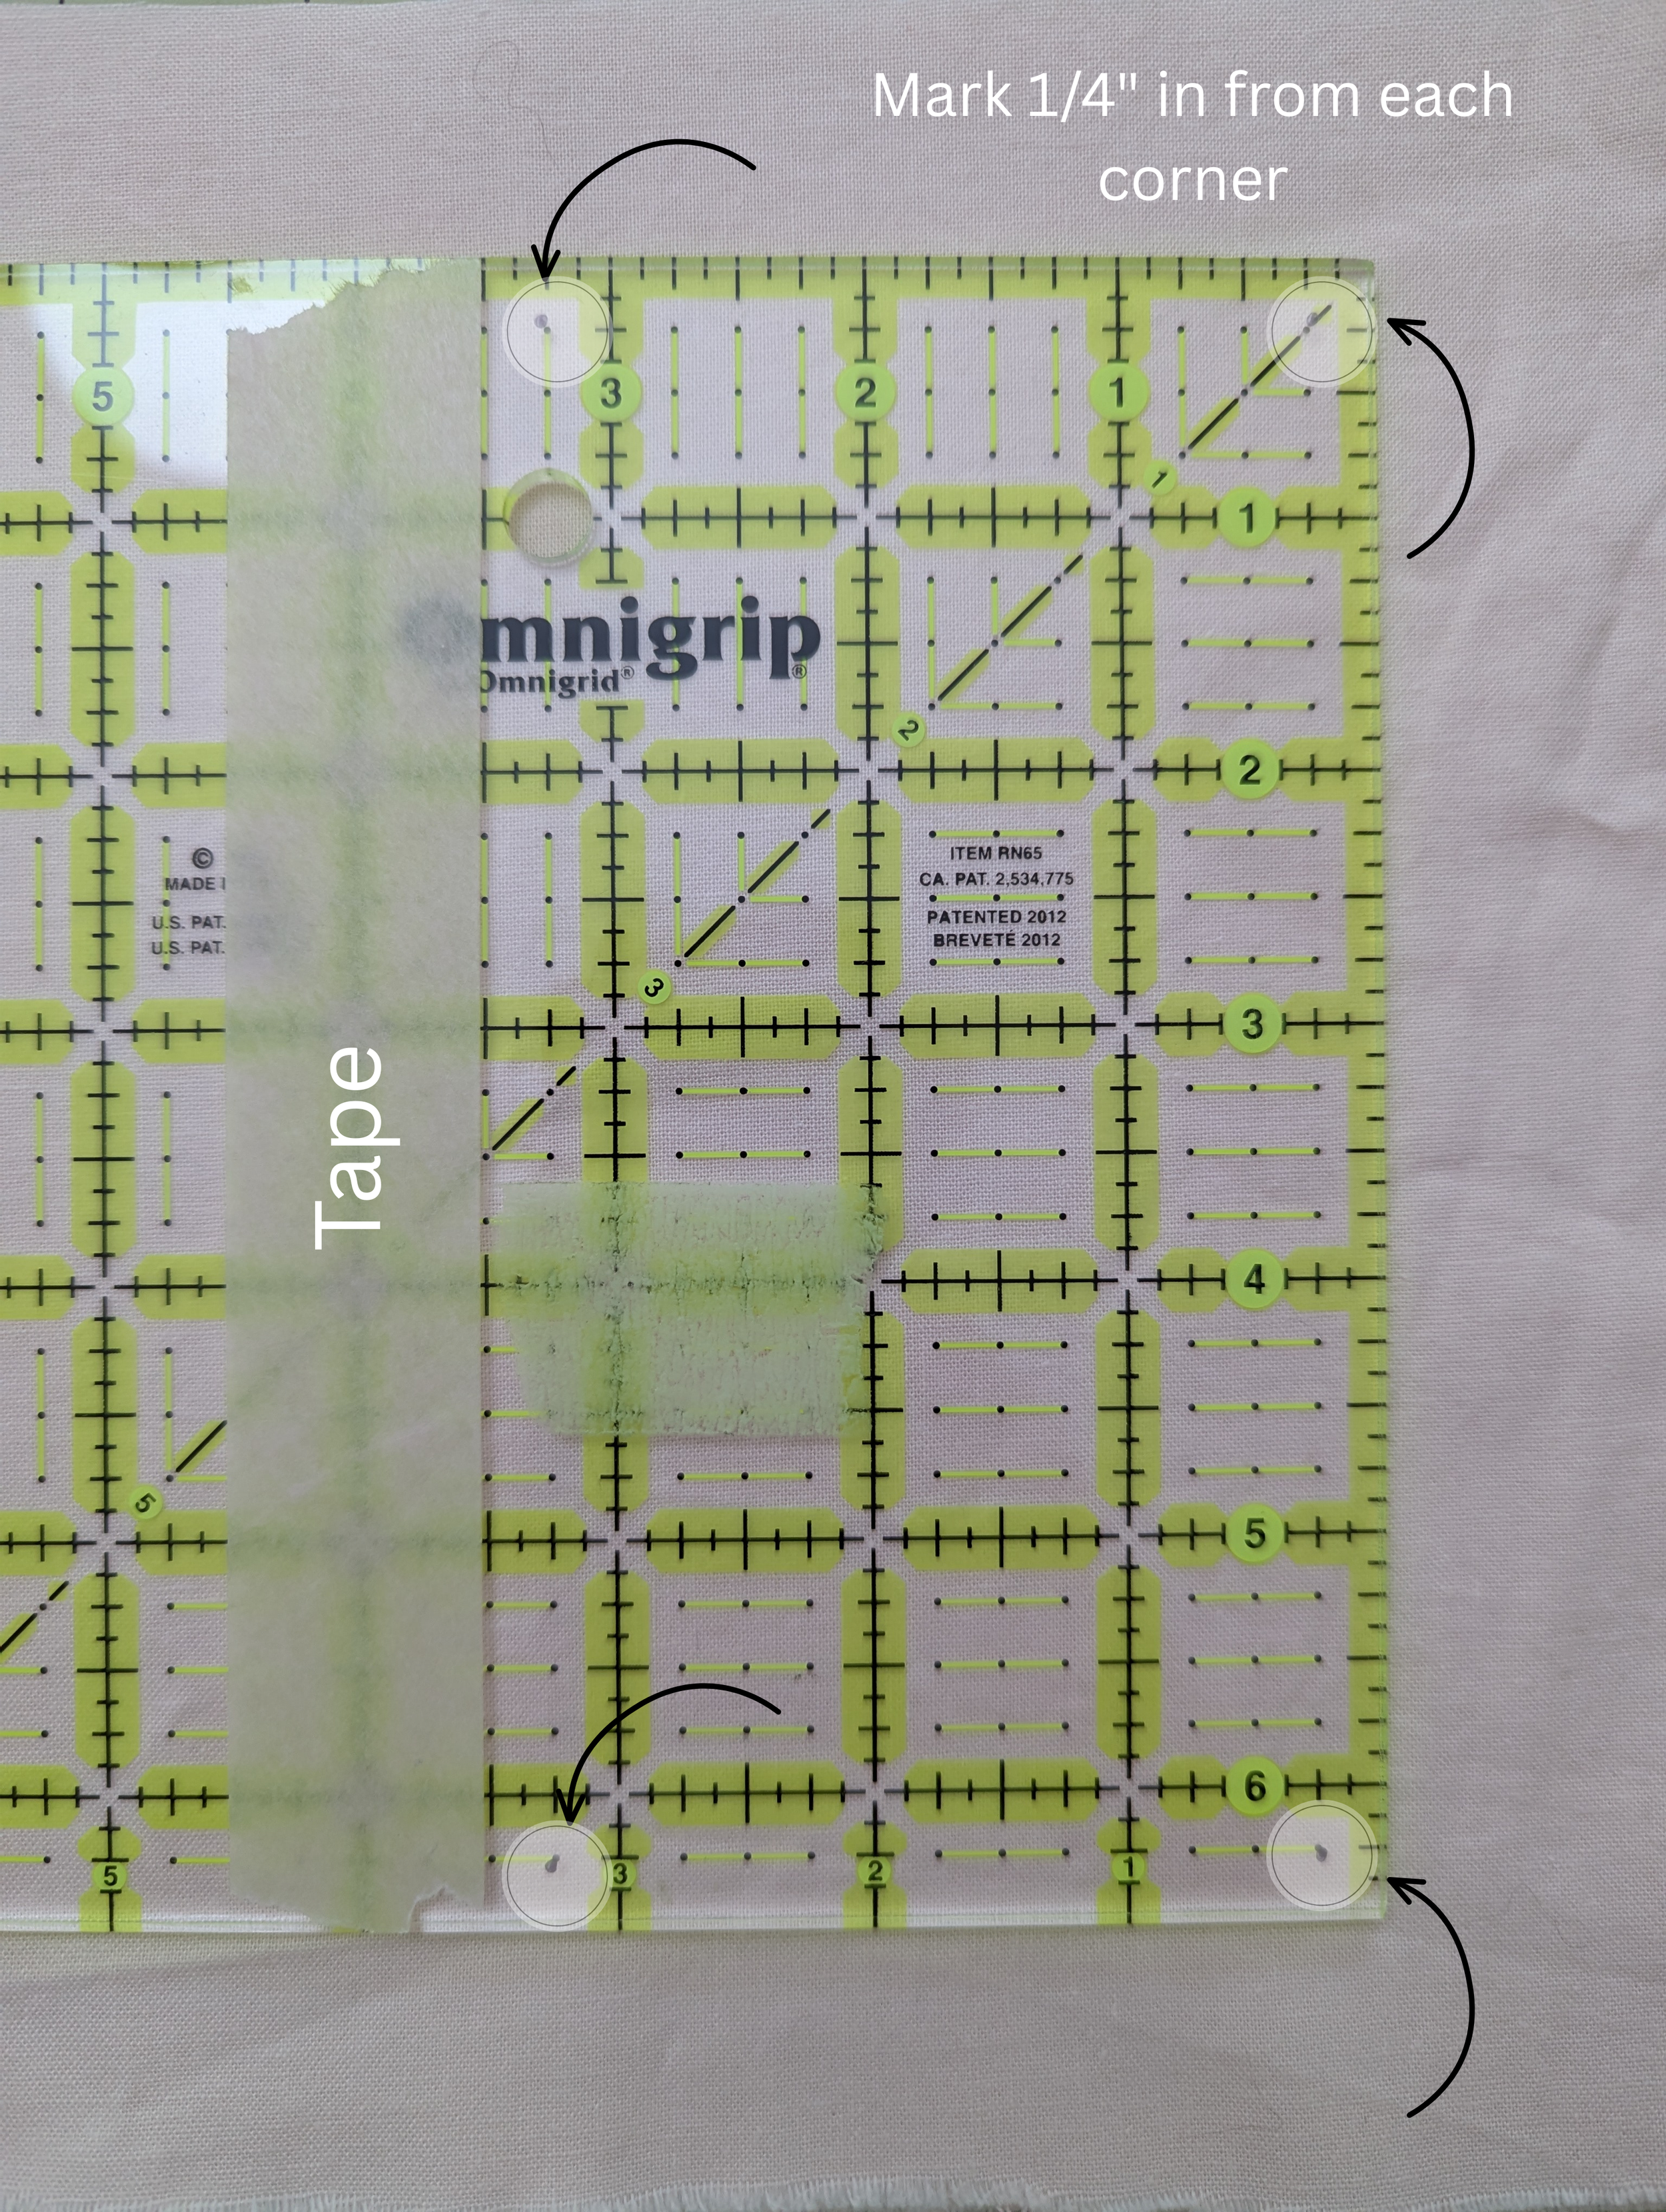
Marking your ruler to trim 3 1/2” x 6 1/2” HRTs
Ready to be trimmed!
Trimming Your Blocks
Place your ruler on top of your HRT. Align the seam line of the HRT with two Sharpie dots (in this case, in the upper left and lower right corners). Be careful on the left side of the ruler that the HRT fills the space all the way past the masking taped line so the block doesn’t measure too short.
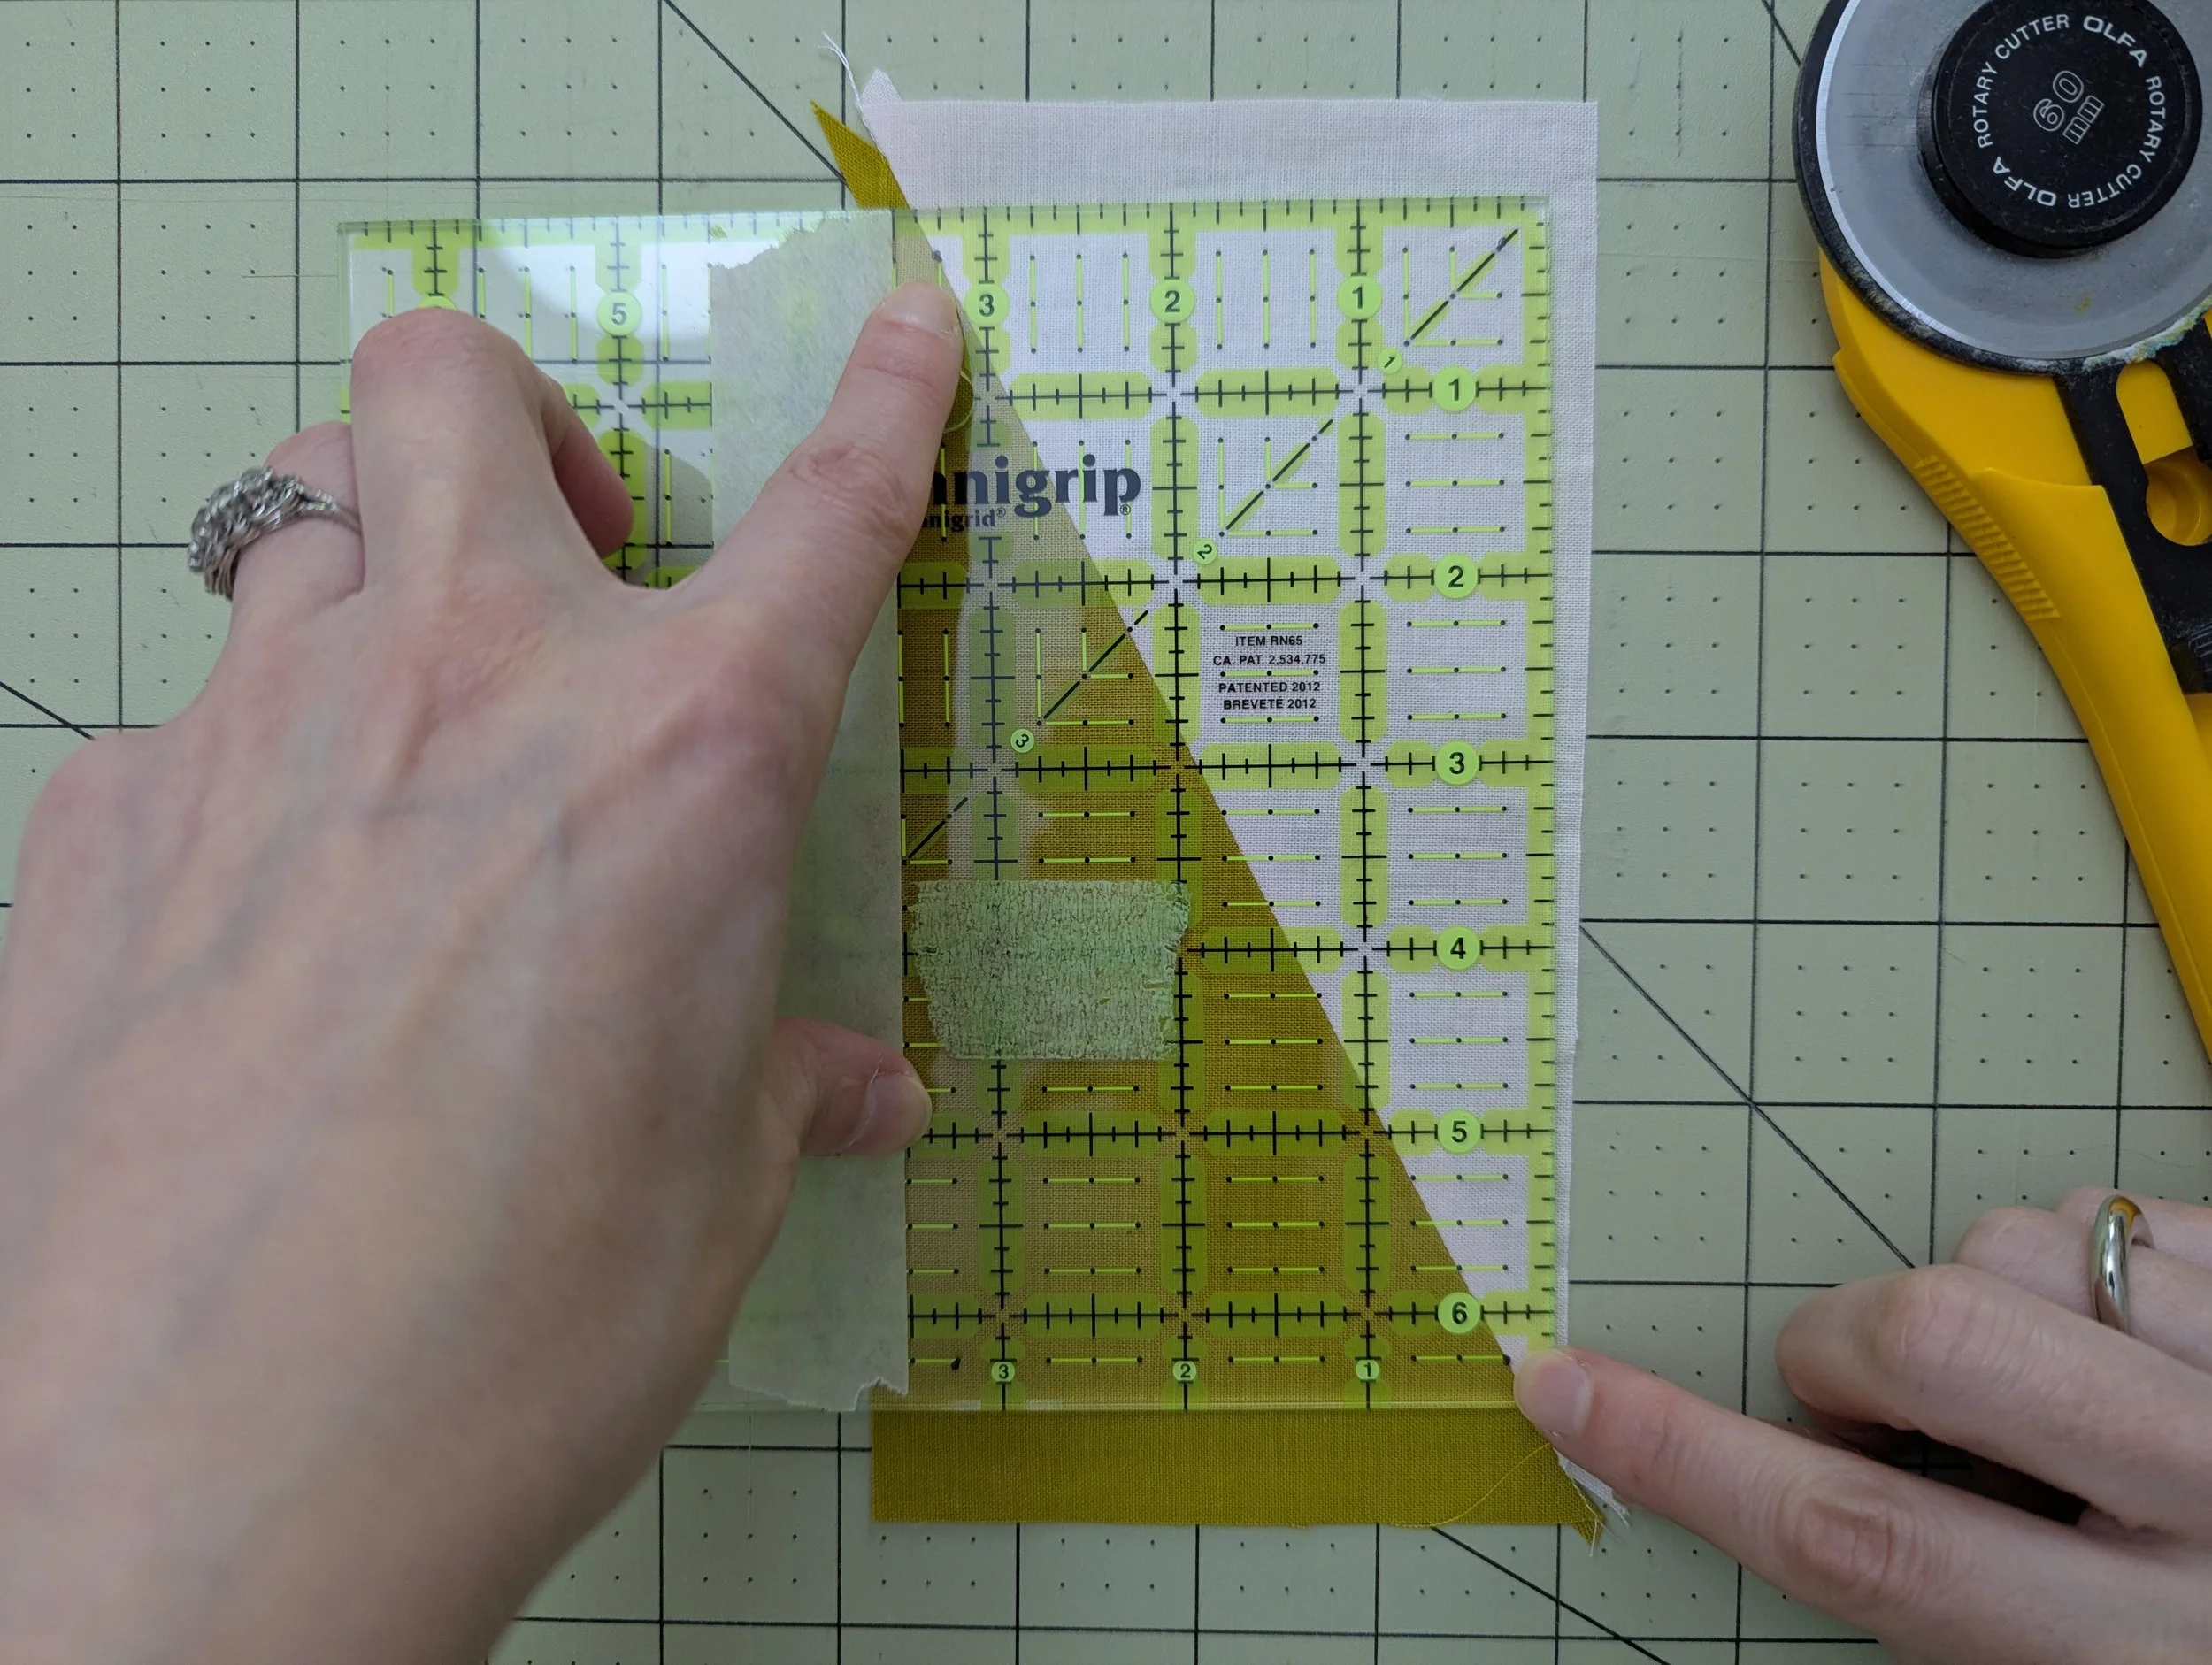
Line up your two Sharpie dots with the seam line
Trim the right and top sides of the HRT.
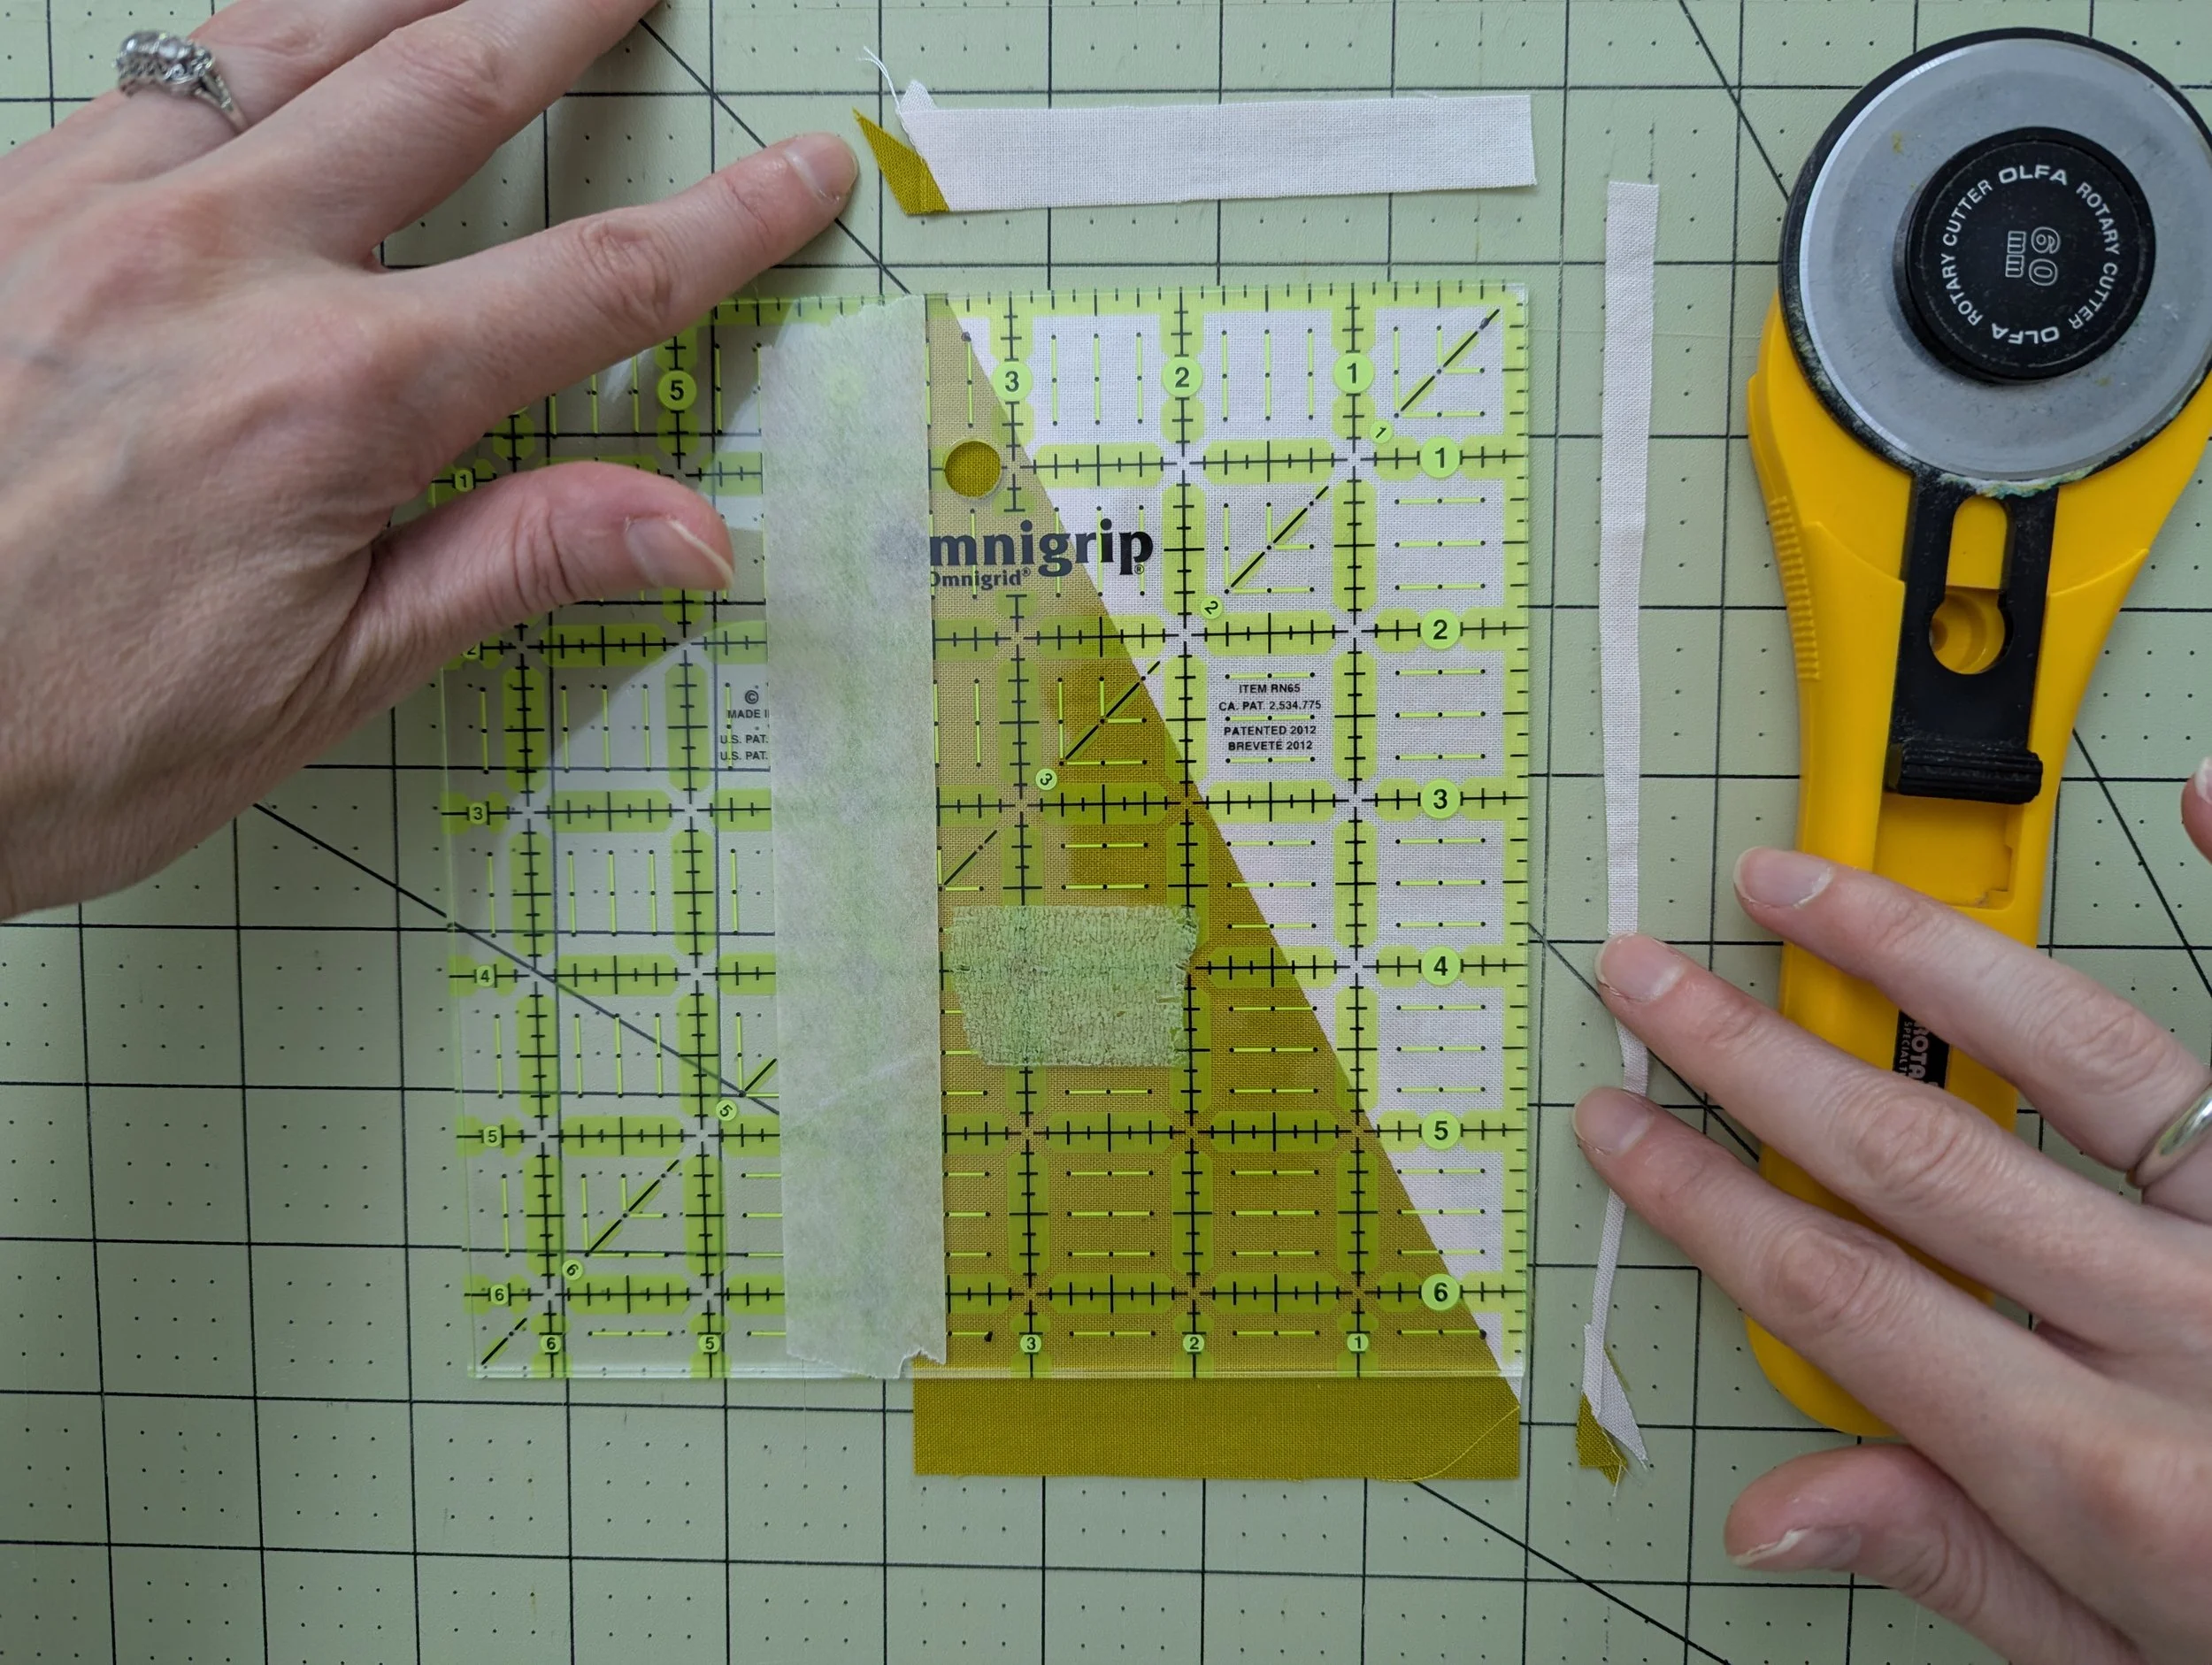
Flip the block. This time, you’ll align the left and bottom sides of the HRT to your ruler measurement, while still aligning your dots to the seam line.

Trim the right and top sides of the HRT.
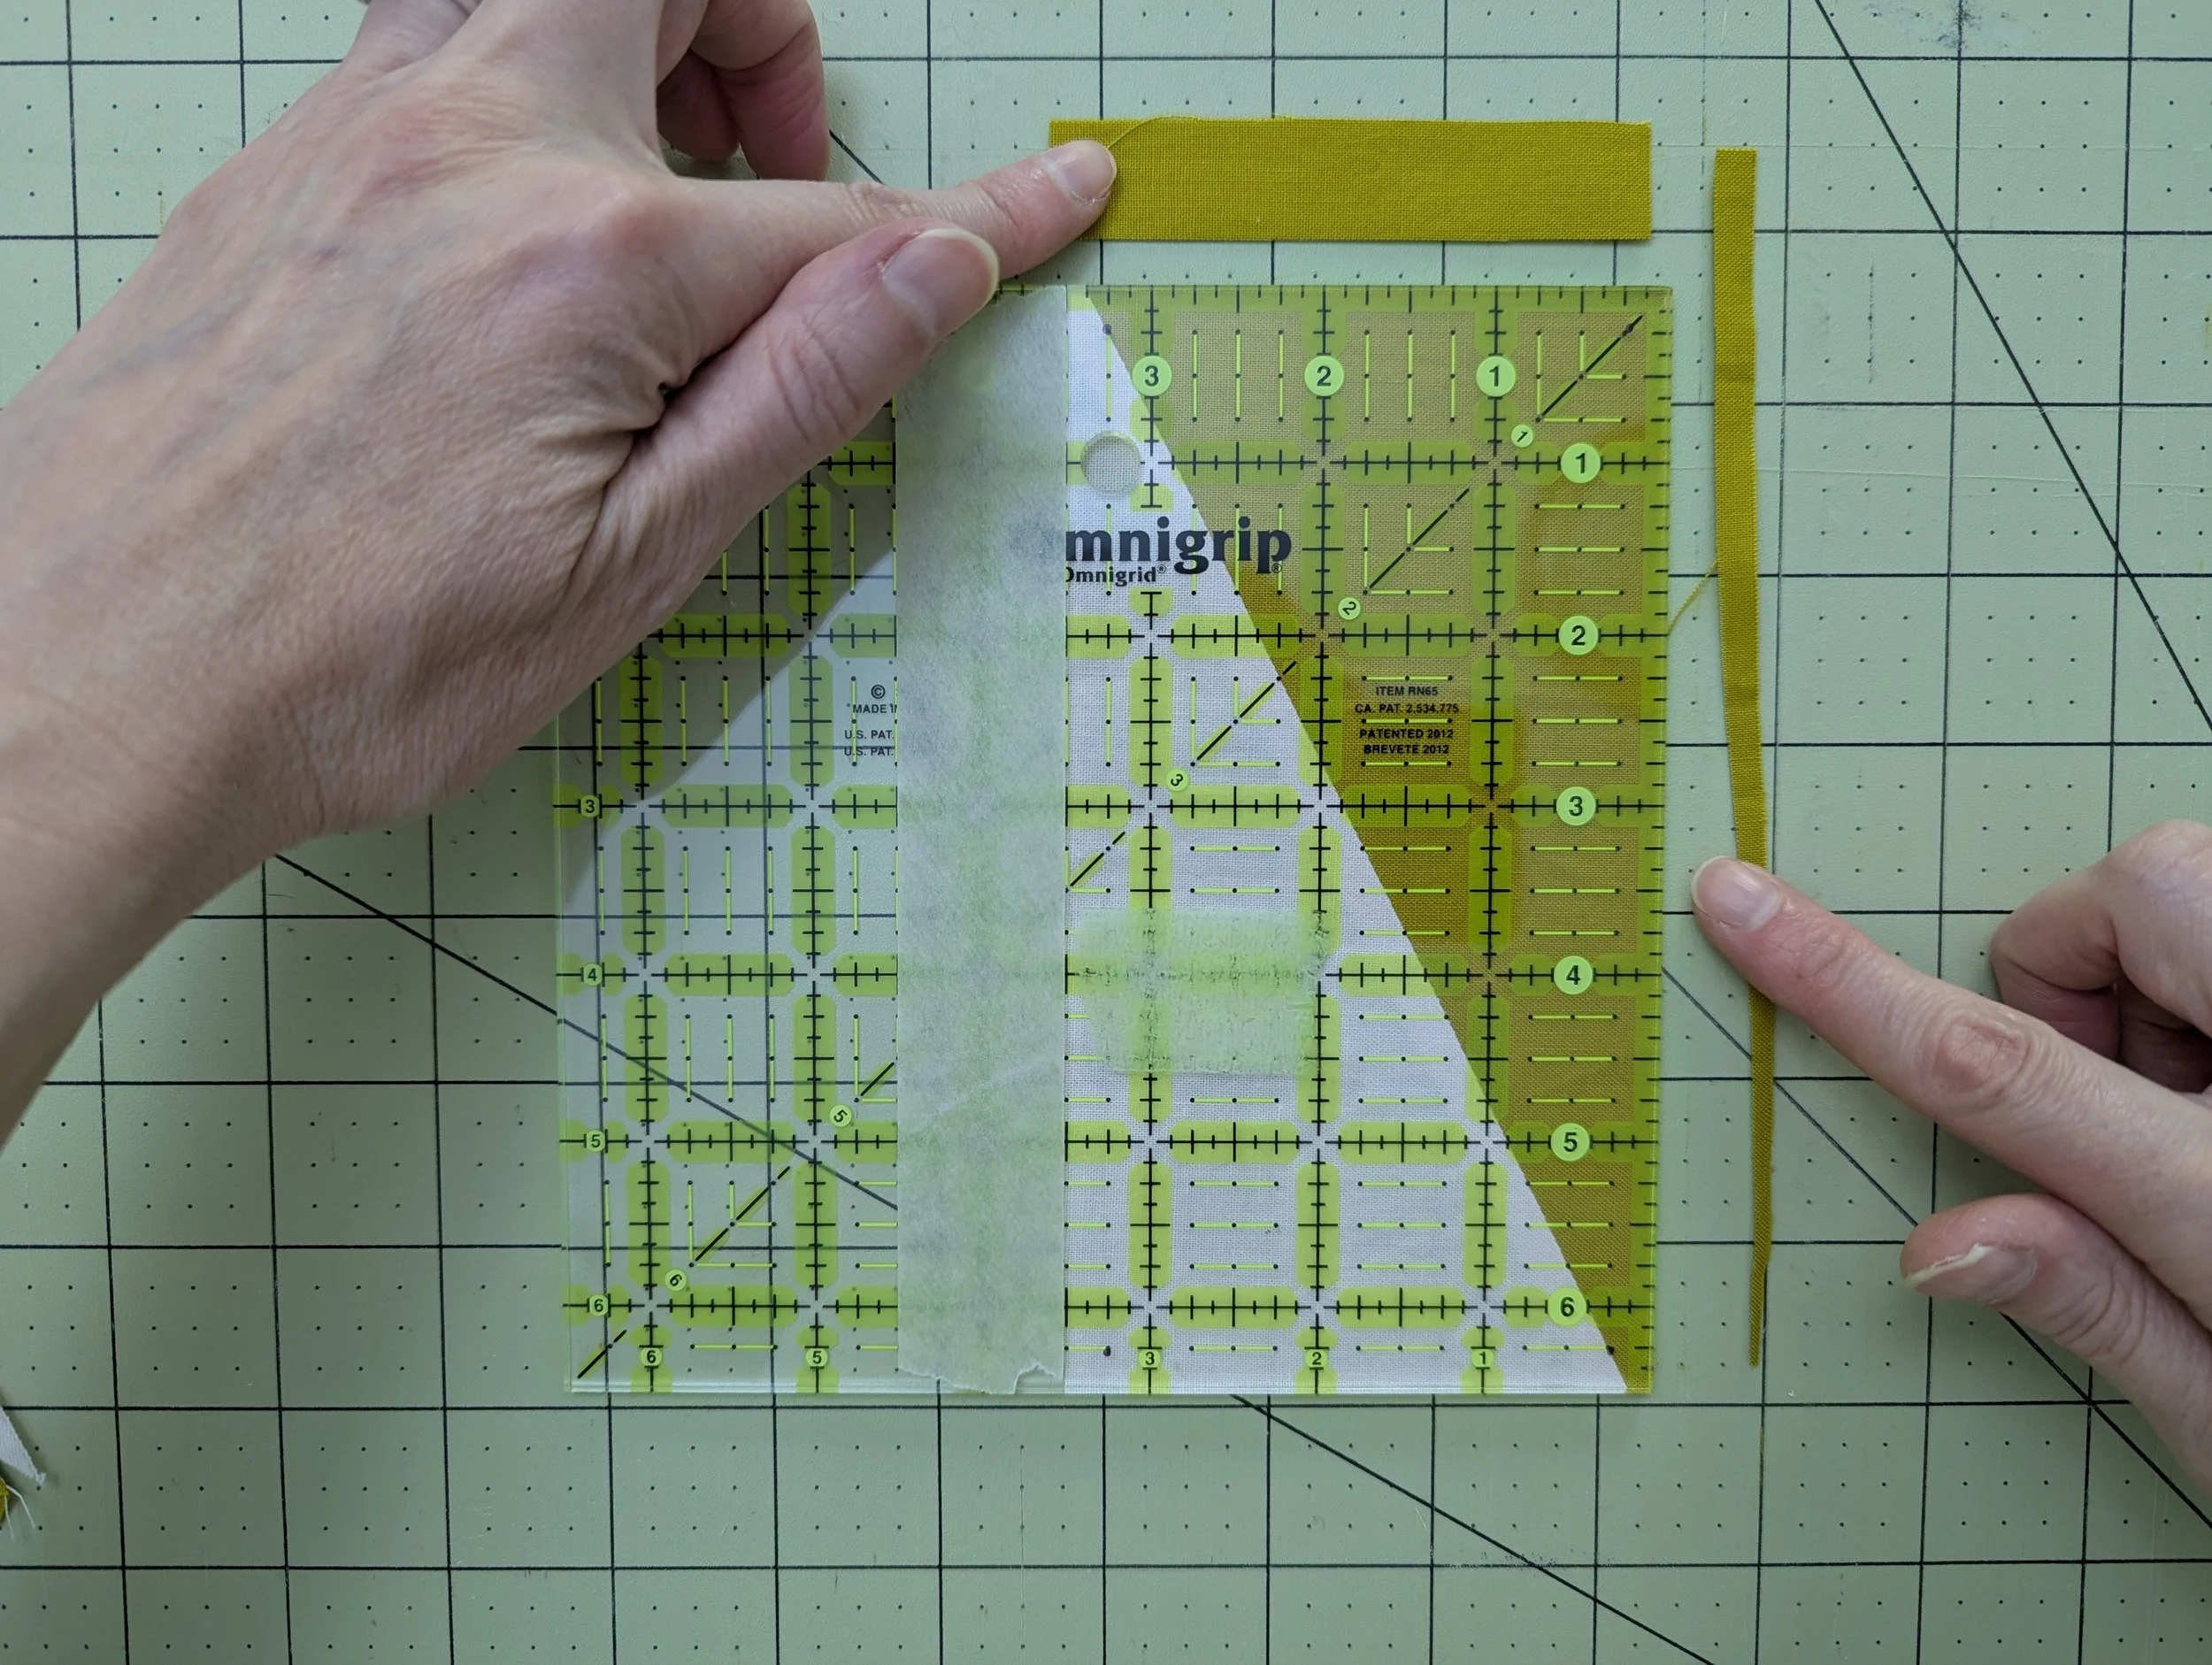
That’s it! You’ll see that the seam line is slightly offset, and doesn’t intersect directly with the corners. That is how it should be! This will give you crisp points in your quilts :)
The seam line is slightly offset, as it should be!
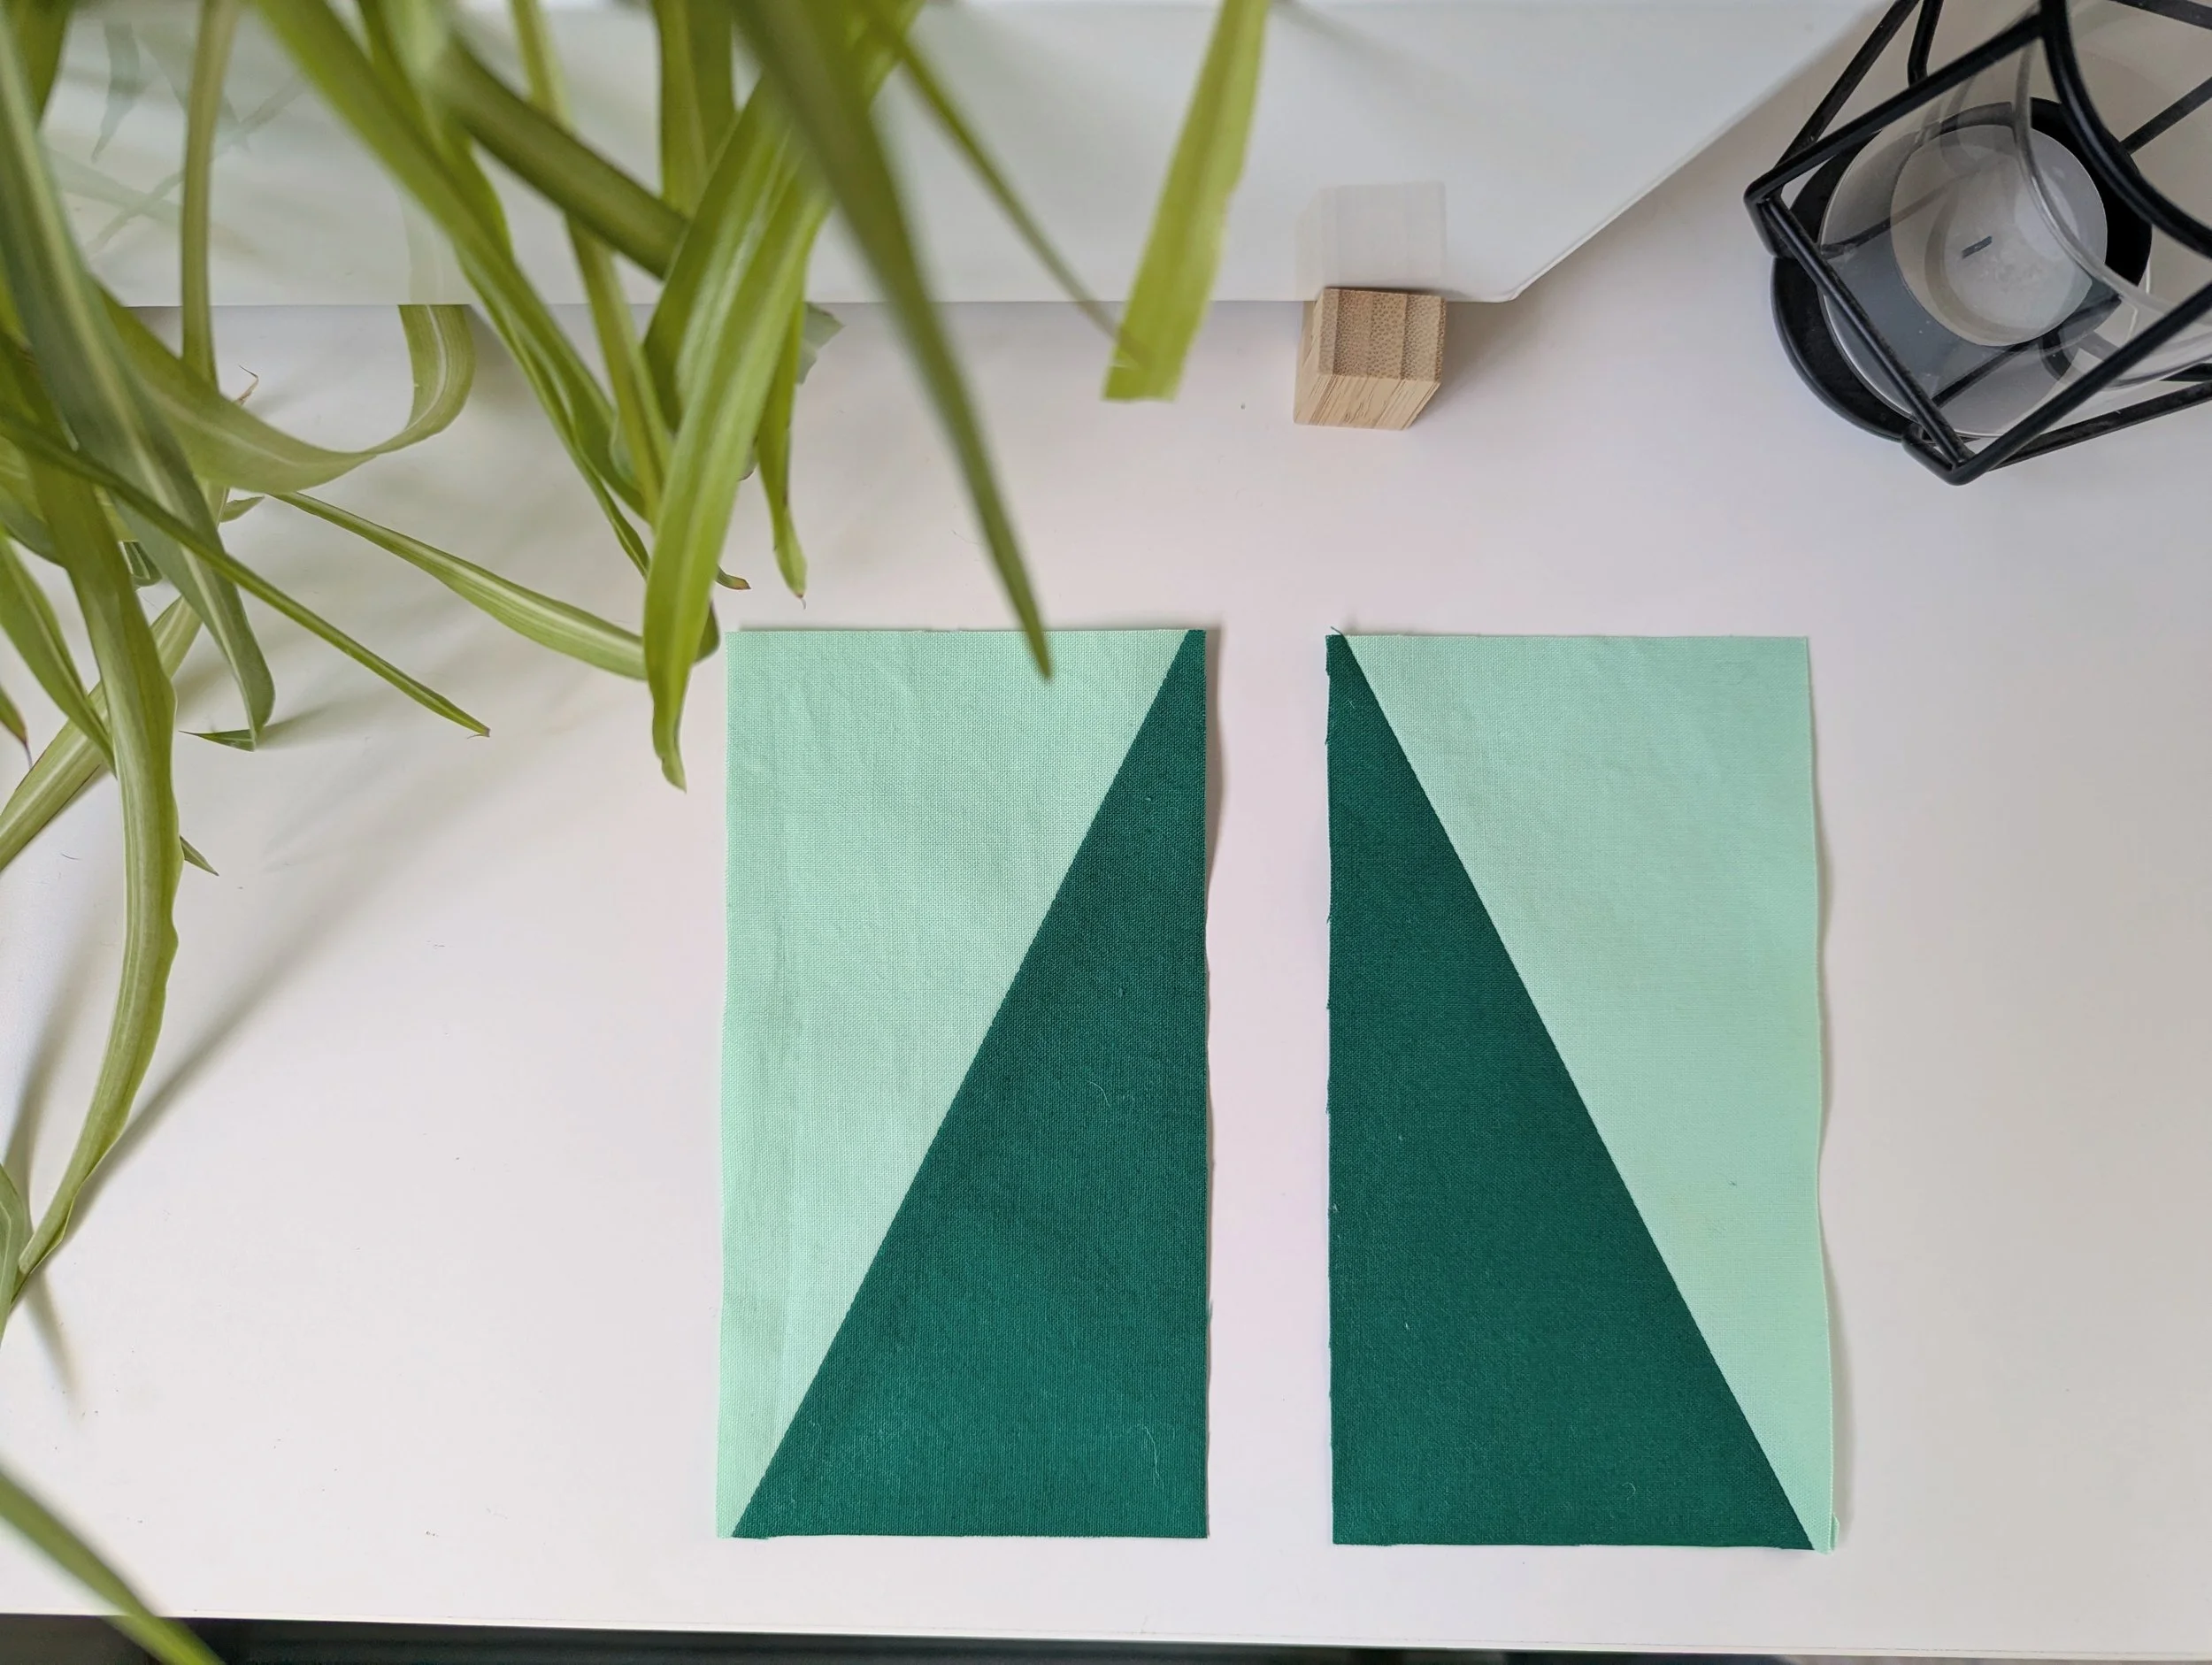
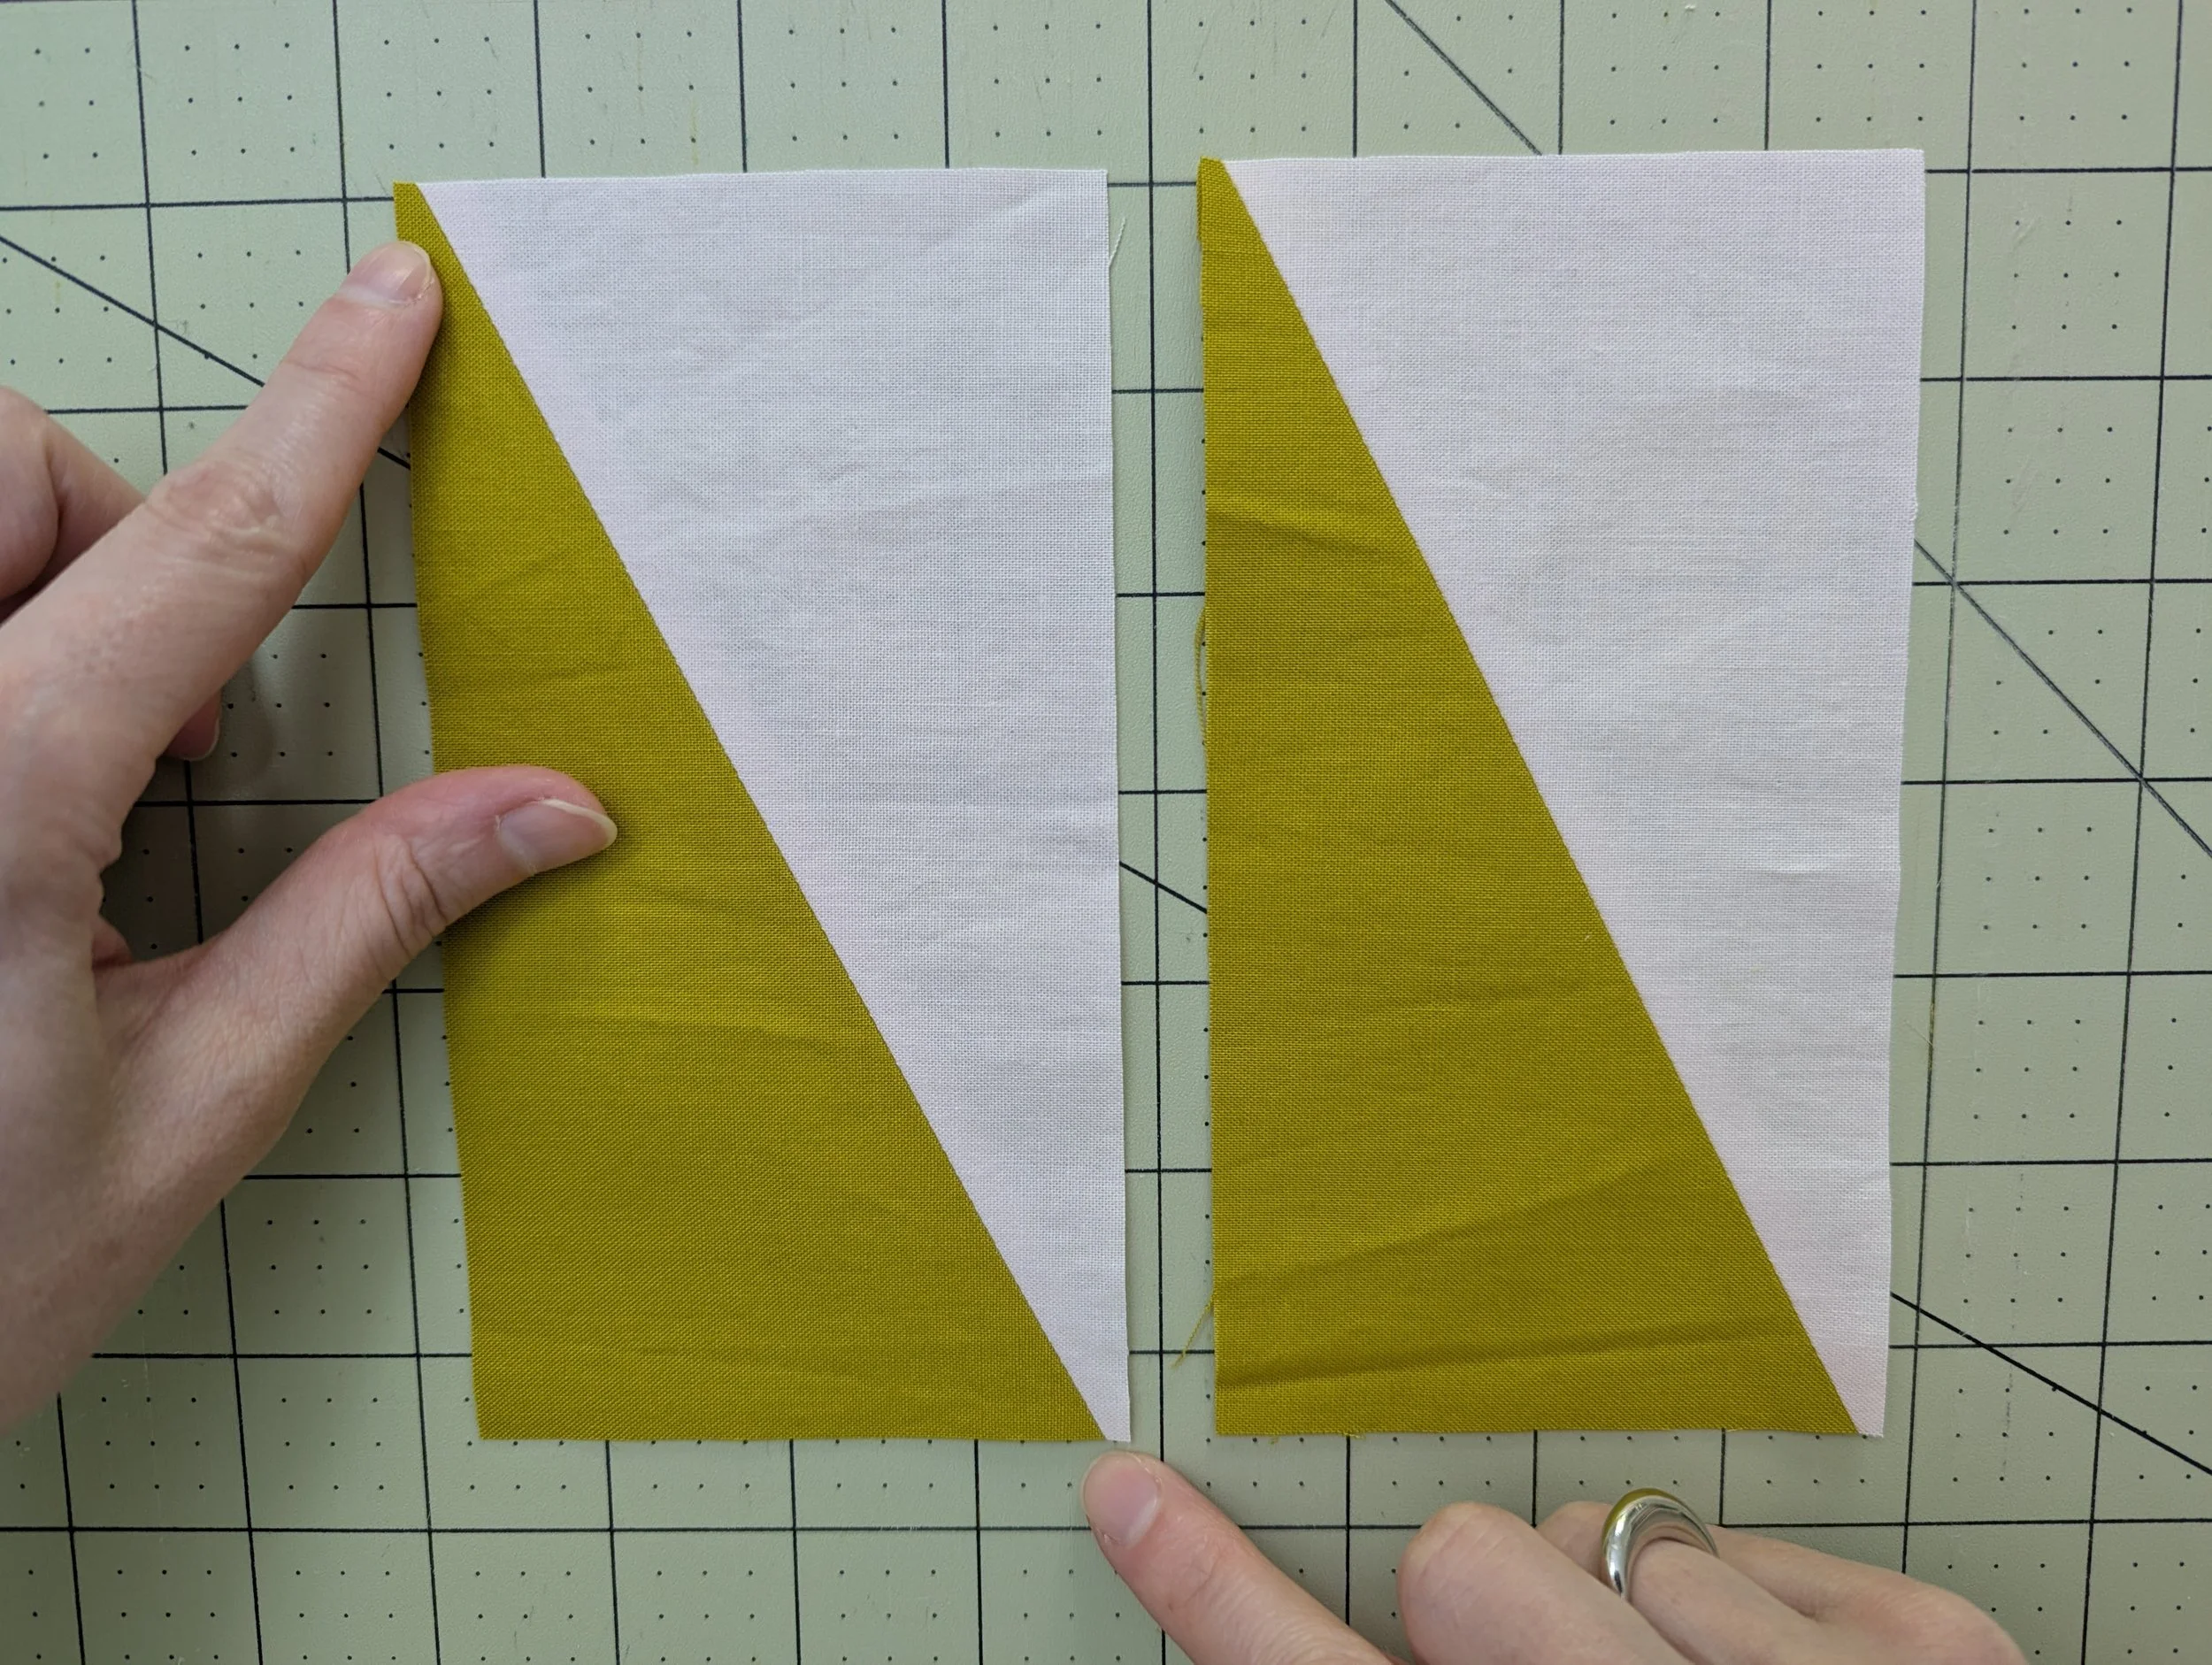
Mirroring Blocks
The pictures I have shared here will result in two HRT units, with angles in the same direction. But what if you want to have mirrored units? No problem! The example in the pictures here shows you how to align your blocks so you will get mirrored HRTs.


Once you get the hang of this block, it comes together so quickly! And I really love the angles that these can create in a quilt top design. This won’t be my last time using them in a pattern!
These blocks are also Bun approved ;)

Bun inspecting the HRTs
If you want to try making HRTs yourself, The 1751 Quilt is a great place to start! It has an intricate design, but comes together super fast in the assembly. You’ll be completing your first HRT quilt in no time!
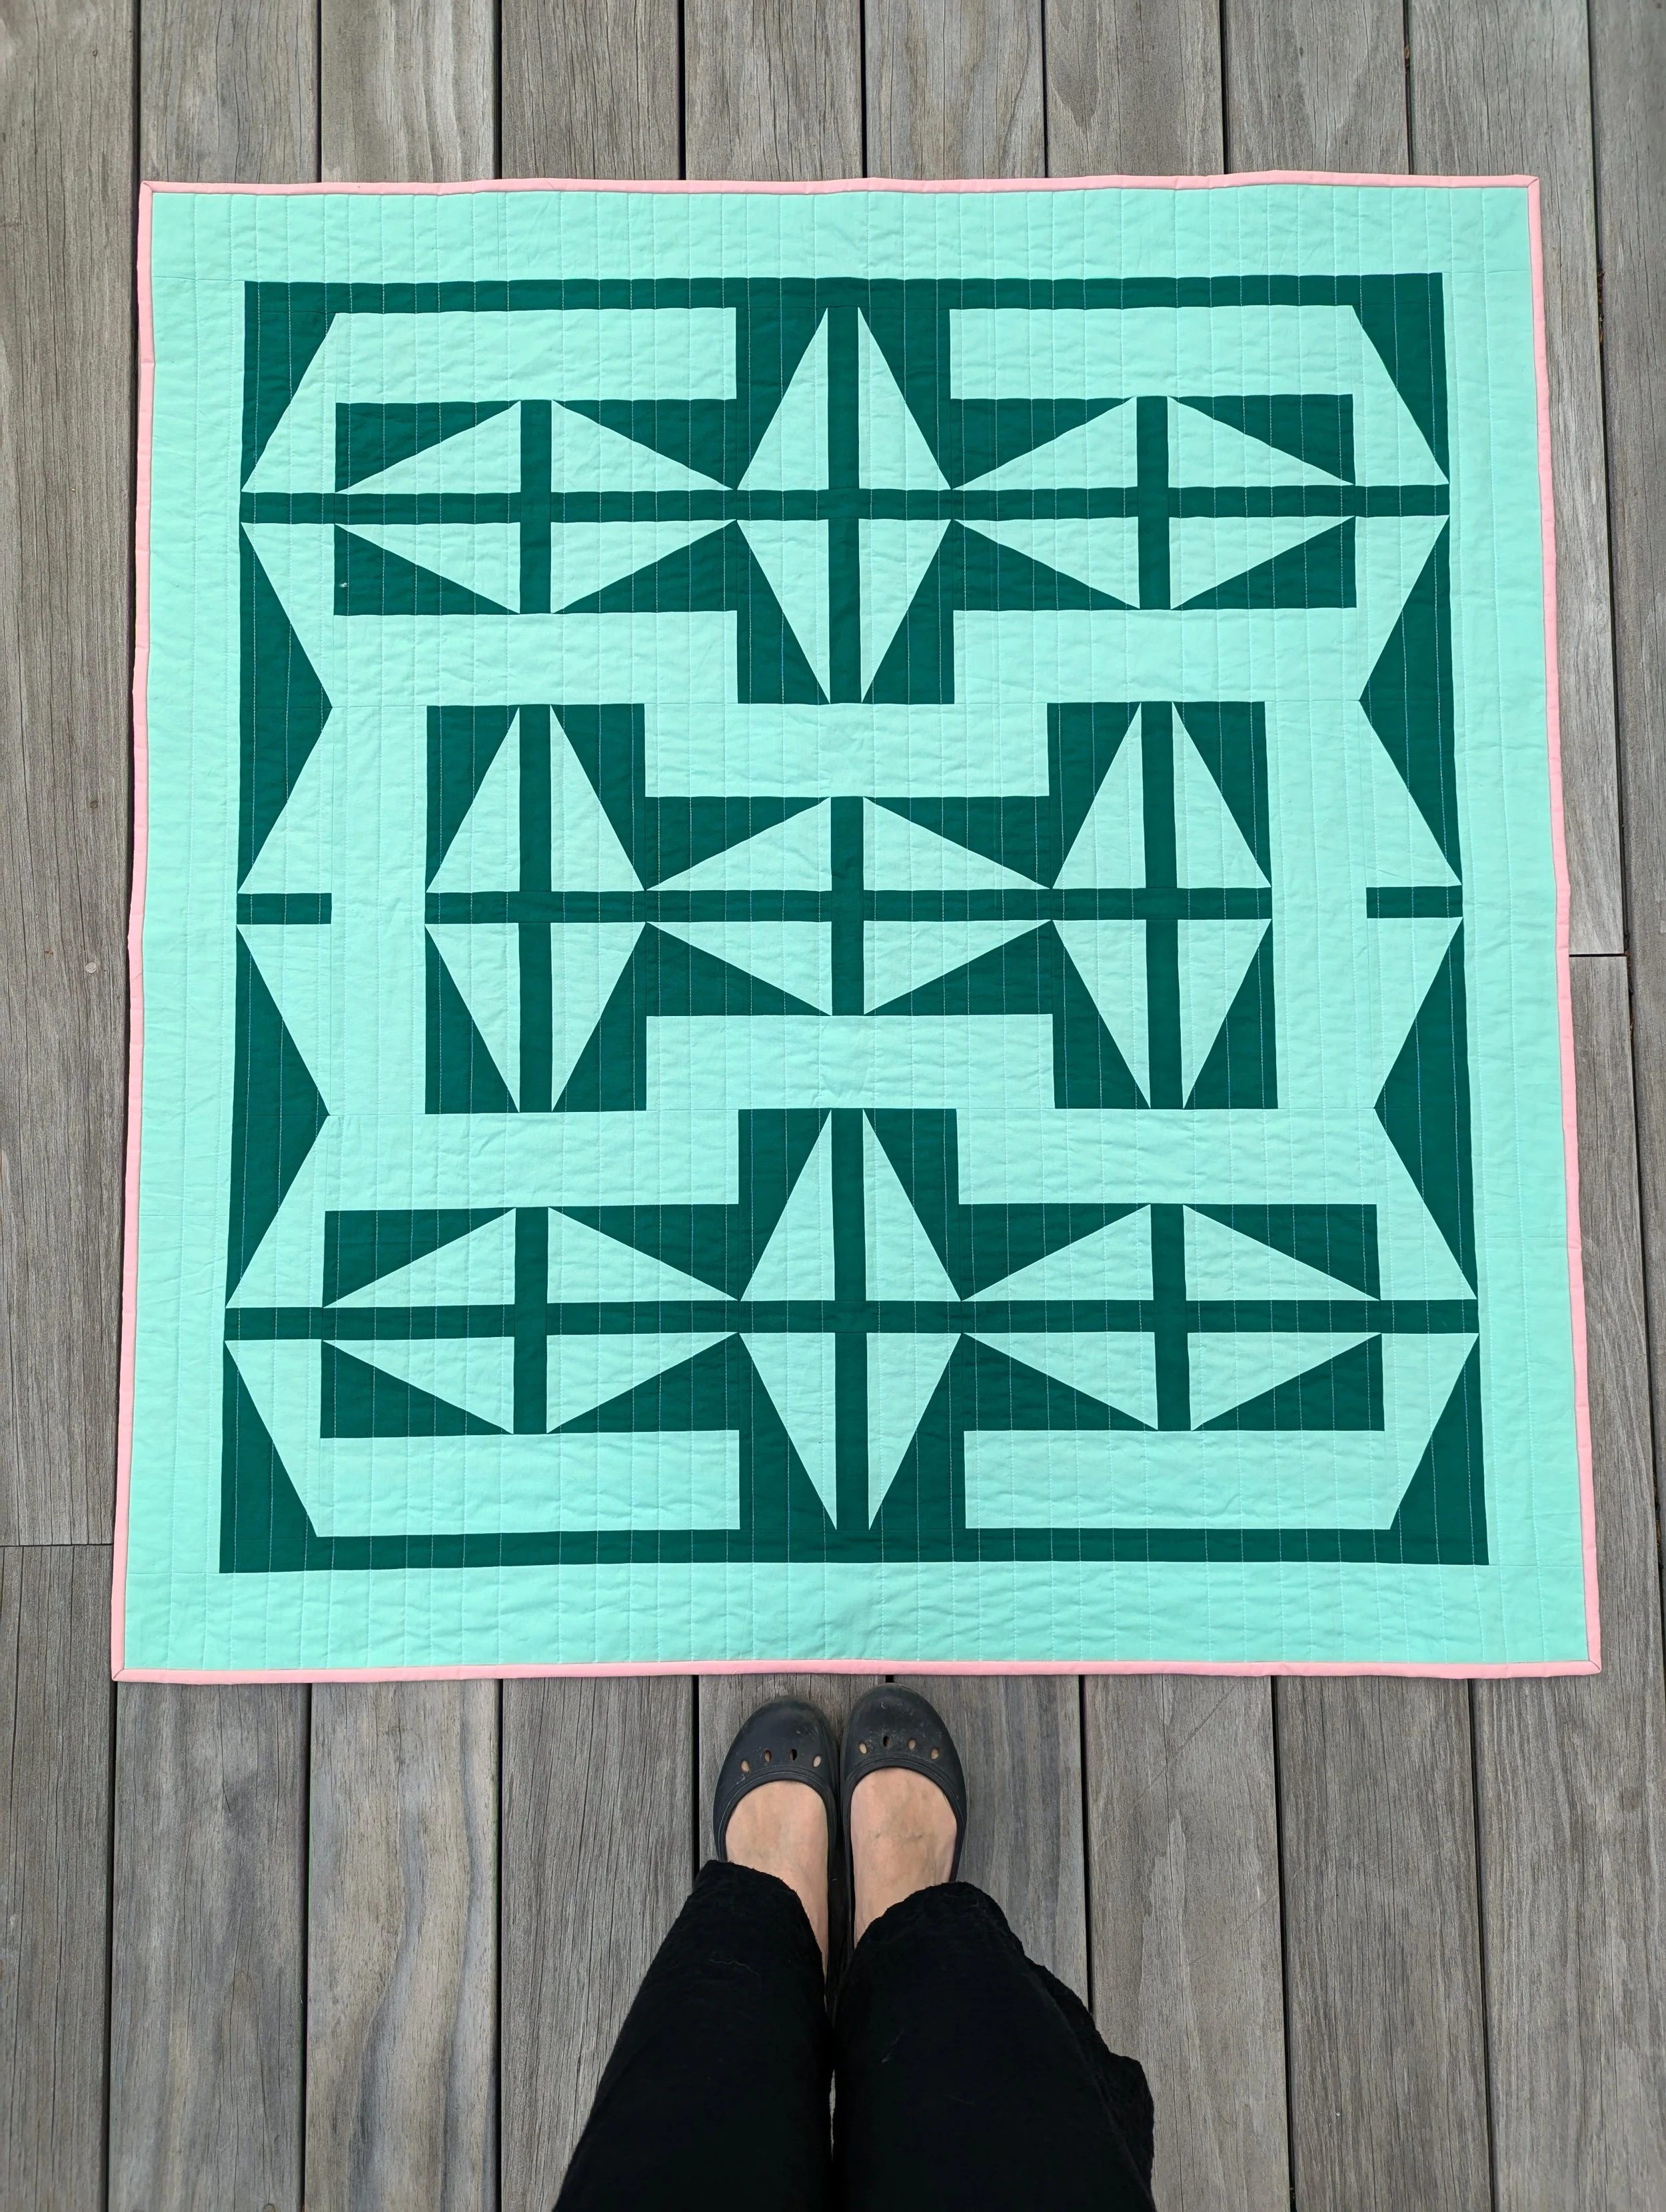
A Lap sized version of The 1751 Quilt in Kona Cotton Pond and Balsam
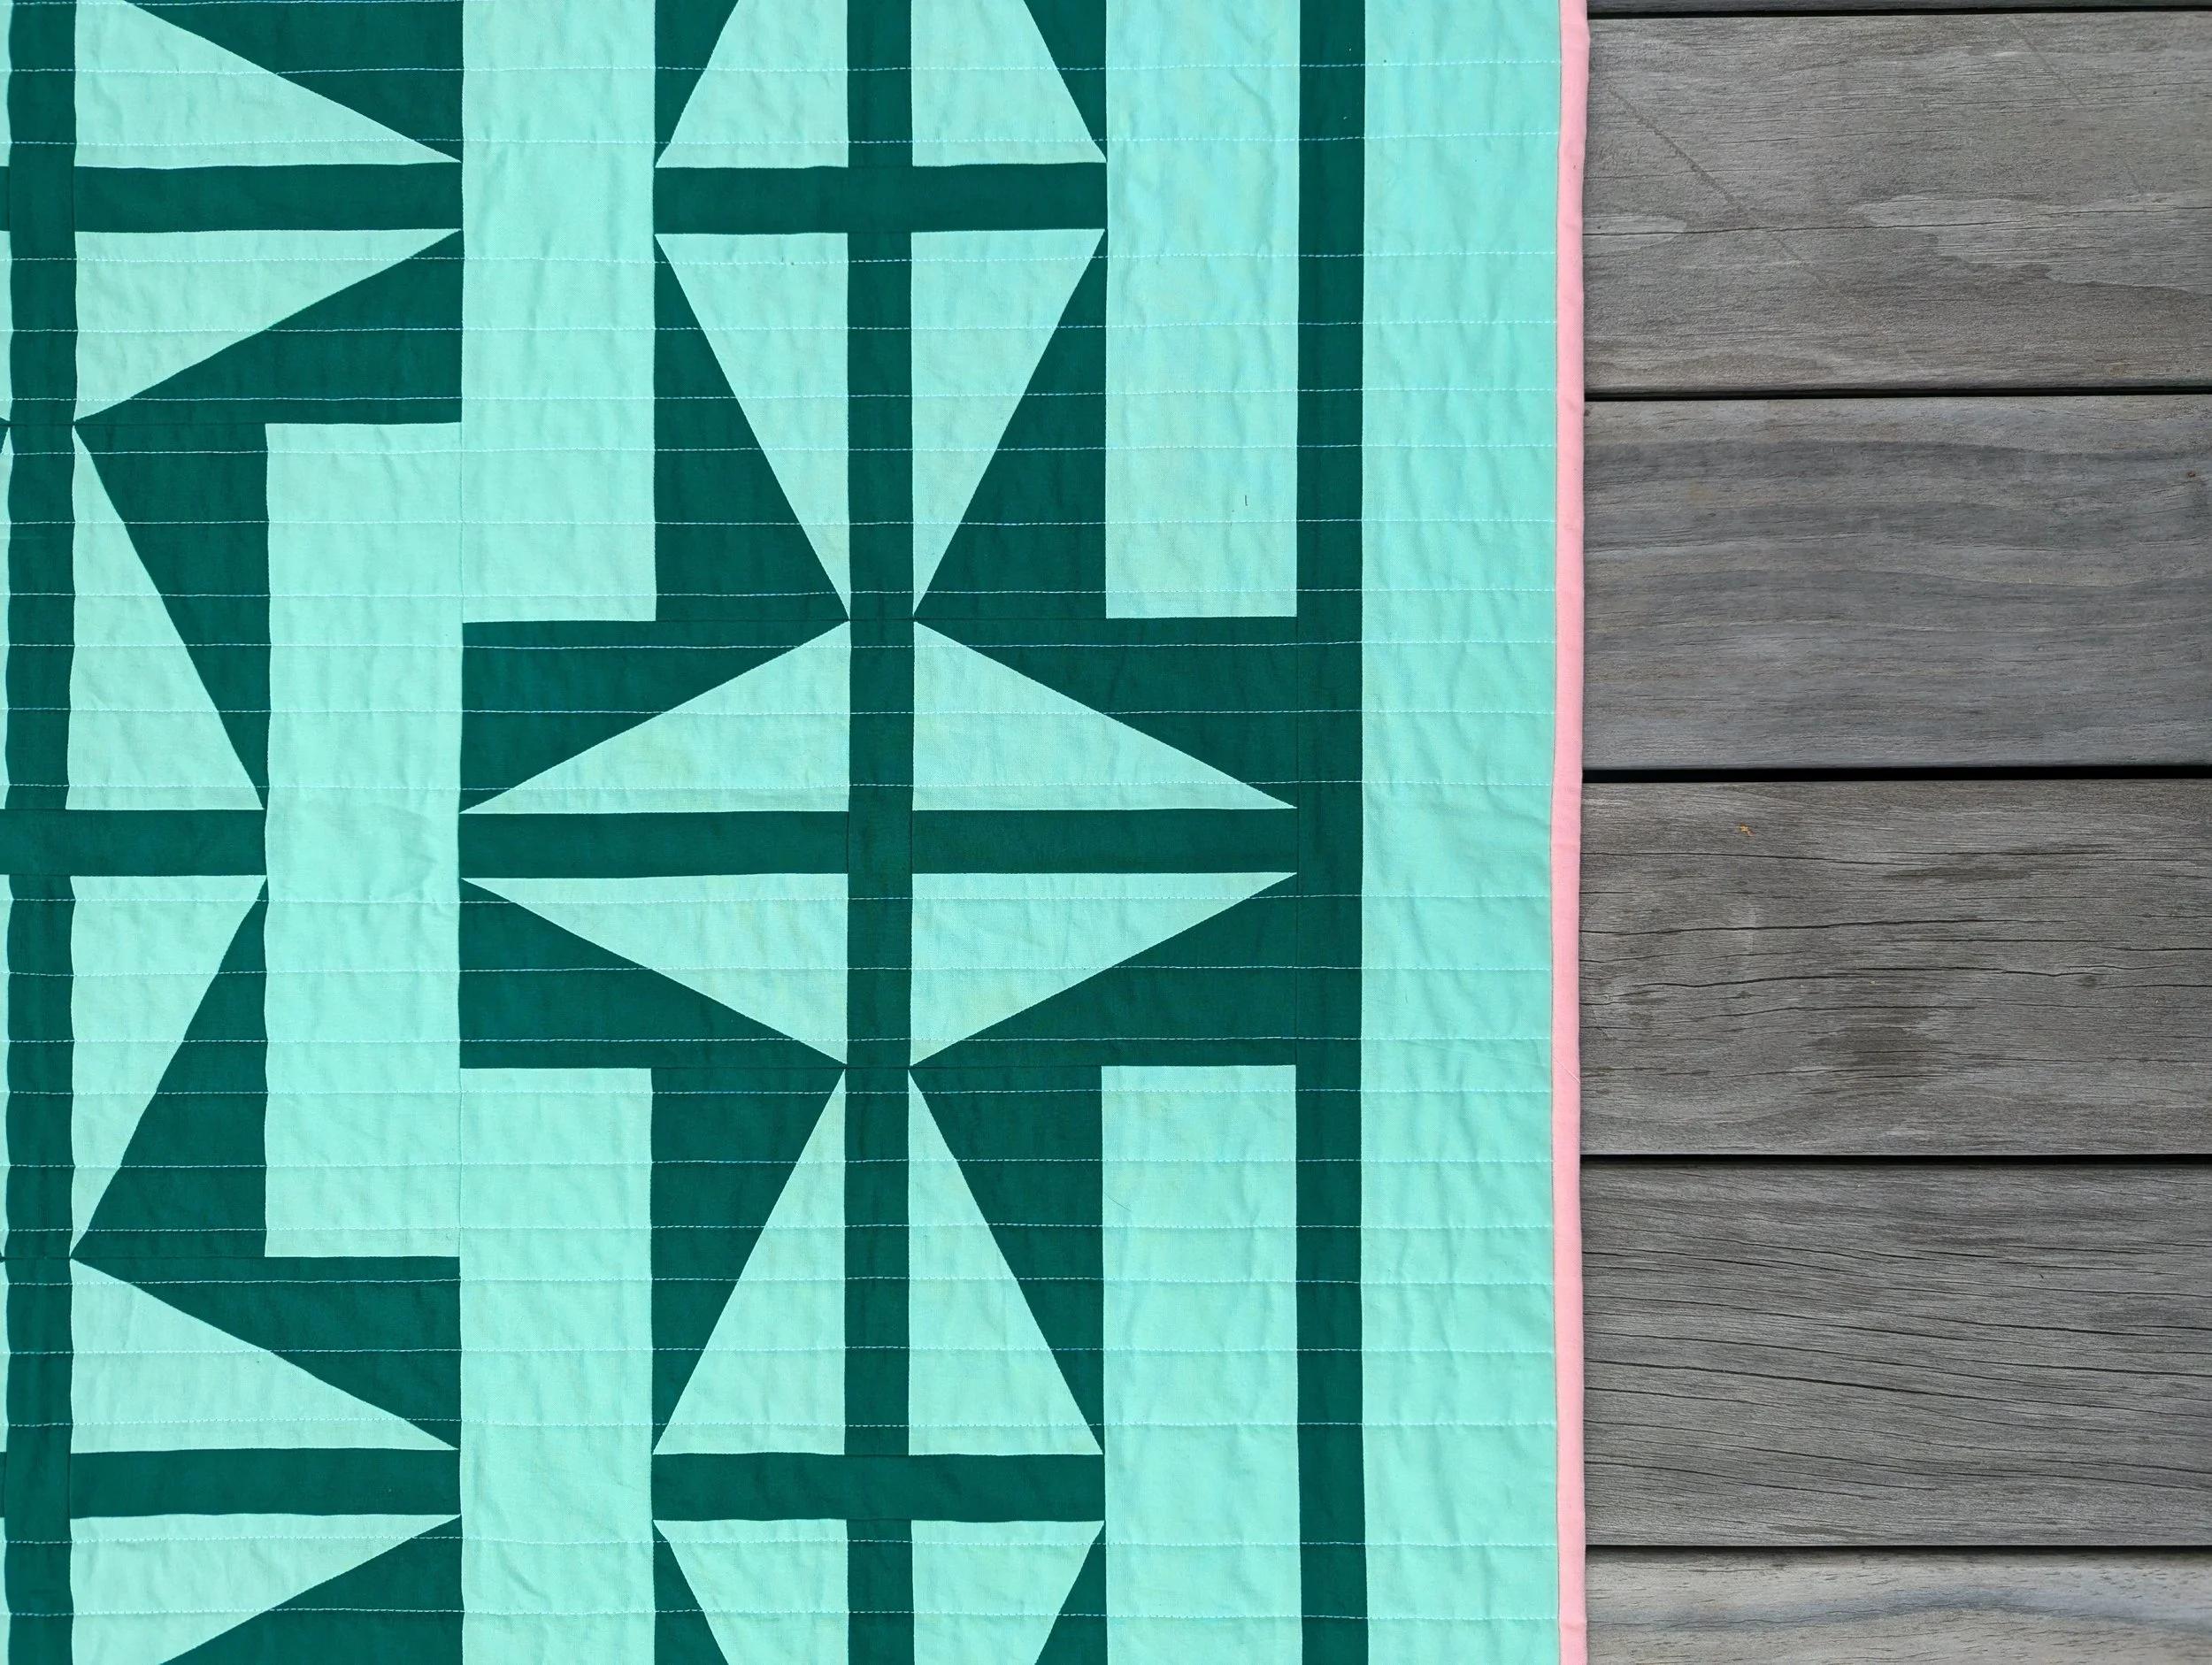
Really loving these nice crisp points of the HRTs :)
Check out The 1751 Quilt here, or check out some more quick geometric quilt patterns from Millie & Bun Designs patterns here.
Happy Quilting!