
The Cheap, Quick, Easy Design Wall Tutorial
All for less than $15 and under an hour of your time!
I’ve been eyeing some seriously gorgeous design walls lately and getting a little envious. I kept thinking how nice it would be to play with layouts and color combinations without crawling around on the floor.
But here’s why a fancy design wall doesn’t work for me:
I don’t have a lot of space. My sewing room is a room I share with my husband so it serves as an office, storage space, sewing space, makeup area, and anything else we need it to be.
I rent my apartment, so the less holes in the wall the better.
I’m not handy. I wish this was a skill I had, but it isn’t.
I don’t want to spend a lot of money.
If you want to make a design wall that won’t break the bank, OR take up a bunch of your time, OR test your carpentry skills, then you’re in the right place.
Let’s get into it!
What you’ll need:
A flannel/microfiber backed plastic table cloth. Last time I was in the US, I wound up at a big box store that I usually don’t go to and I saw some tablecloths for less than $5. Get a rectangle one that will work with the wall size you are working with (it’s okay if it’s too big- you can just fold it!)
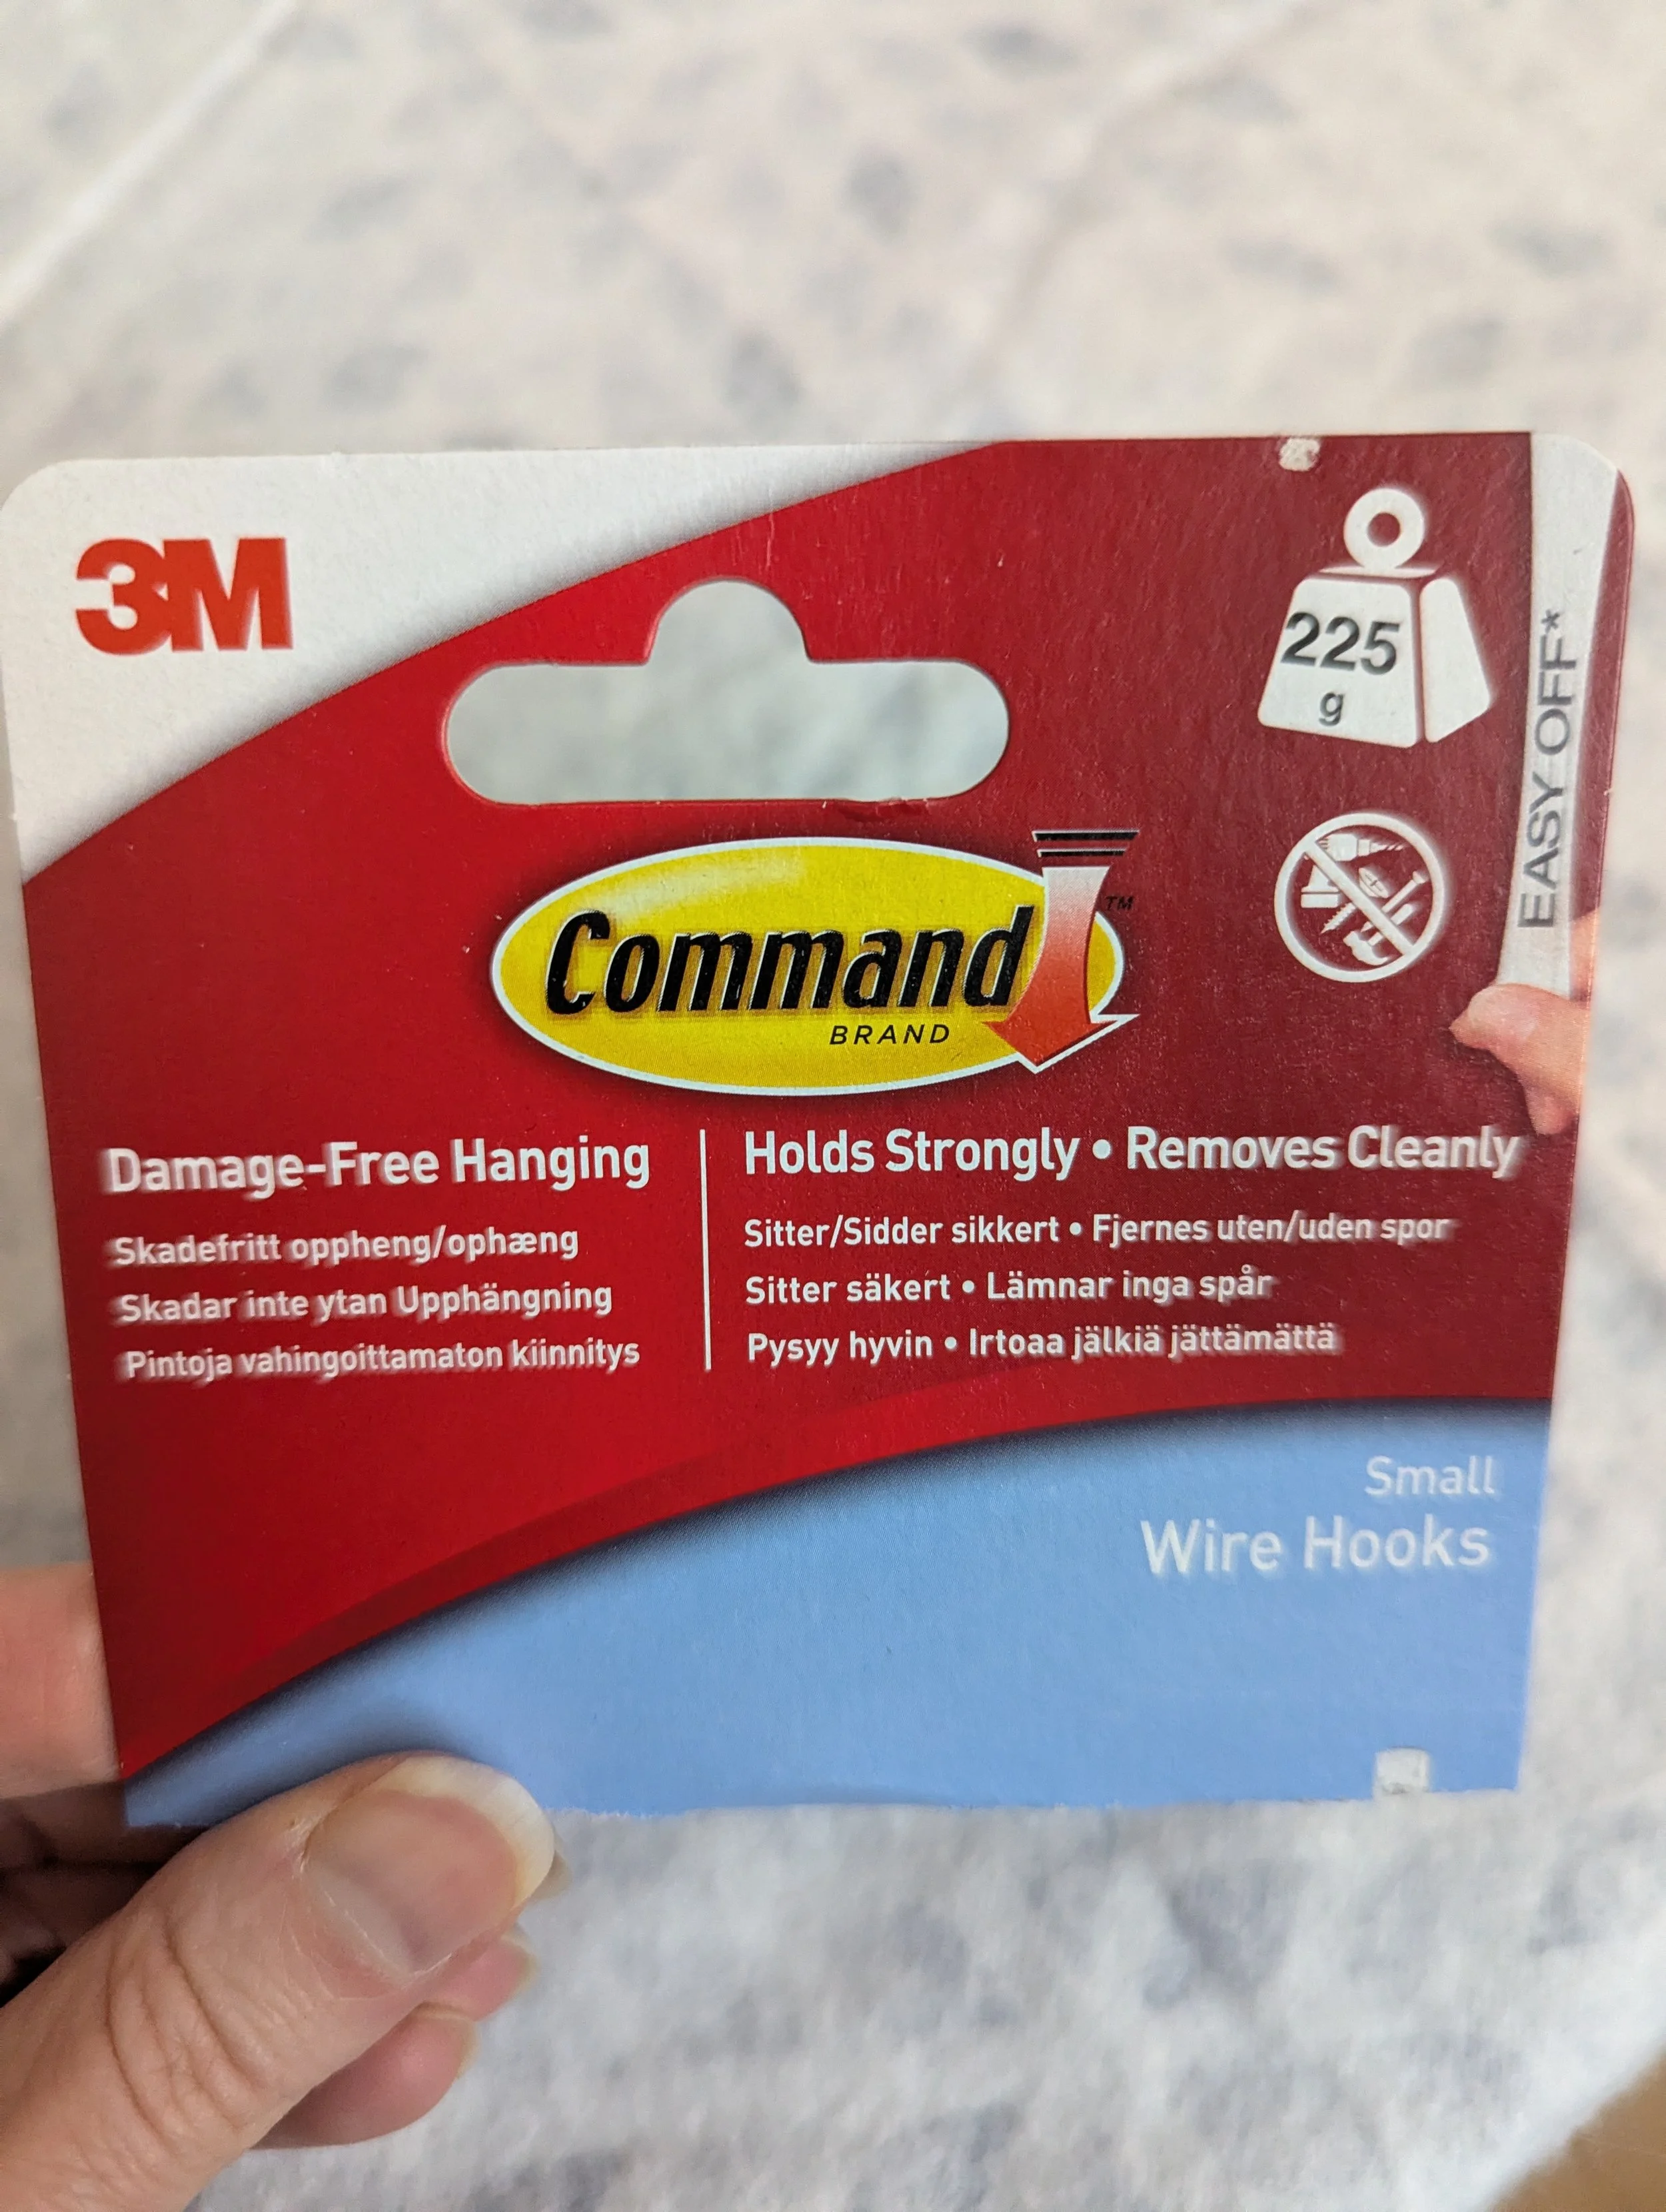
Command strips. As renters, my husband and I use these a lot. Since the strips are just holding up a table cloth, you don’t need anything too beefy. I used 3 of the hook kind, like this.
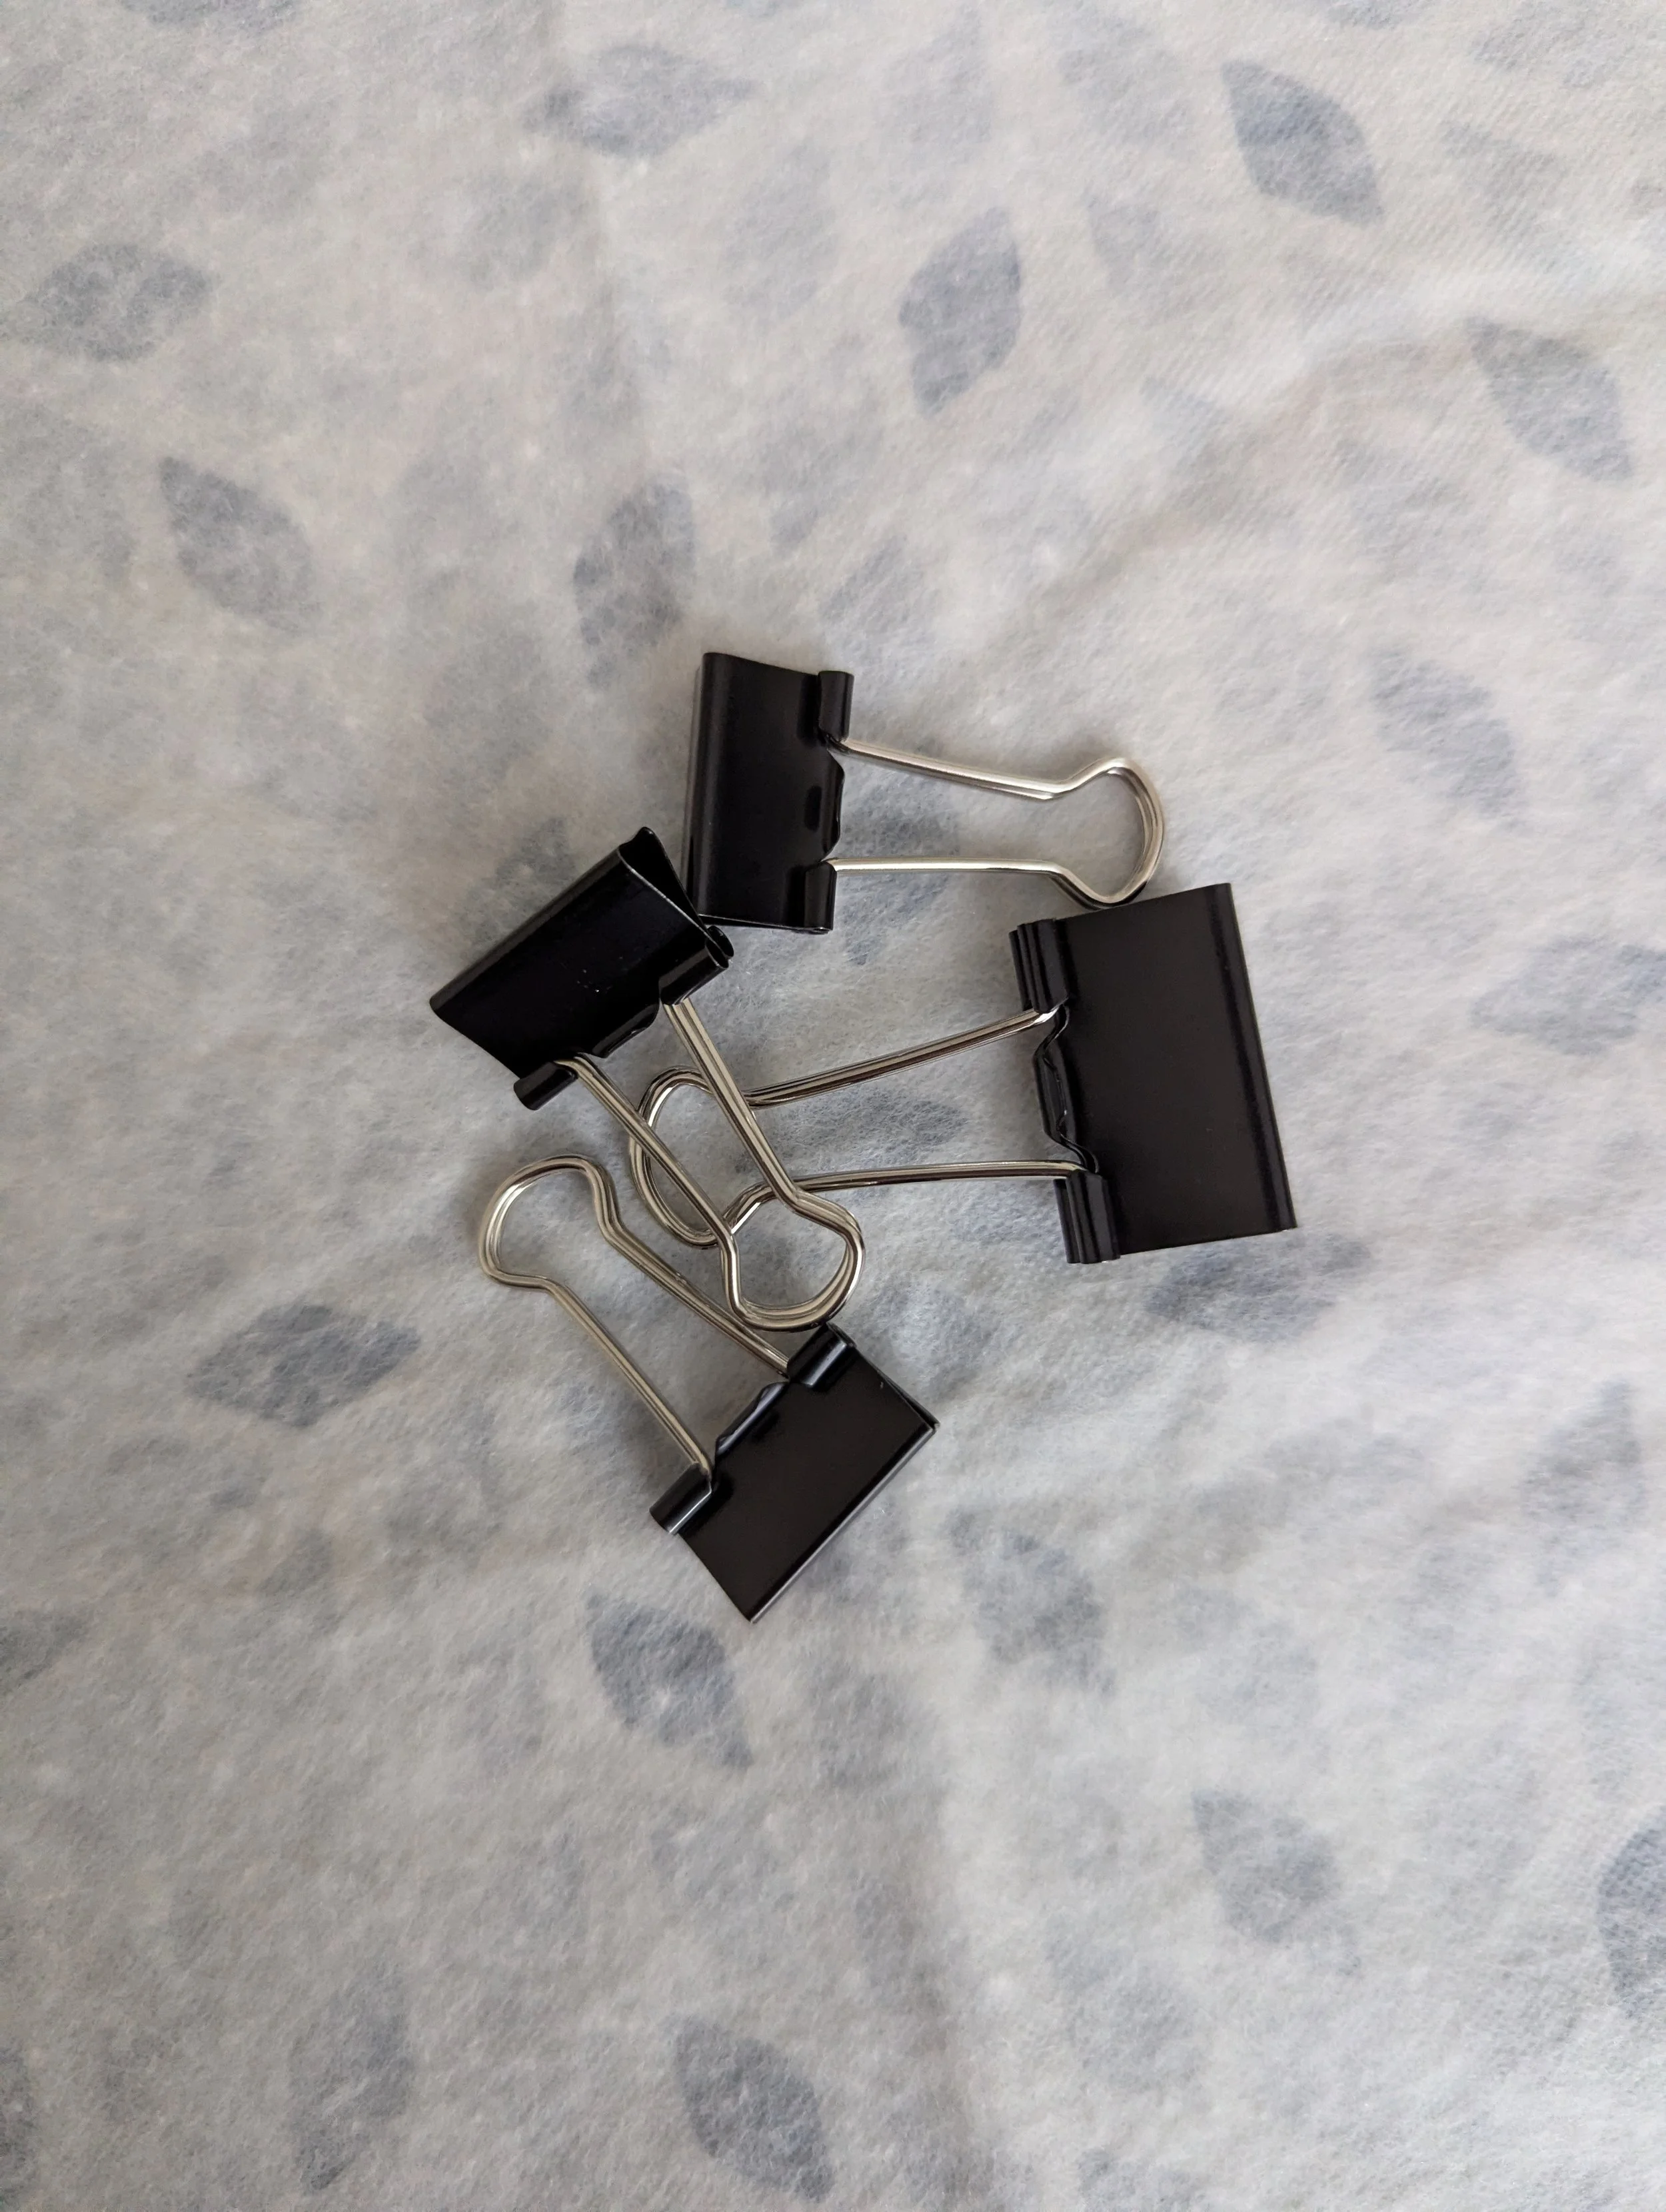
Binder Clips. These are used to both hang the cloth and to keep it in place if you need to fold it. You might have these laying around in your office drawer, but you can also get ones like these anywhere. Because I had to fold my tablecloth a little to fit my space, I used 7 clips. Small or medium size will work.
Ruler.
Pencil (to lightly mark the wall).
Measure Your Space
First, you’ll want to identify where you’d like the design wall to hang. As I mentioned, space is quite tight in my sewing room. But, there was some dead space behind the door of the room. Perfect!! It’s not enough space for a big quilt layout, but it’ll allow me to play with block placements, and that’s good enough for me at the moment.
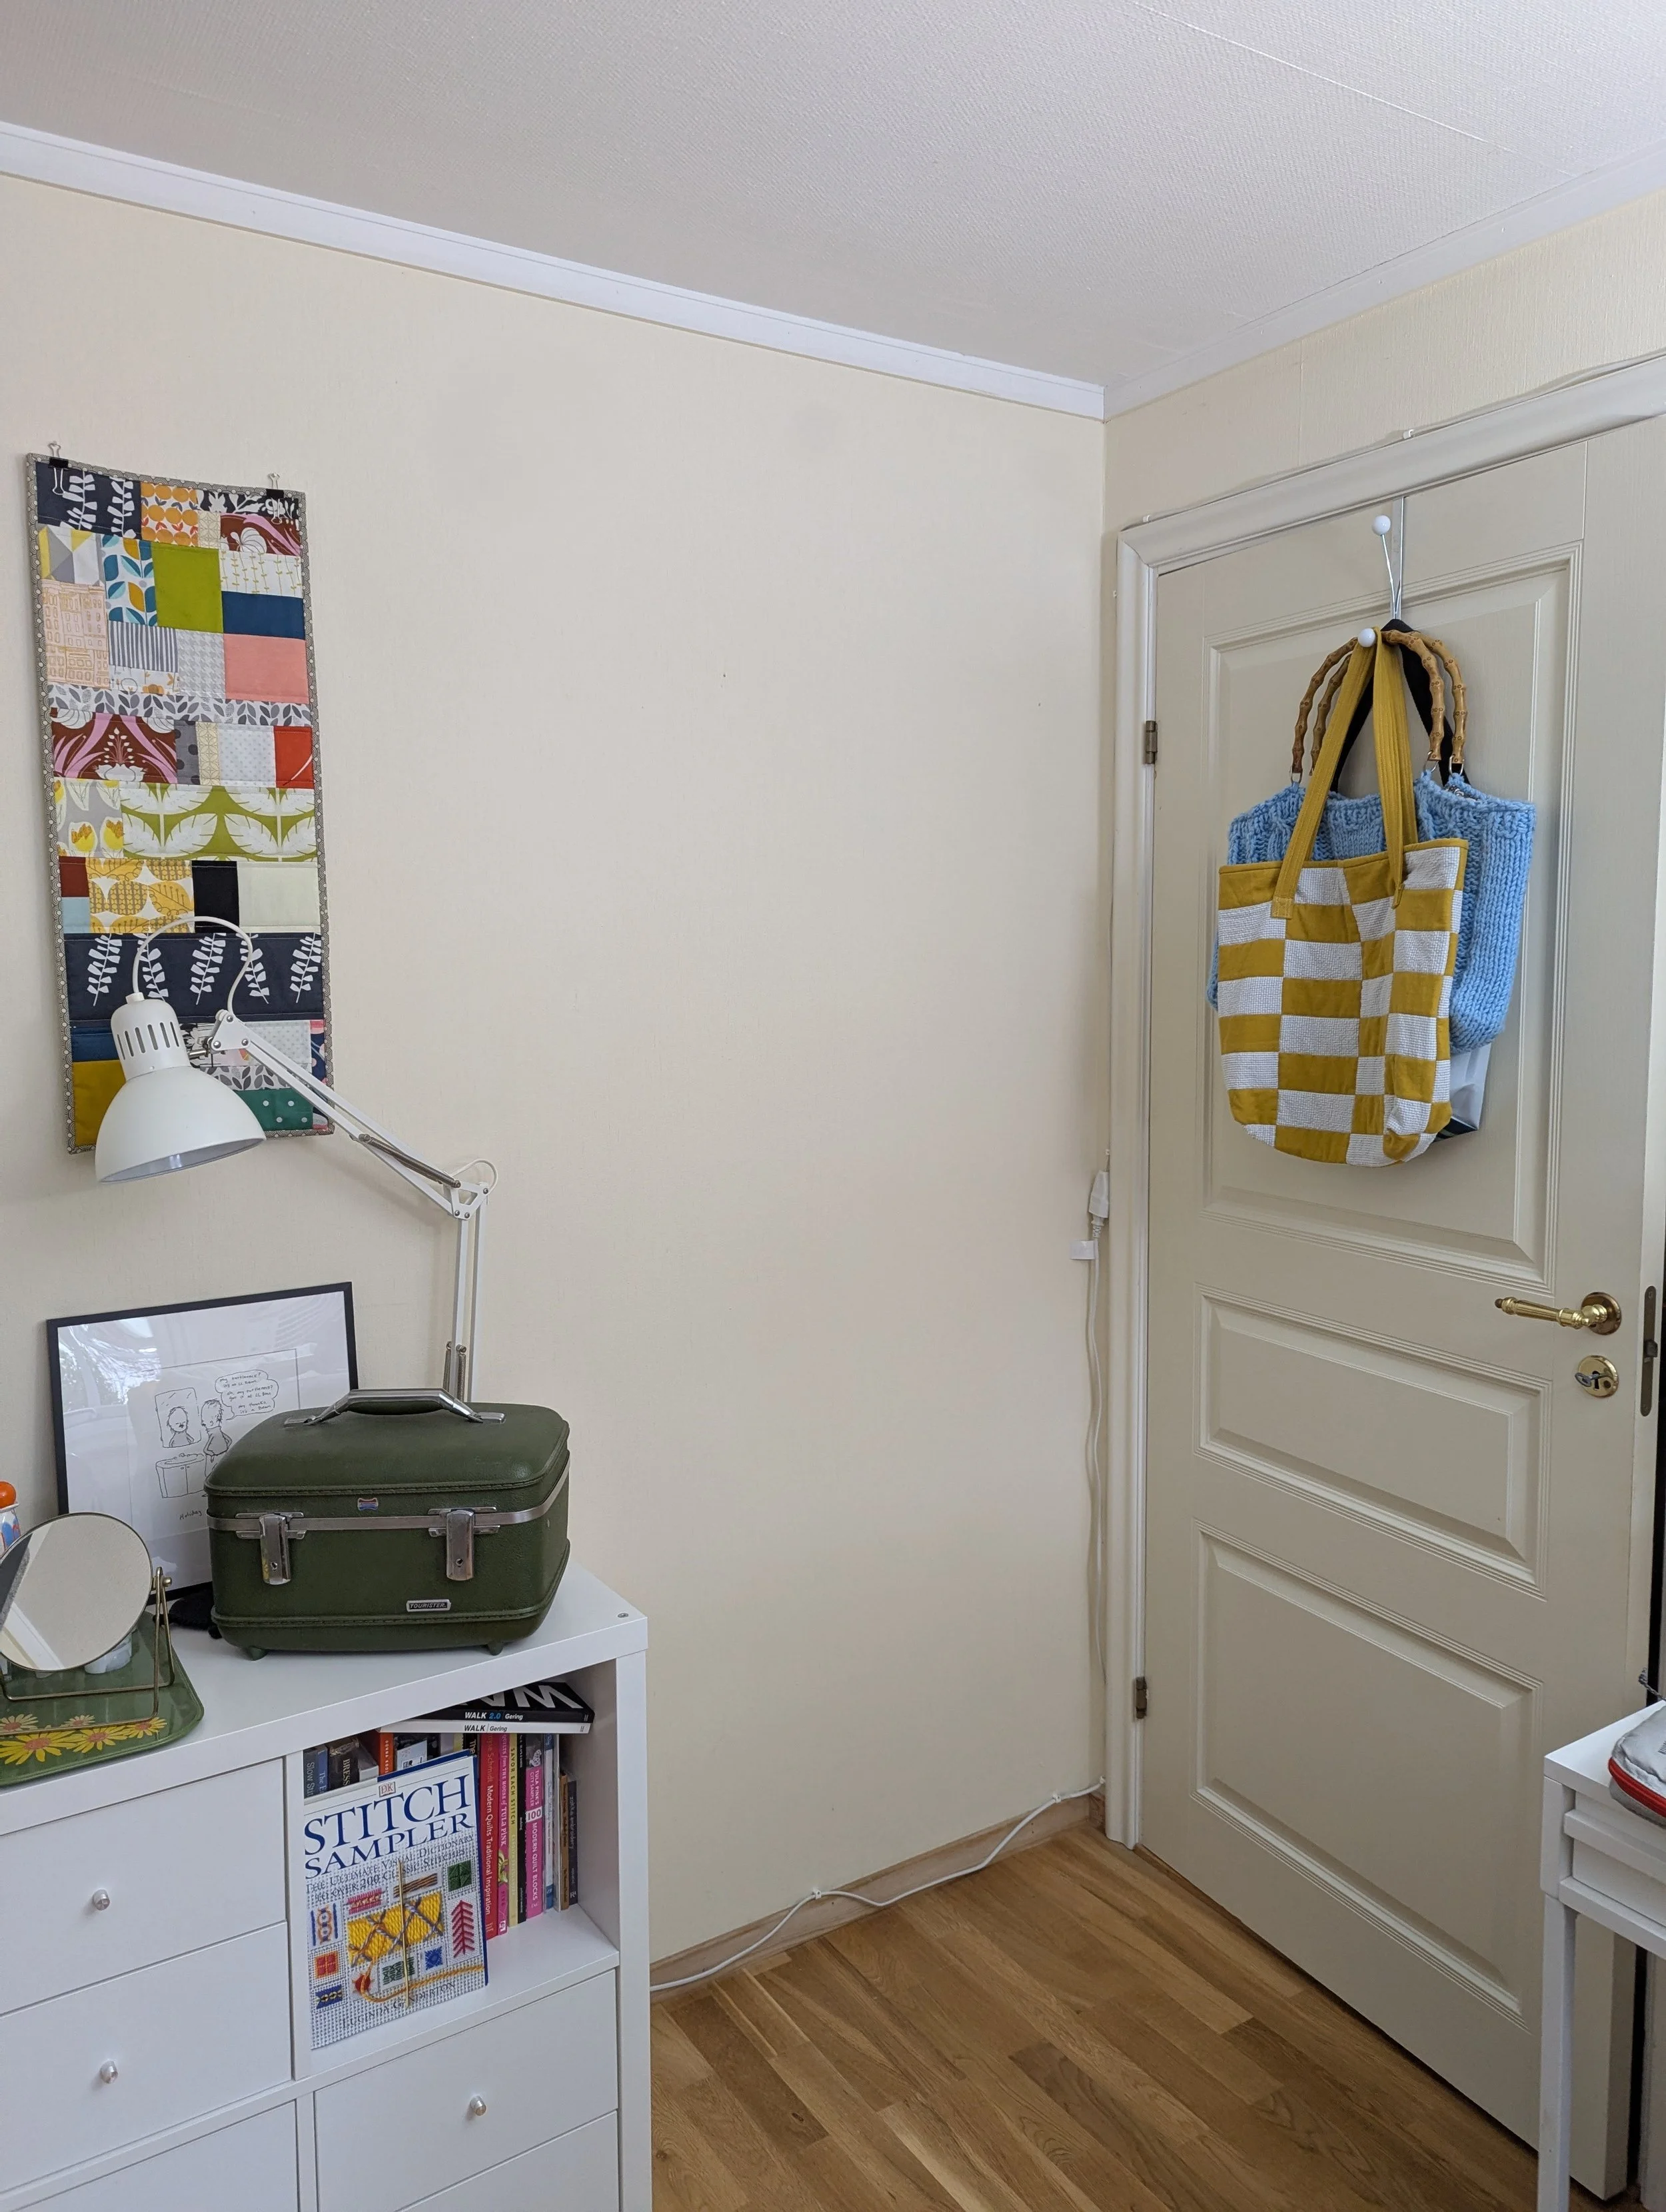
This wasted space behind the door is perfect!!
Grab the width and the height of the space you have. The table cloth I bought was 60”x84.” 84” was enough to accommodate the full height of the wall, which was great. But the width I was working with was only about 40.” That’s okay! You can fold the cloth to whatever size you need.
Hang The Command Strips
Next, identify approximately where you want your command strips to go. Take into account the width and height of your wall space. My width was about 40,” so I wanted to space my two outer strips about 34” apart, with a third hook in the center to help stabilize. I measured about 3.5” down from my ceiling height to get where the hooks should sit while not letting the cloth hit the floor.
If your wall space width is more than 40,” you may want to use one or two more command hooks to make sure the design wall doesn’t sag. Mark where you want the command strip hooks to go, and follow the instructions on the package (this part takes the longest, as you have to let the hooks sit before you use them!)
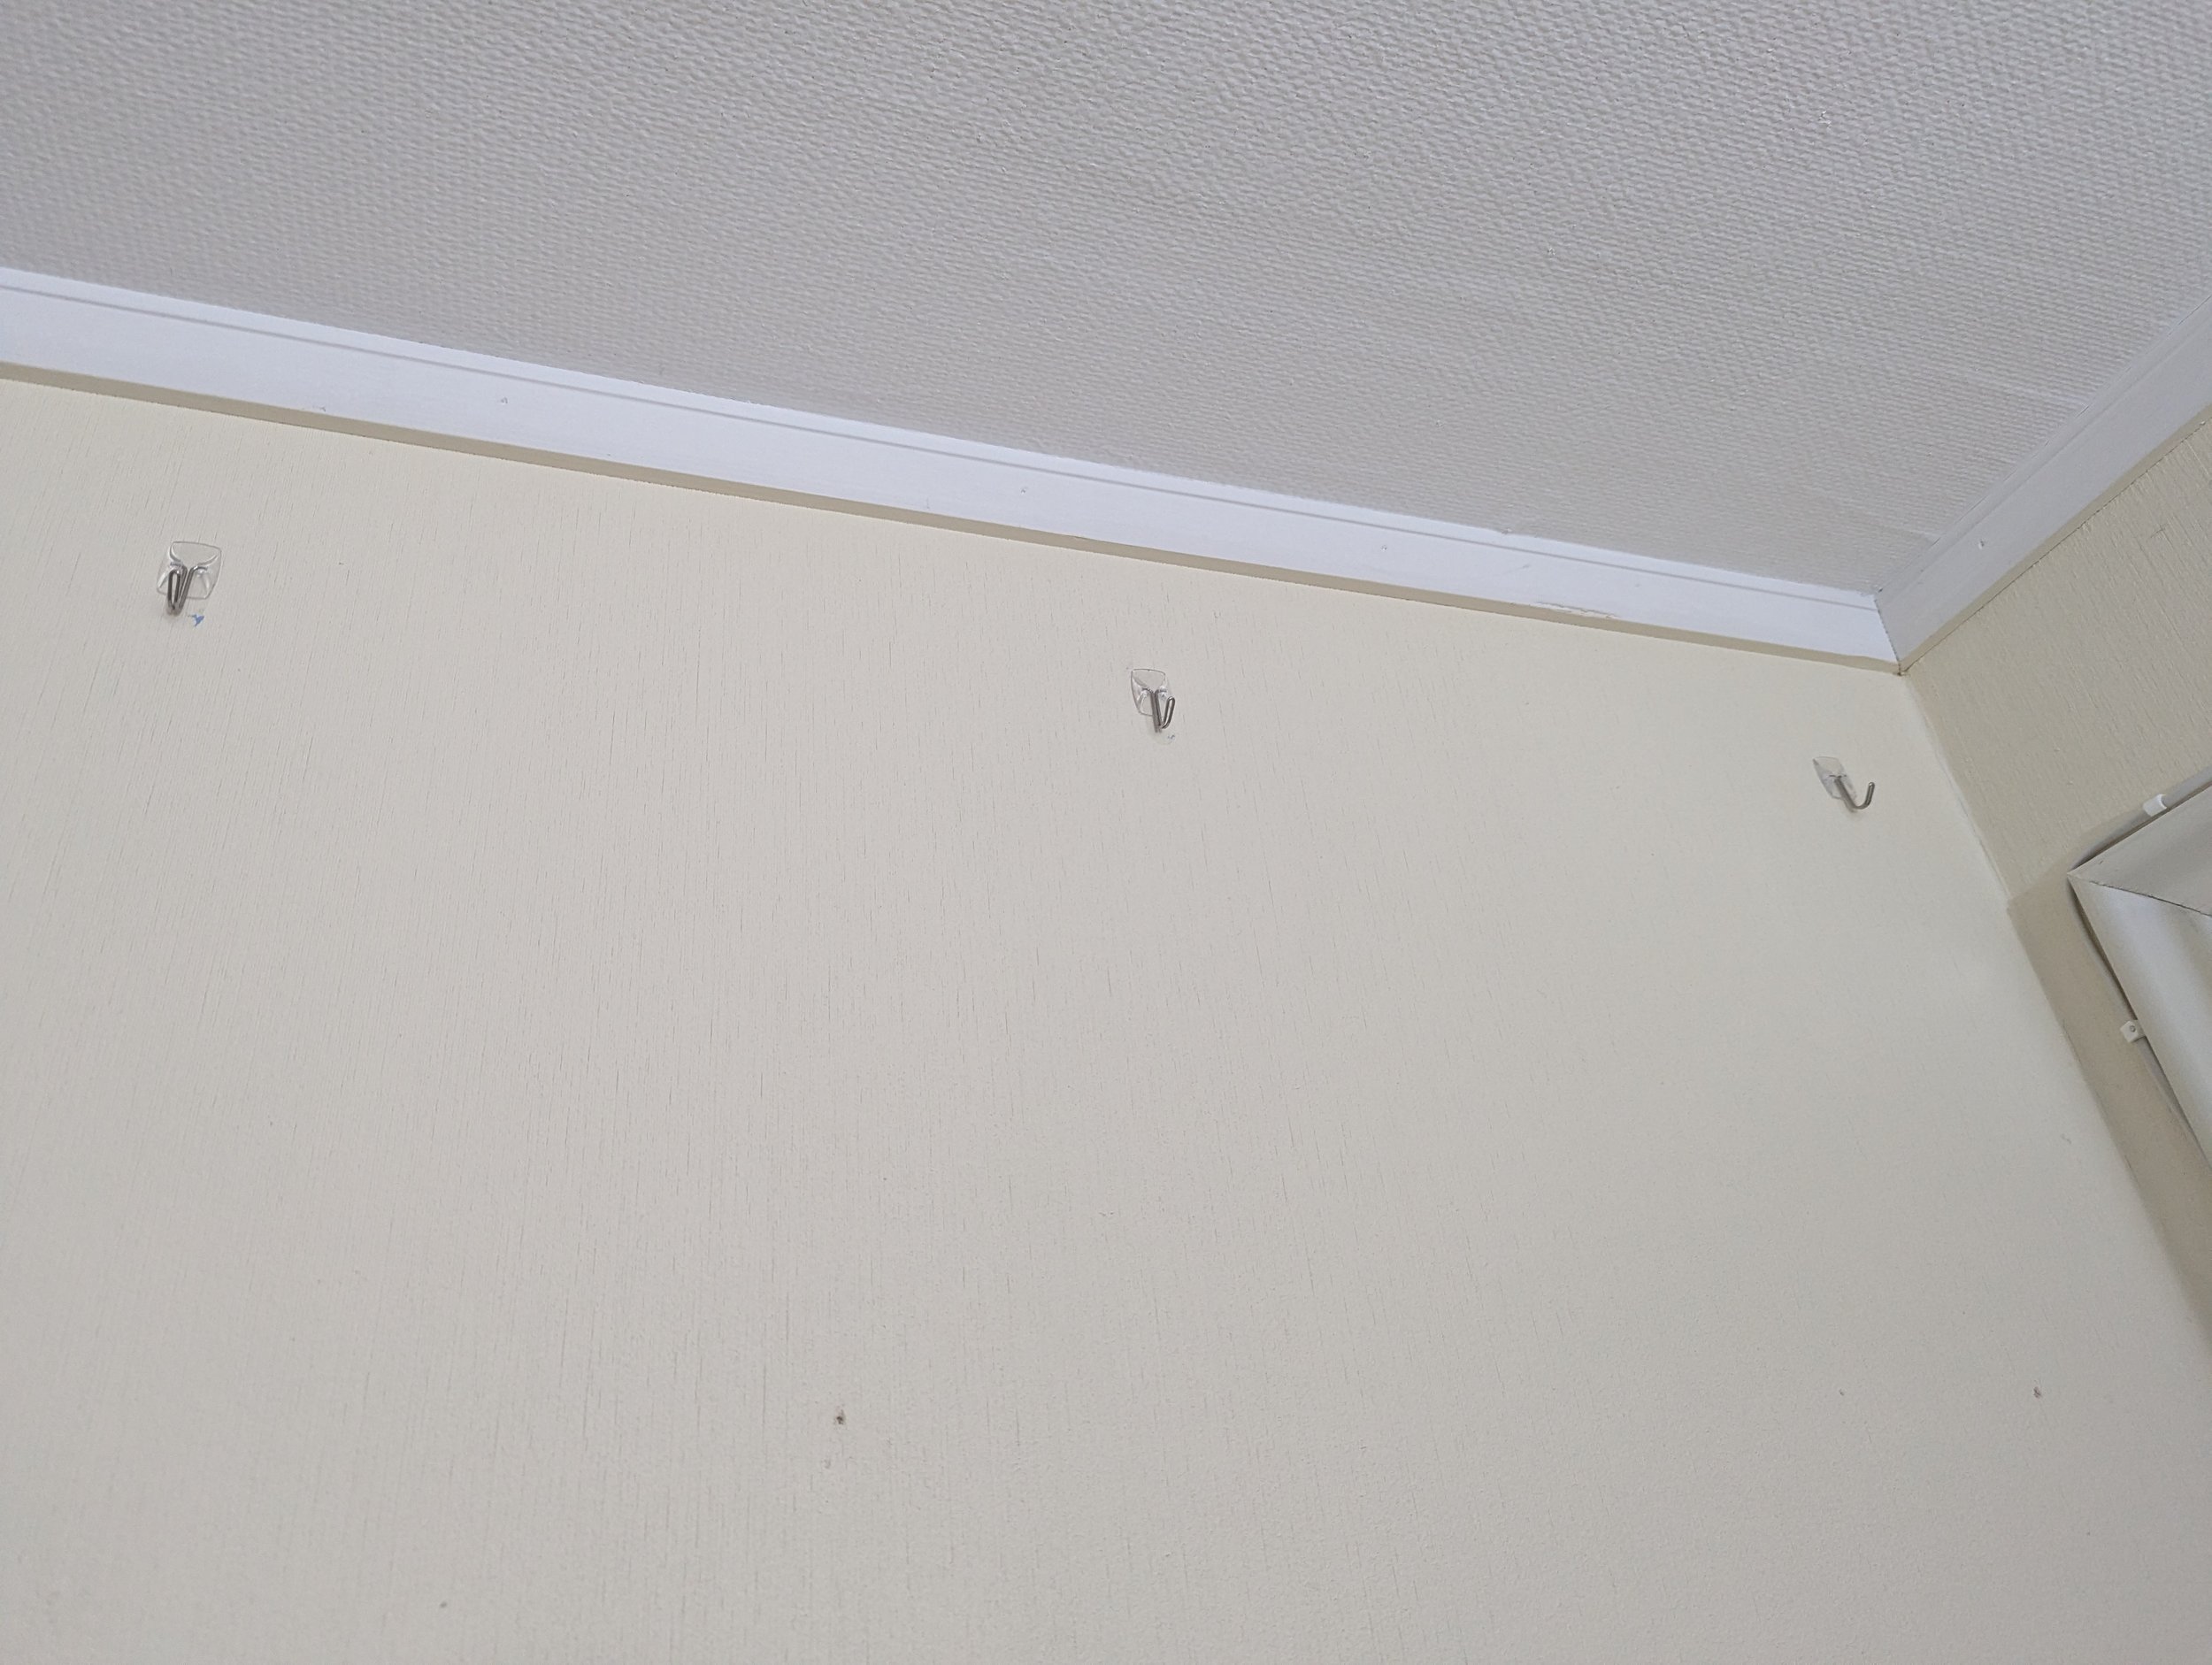
Command strip hooks ready to go
Prep The Tablecloth
Lay your cloth out on the floor, right side up. Fold the two sides in until your width is slightly less than the width of your wall space. Identify which end you want to be the top, and put clips in the approximate places that you have hooks (you can adjust when you go to hang the cloth). You may want to use more binder clips to secure the folded edges as needed. Fold down any binder clips that you won’t be using to hang.
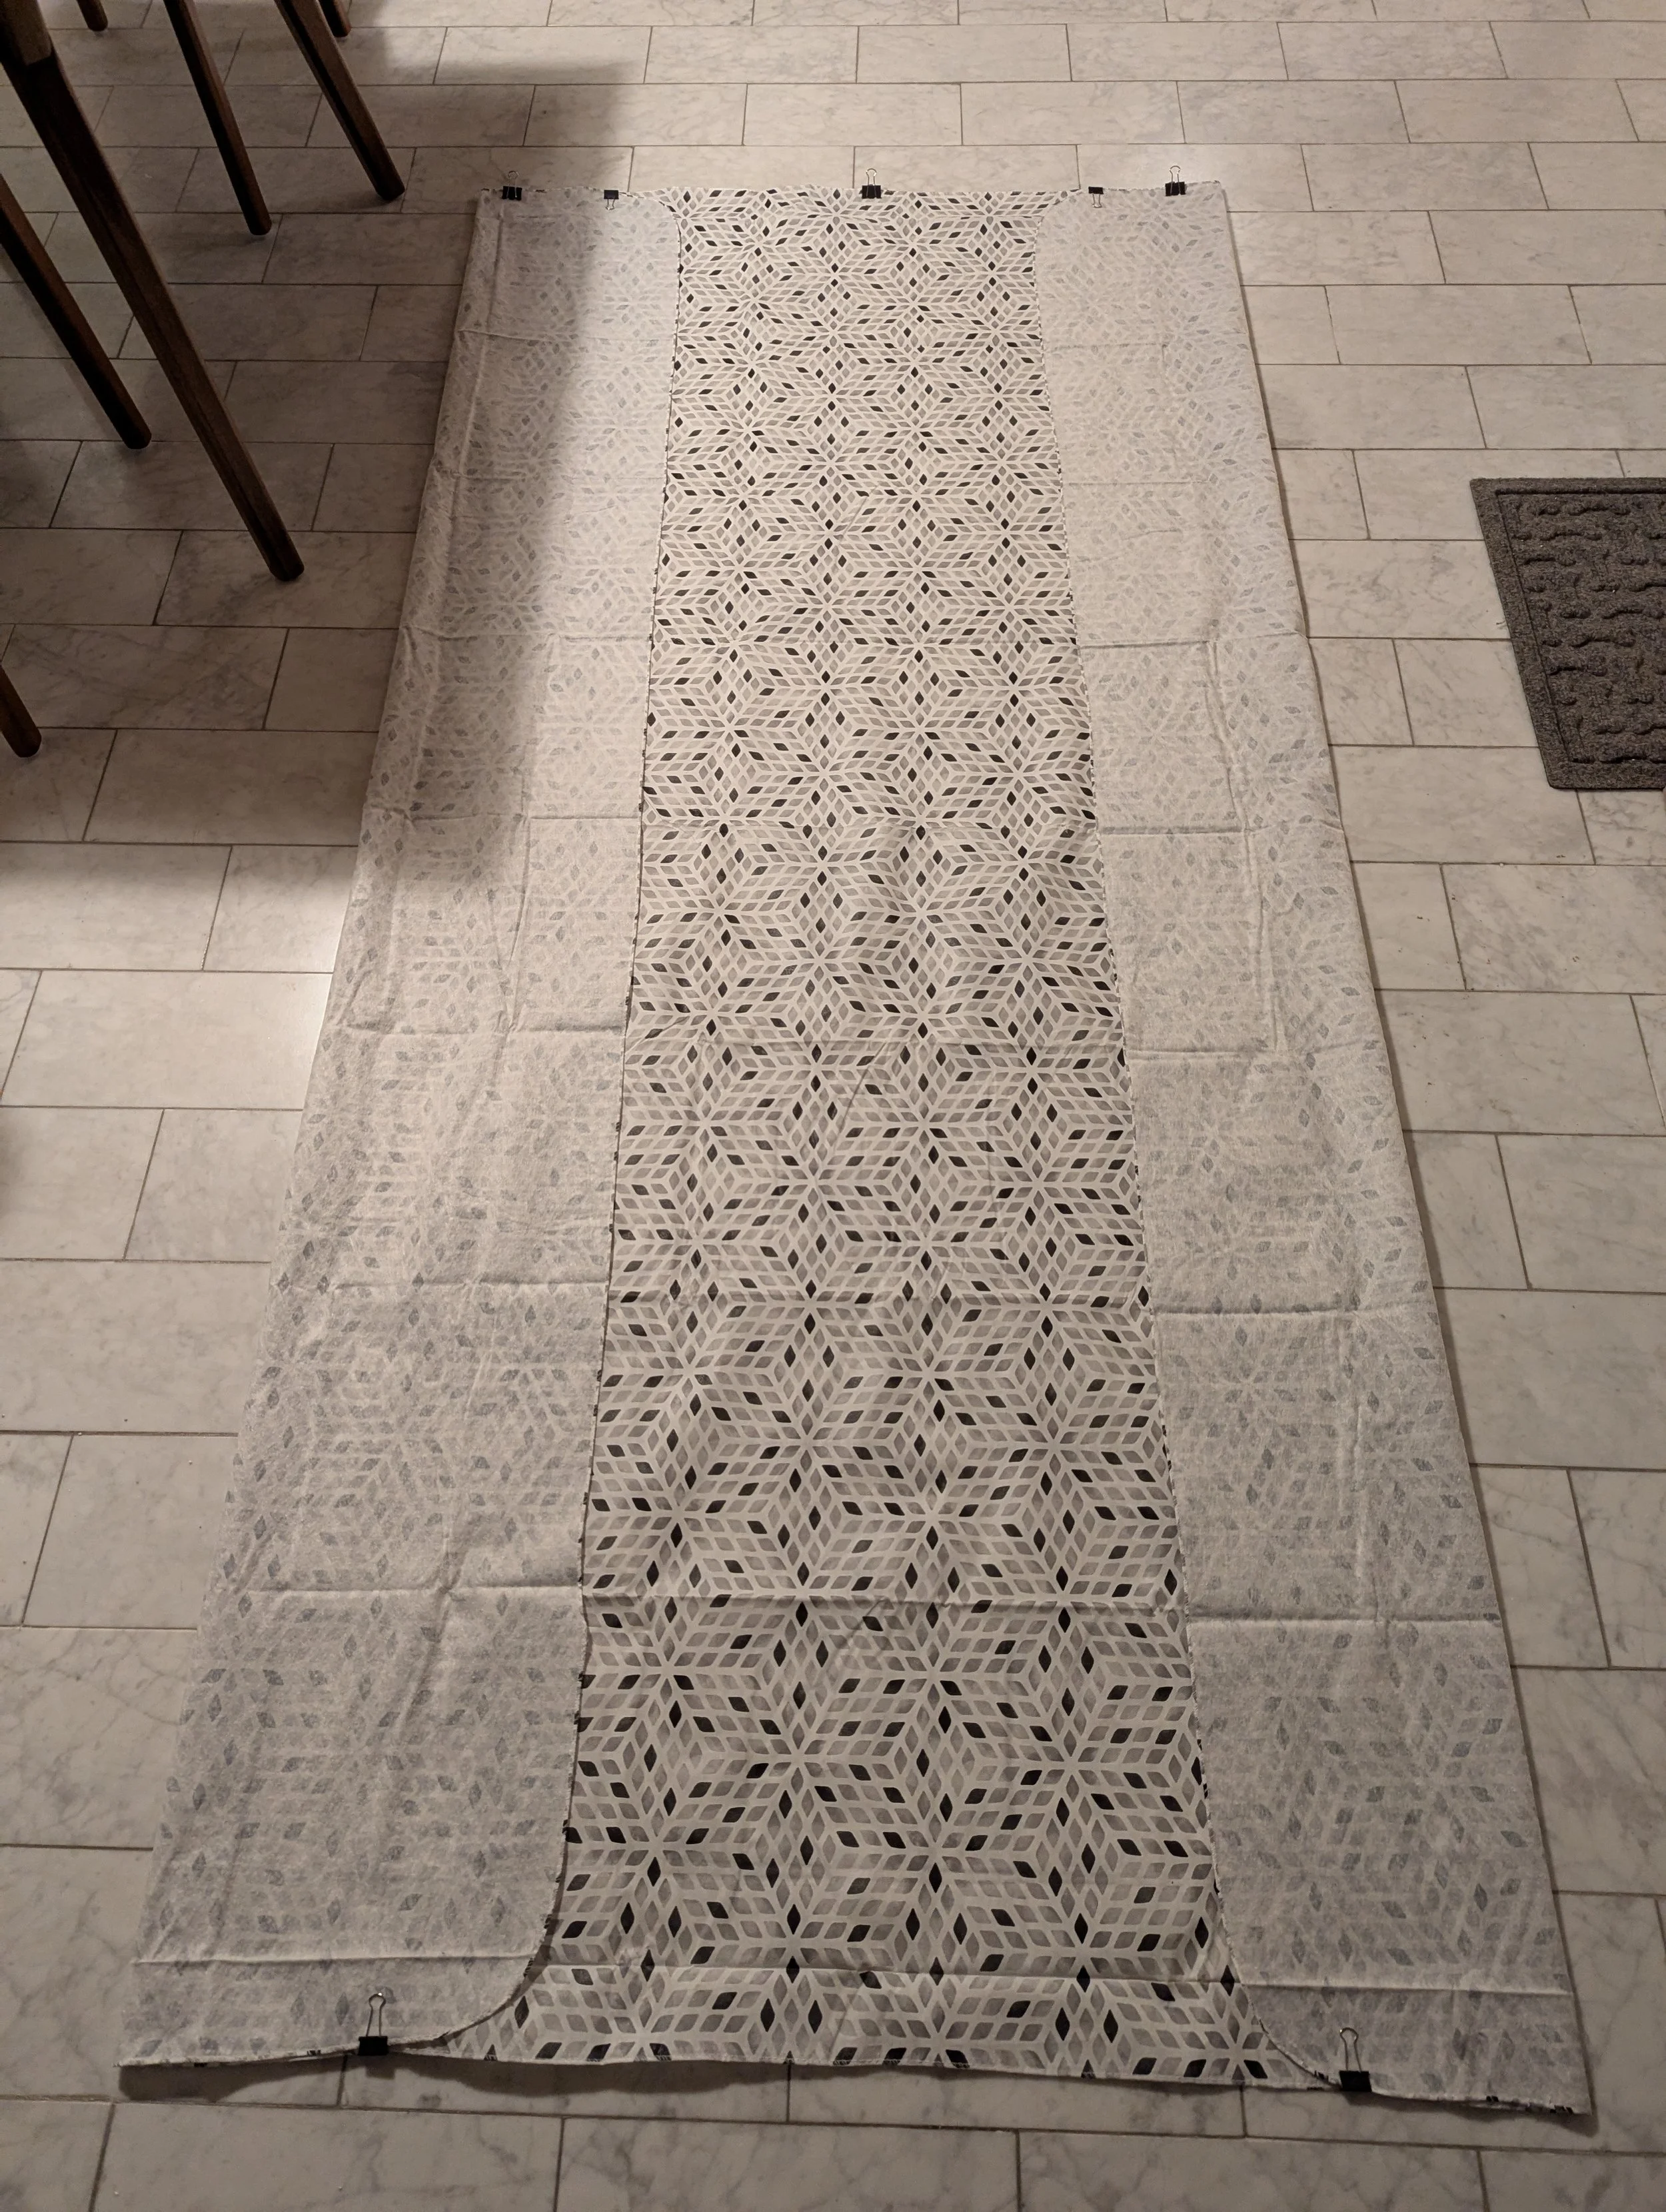

The binder clips help keep the cloth folded, and are used to hang!
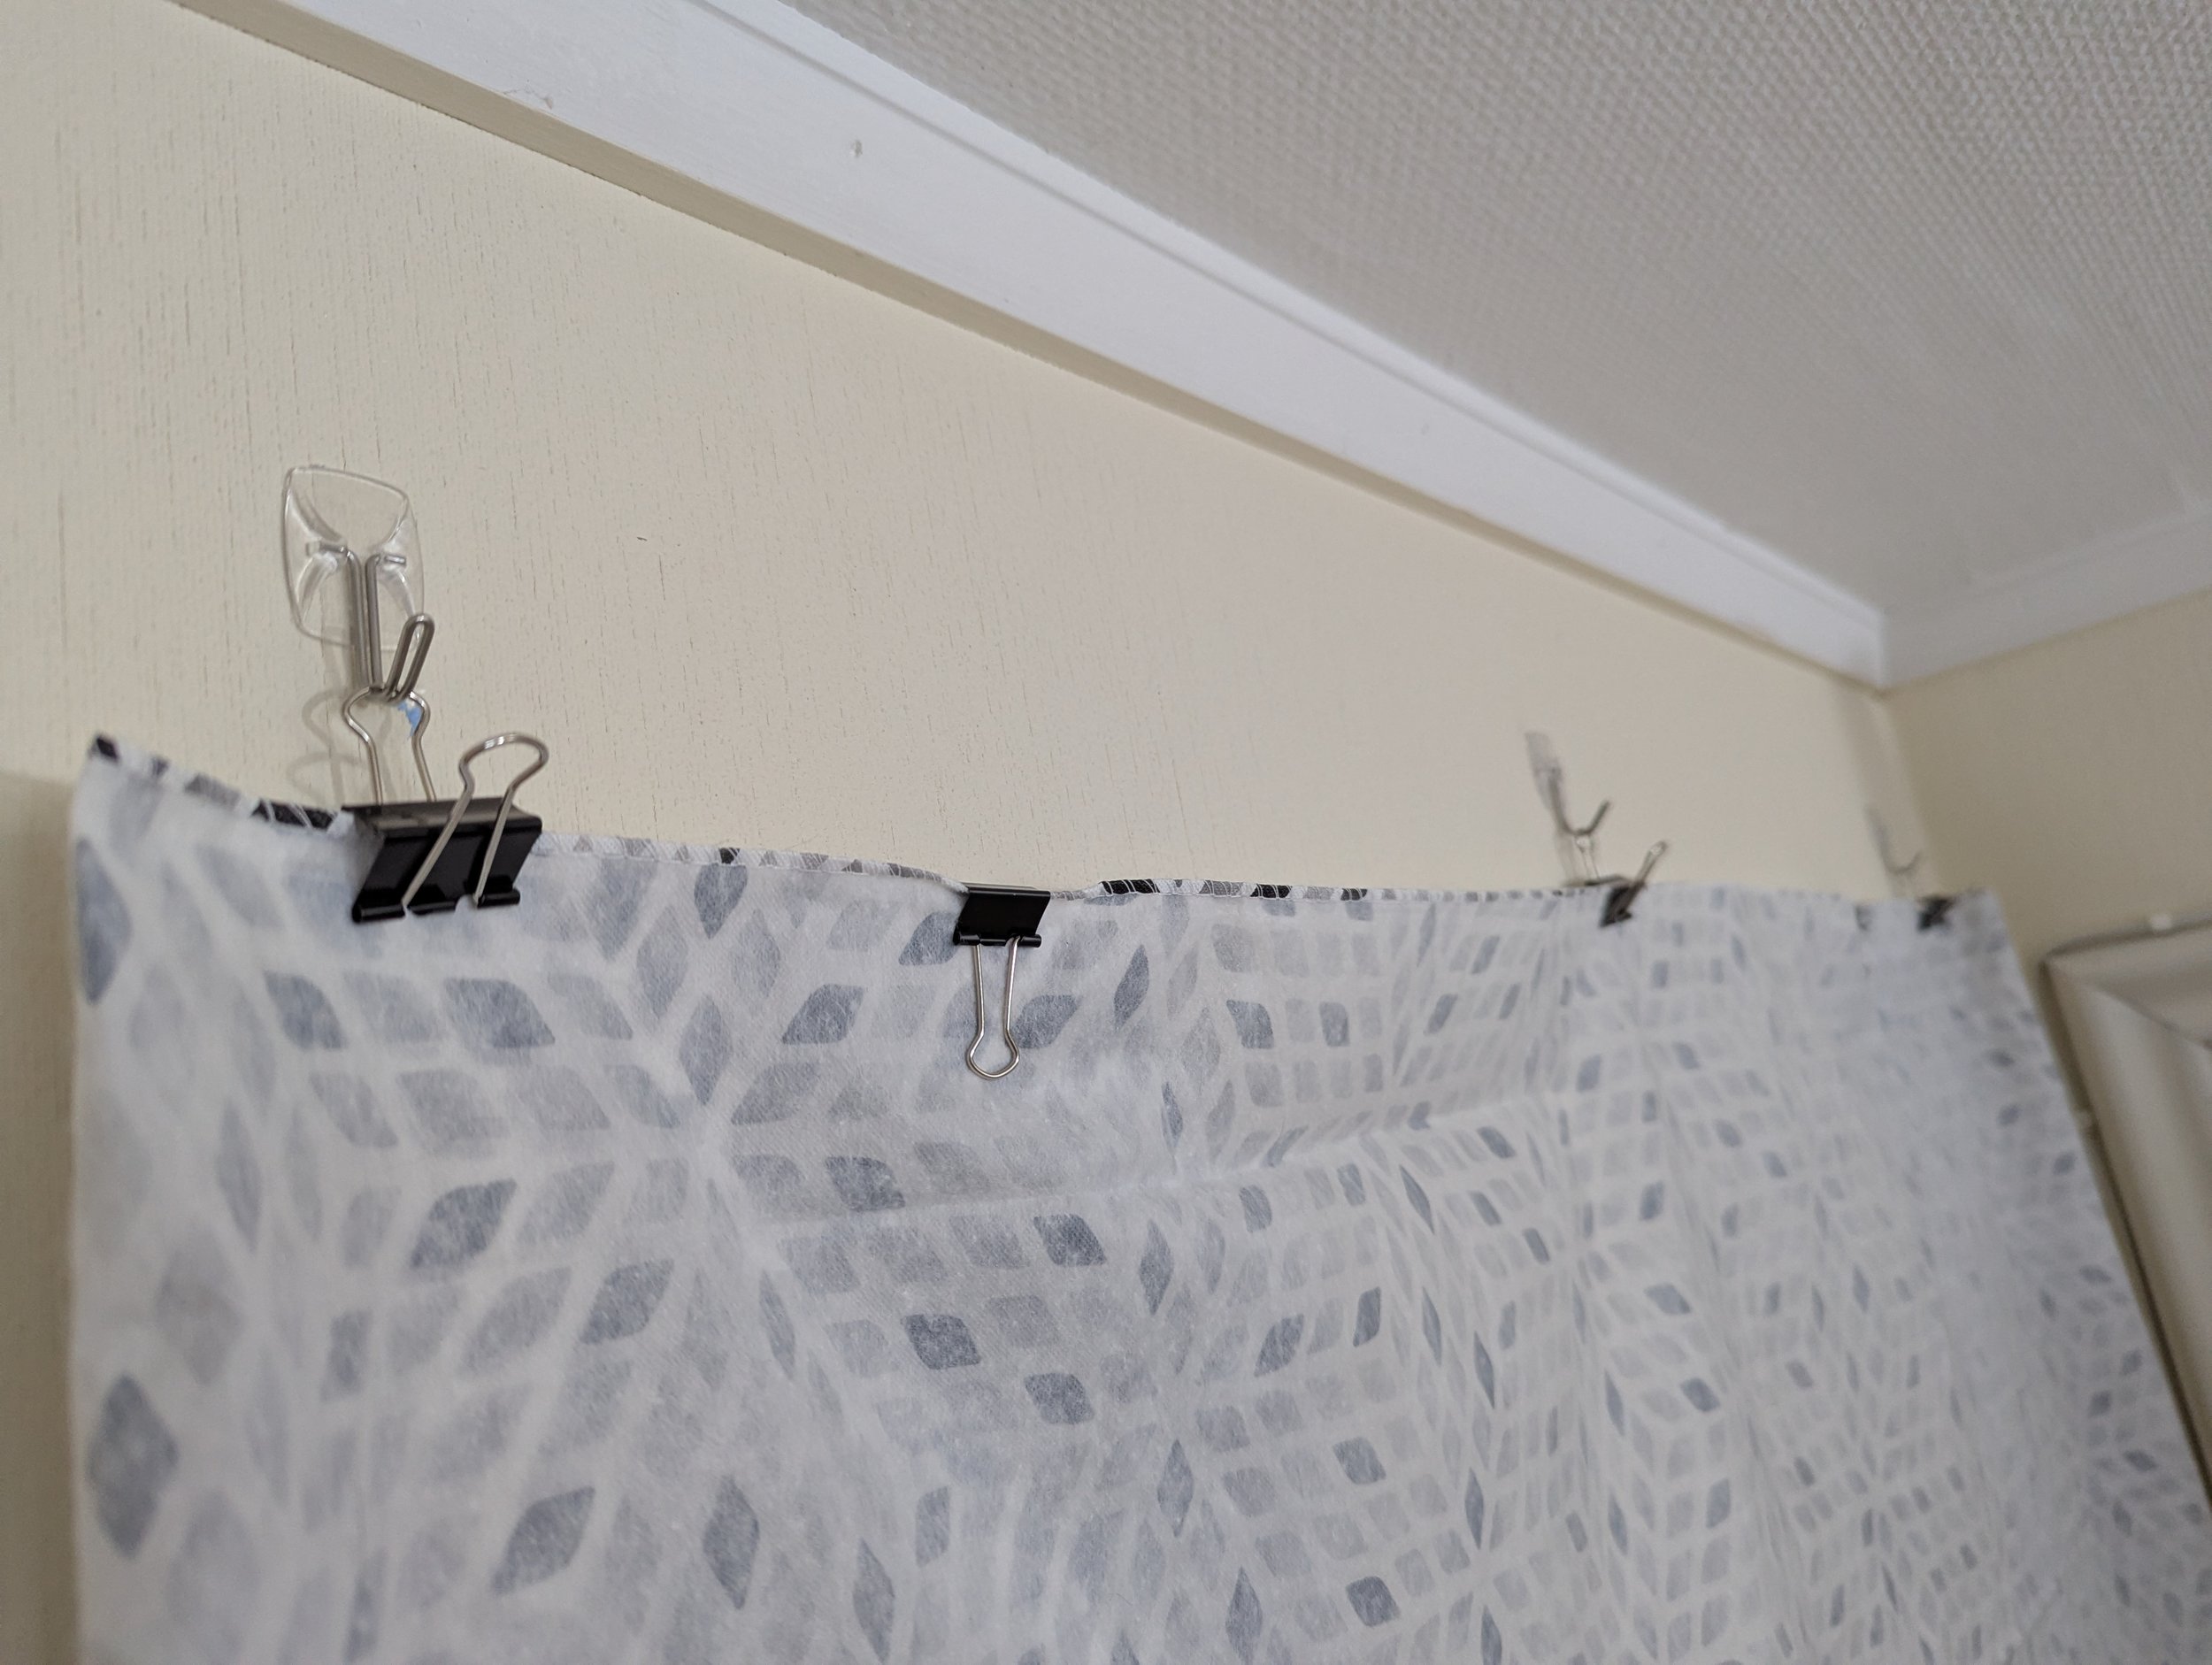
Hang The ‘Wall’
Flip up the binder clips that you will be using to hang (in my case, I have three- two on the edges and one in the middle of the cloth). Hang your cloth, adjusting the binder clips to fit the command hooks.
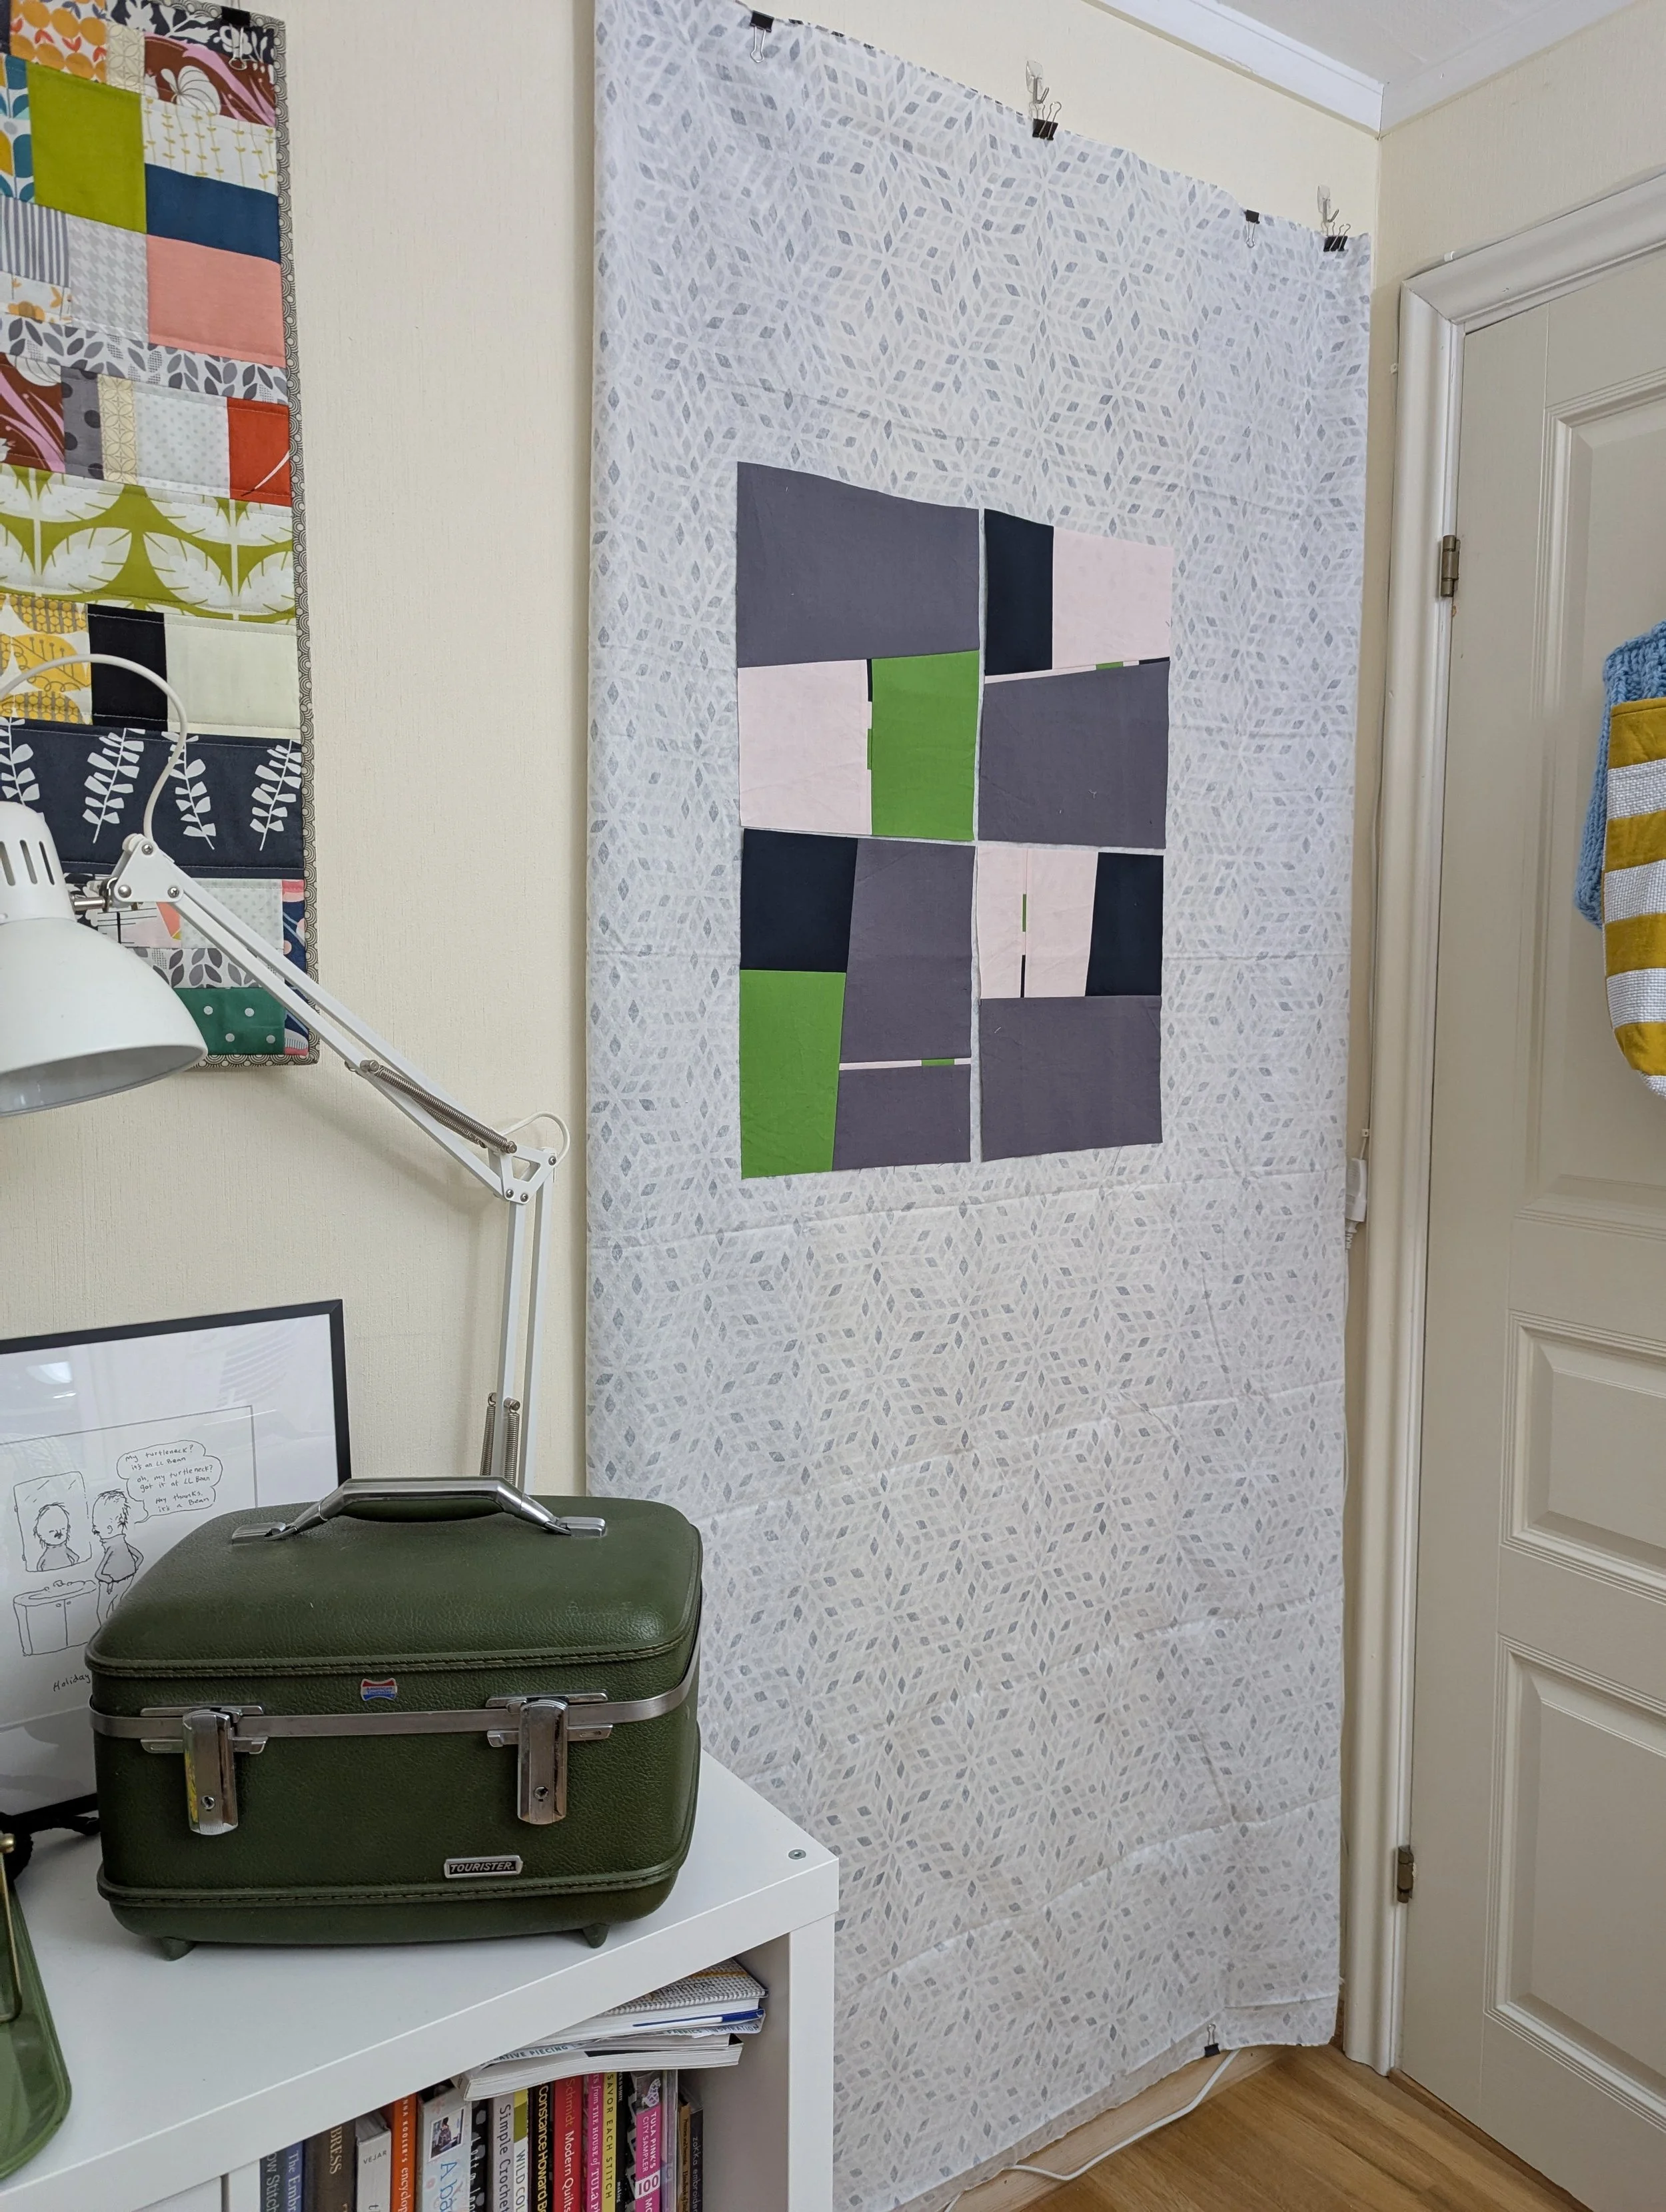
Quick and easy design wall in action
That’s it! And it was so easy.
Some Caveats
Okay so I know this has some things going against it:
It won’t last forever.
It won’t take a lot of weight.
It’s pretty flimsy.
It’s not the best looking design wall.
But! If you’re renting, or working with a small space, or working on a tight budget, or not terribly handy, I think this is a great solution for you. I’m hoping in the future I’ll have the space/time/money for a fancy pretty design wall. And when that happens, this will take two minutes to dismantle without a lot of fuss. Until then, I’ll enjoy playing with blocks and seeing where my designs take me.
Let me know if you make your own cheap, quick, easy quilt design wall! And happy quilting!