
The 2537 Quilt - Block B
A Tutorial from Millie & Bun Designs
I am so excited that you will be making The 2537 Quilt!
This tutorial will walk you through making Block B of this quilt, just in case you need some extra visuals or a little hand holding :)
I will be talking you through how to make the block with and without a 12.5” square ruler, as well as trimming up the block and some tips on keeping the block from stretching. The block is easier to construct if you have a 12.5” ruler but don’t worry if you don’t have one! I’ll walk you through the steps both ways. Let’s get into it!
12.5” Square Ruler Instructions
Start by placing (1) B1 piece and (1) B2 piece, RST, and sew along the long edge. Press seam. For the Lap Size, you’ll be making a total of (4) B1 + B2 strips. For the Throw Size, you’ll be making a total of (6) B1 + B2 strips.
Next, take (2) of your B1 + B2 strips and place RST, with opposite colors facing each other. Line up the edges and sew along both long edges. This will create a tube!

Opposite colors facing each other.

Sew along both long edges to form a tube.
For the Lap Size, make a total of (2) tubes. For the Throw Size, make a total of (3) tubes. You will get (6) blocks per tube if you make sure you are using fabric that measures 42” wide without the selvedges.
Using a 12½" square ruler, line up your bottom sewn seam with the 45 degree line on your ruler at the end of one tube. The measurements are a little tight so make sure you start at the very end of your tube!
Following the ruler, trim off excess.

Line up your bottom sewn seam with the 45 degree line on your ruler.

Following the ruler, cut off excess.
First, this little corner…

… then cut off the bigger corner.
Next, move your ruler to align the 45 degree line to the top sewn seam. Be sure to line up the top right of the ruler's edge with the edge you just cut.
Cut along the bottom right of your ruler to cut out a triangle shape.

Line up your ruler’s 45 degree line and your top sewn seam. Be sure to align your ruler’s edge with the fabric edge you just cut too!

Cut out your first triangle shape.
Now move your ruler to align the 45 degree line to the bottom sewn seam again. Be sure to line up the bottom right of the ruler's edge with the edge you just cut.
Cut along the top right of your ruler to cut out another triangle shape.

Line up your ruler’s 45 degree line and your bottom sewn seam. Be sure to align your ruler’s edge with the fabric edge you just cut too!

Cut out your second triangle shape.
Continue working down your tube to cut your triangles, alternating between aligning the 45 degree line on the ruler with the top and bottom sewn seams.
You will get (6) triangles from each tube.
You will want to be careful when pressing these blocks! Because the blocks are cut on the bias, they can easily stretch and get wonky.
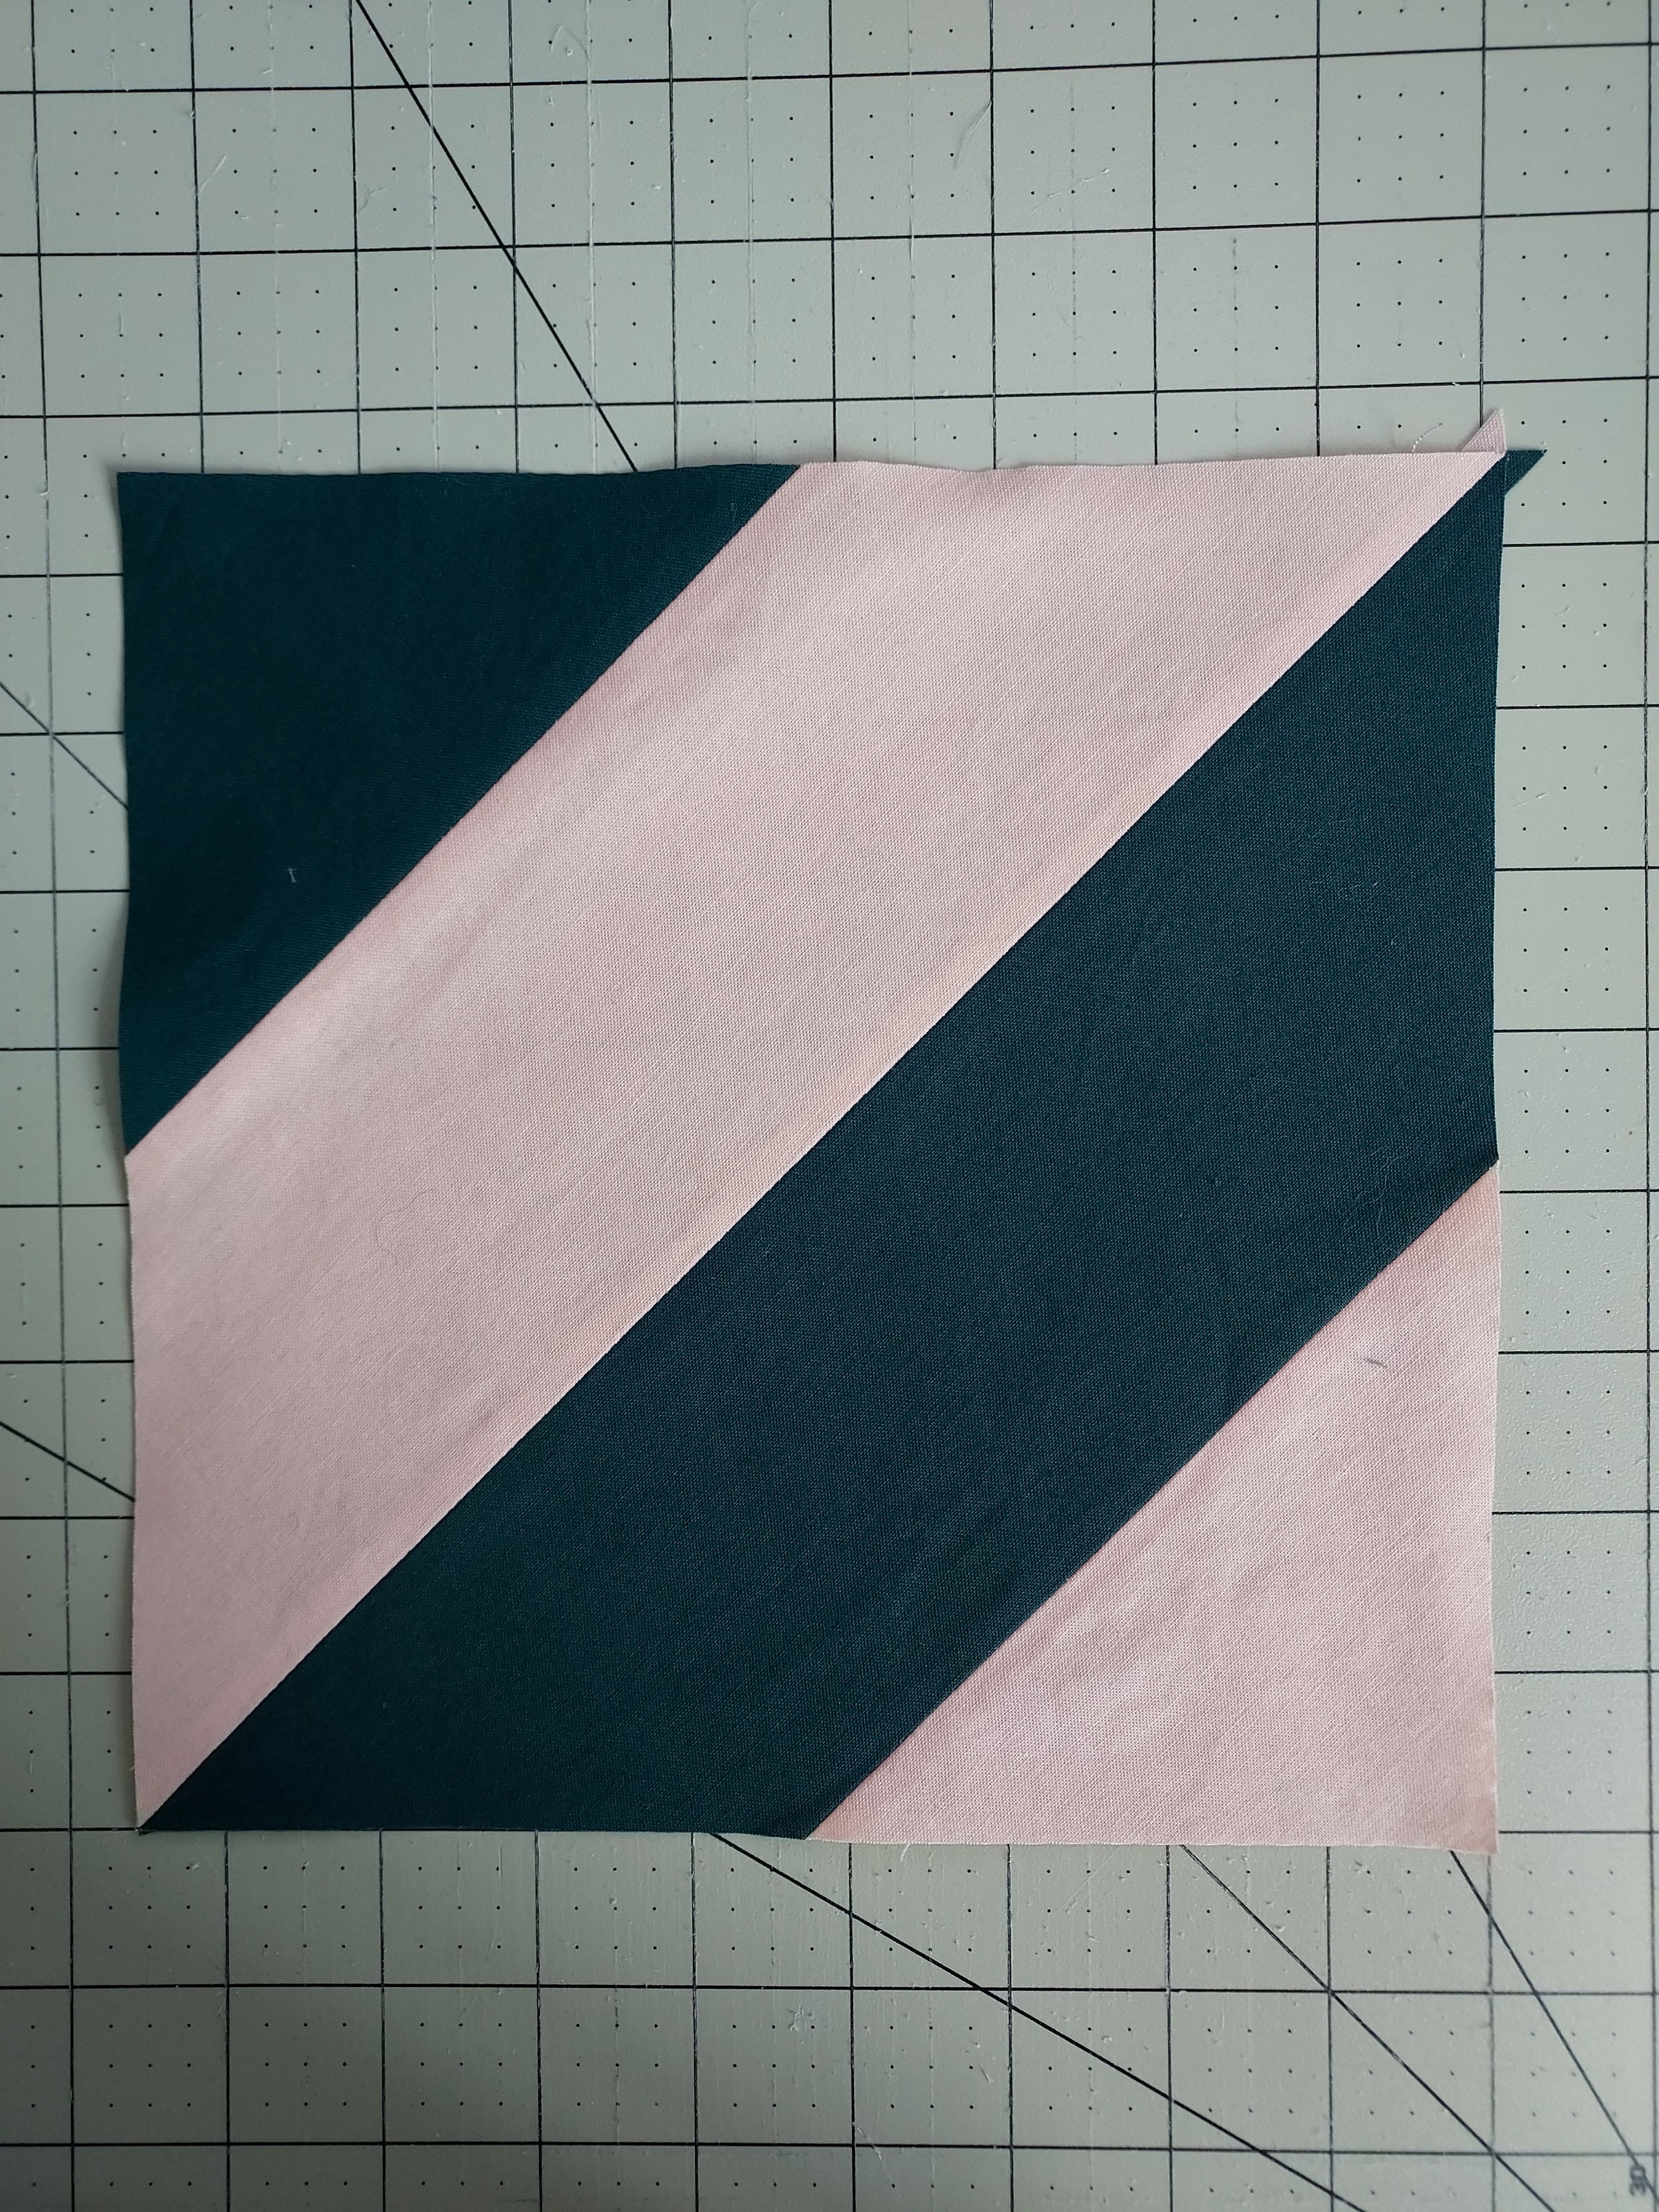
For each triangle: open, press seams, and trim any 'ears' at the corners. Now you have a nice Block B :)
For the Lap Size, make a total of (8) Block Bs. For the Throw Size, make a total of (16) Block Bs.
Keep scrolling for trimming instructions!
Without A 12.5” Square Ruler Instructions
Start by placing (1) B1 piece and (1) B2 piece, RST, and sew along the long edge. Press seam. For the Lap Size, you’ll be making a total of (4) B1 + B2 strips. For the Throw Size, you’ll be making a total of (6) B1 + B2 strips.
Next, take (2) of your B1 + B2 strips and place RST, with opposite colors facing each other. Line up the edges and sew along both long edges. This will create a tube!
Opposite colors facing each other.
Sew along both long edges to from a tube.
For this part of the tutorial, I will be using my cutting mat and my 6” x 24” ruler to help guide my cuts.

This 45 degree line on my cutting mat will help me get my angles correctly cut :)
Place your tube on your cutting mat with the bottom edge aligned on the 1” line. Align your 6” x 24” ruler’s edge with the 45 degree line of your cutting mat.
Following your ruler’s edge, cut off the upper right corner of your tube.

Here I’m aligning my ruler with the 45 degree line on my mat. The bottom of my tube is lined up with the 1” line on the mat.

Cut off the outside corner of your tube.
Keep your tube where it is (for now!). Pick up your ruler and find the 45 degree line.
Align your ruler’s 45 degree line with your top sewn seam.

Align your top sewn seam with the 45 degree line on your ruler.

You can also see that I’ve lined up the raw edge of the fabric in line with the 1” mark on the ruler.
Cut out your first triangle.

Here is your first triangle.
Now align your ruler’s 45 degree line with the top sewn seam. The bottom edge of the ruler should intersect with the bottom sewn seam.

The ruler’s 45 degree line is aligned with the top sewn seam…

…and the ruler’s edge hits just where the bottom sewn seam begins.
Cut out your second triangle.
Now you are going to move your tube and align the cut edge with the cutting mat’s 45 degree line.
Align your ruler’s 45 degree line with the top sewn seam.

The edge of the fabric is lined up with the cutting mat’s 45 degree line…

…and the ruler’s 45 degree line is lined up with the top sewn seam. The 1” line of the ruler also aligns with the fabric’s edge.
Cut out your third triangle.
You will repeat these steps, working down your tube until you have (6) triangles cut.
If the angles ever get confusing, it always helped me to remember (as silly as it sounds): “I need to cut out a triangle here” and that usually gets me back on track! Use your mat and your ruler to help guide your cuts :)
For each triangle: open, press seams, and trim any 'ears' at the corners. Now you have a nice Block B :)
You will want to be careful when pressing these blocks! Because the blocks are cut on the bias, they can easily stretch and get wonky.
For the Lap Size, make a total of (8) Block Bs. For the Throw Size, make a total of (16) Block Bs.
See below for trimming instructions!
Trimming Instructions and Optional Stay Stitching
Your blocks at this point should be 8.5” square. They might need to be trimmed, so let’s go over how to do that :)
If you have the 12.5” square ruler, line up your block using the 8.5” gridlines, and try to match the diagonal on the ruler with the diagonal of your block.

Align the bottom and left sides of the block with the 8.5” markings on your ruler. Any excess fabric to be trimmed will stick out on the top and right hand sides.

Also align the diagonal line on your ruler with the diagonal line of your block.
Trim any excess from the top and right sides of the block and you’re done!

Trim any excess from the top and right sides.
When working without a 12.5” square ruler, it’s time again to use the grids provided by your cutting mat and your 6” x 24” ruler.
Line up your block in the corner of your cutting mat. Take your ruler and align it’s long edge with your cutting mat’s 8.5” line at the top of your block. Trim away any excess.

The long edge of the ruler is aligned horizontally with the 8.5” line on the cutting mat.

You’ll be trimming off a little from the top here.
Then, keep your block where it is, but move your ruler to trim any excess from the left side of the block.
Align the long edge of the ruler vertically with the 8.5” line on the cutting mat. Trim off any excess from the left side of the block.

The long edge of the ruler is aligned vertically with the 8.5” line on the cutting mat.
At this point, your blocks are ready to go! If you’ve been careful with the pressing and the trimming, they should come in at 8.5” square. If you are worried about your blocks stretching at all, you could add a stay stitch to stabilize the edges and prevent any distortion. This would be just an extra line of stitching around each block, about 1/8” from the edge of the block (it will be hidden within your seam allowance). I am typically just careful with my blocks but this is definitely an option if you are worried about your blocks getting a little funky!
That’s it! You’ve got your Block Bs all trimmed up and ready to go, and I can’t wait to see your own version of The 2537 Quilt!